These 3 easy methods of watermarking images in Photoshop will protect and brand your work faster.


Adding watermarks to your designs protects your work and strengthens your brand identity. But when you have dozens of images, applying them one by one is a nightmare.
In this guide, we’ll show you three reliable methods for batch watermarking your images in Photoshop, including the fastest and most consistent way using Bulk Mockup.
A watermark is a visible mark, logo, or text added to a design or image to identify ownership and prevent unauthorized use. It acts as a subtle branding layer, often semi-transparent, overlaying the artwork.
Watermarking is widely used by photographers, digital artists, agencies, and online sellers to protect creative assets and maintain professional presentation across product previews, portfolios, and mockups.
Watermarking does more than mark ownership — it adds credibility and consistency to your creative work. Here’s why it matters:
Well, there are three ways to do it. All you need to keep in mind is that the watermarks must be placed consistently across the batch. Let’s take a look.
This is the traditional way of recording a Photoshop action and running it on a folder of images.
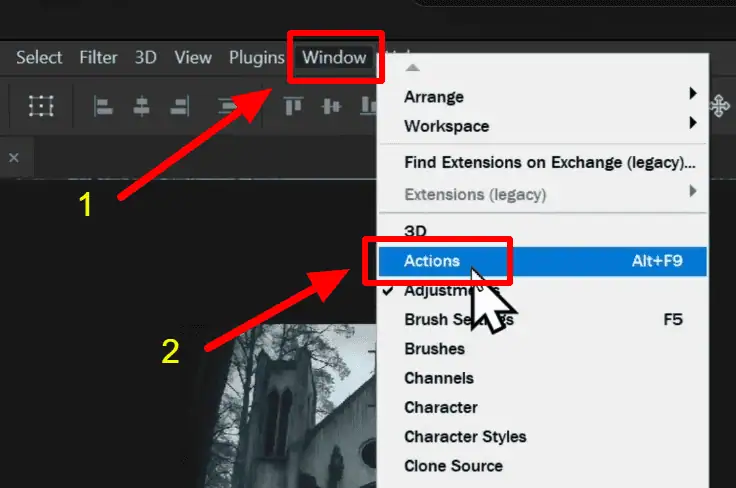
Open any image in Photoshop. Then, go to Window → Actions to enable the Actions panel.
Click the Folder icon to create a new set (e.g., “Batch”).
Click the + icon beside the folder icon to create a new action. Name it “Watermark” and hit Record.
Photoshop now records every step you take.
Go to File → Place Embedded, and select your watermark (logo or text).
Select the background layer and then click on your logo layer. Use alignment tools to position it — top-left, bottom-right, or center.

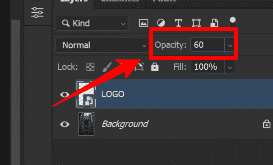
Adjust opacity to around 60% for a subtle look.
Go to File → Save as, choose JPEG, and save the watermarked image in an Export folder. Once done, click Stop on the Actions panel.

The action has been recorded. To run the action, prepare a folder of images to be watermarked.
Then, go to File → Automate → Batch. Choose your Action Set and Watermark Action.

Under Source, select the folder with your images. Under Destination, choose where to save watermarked images.
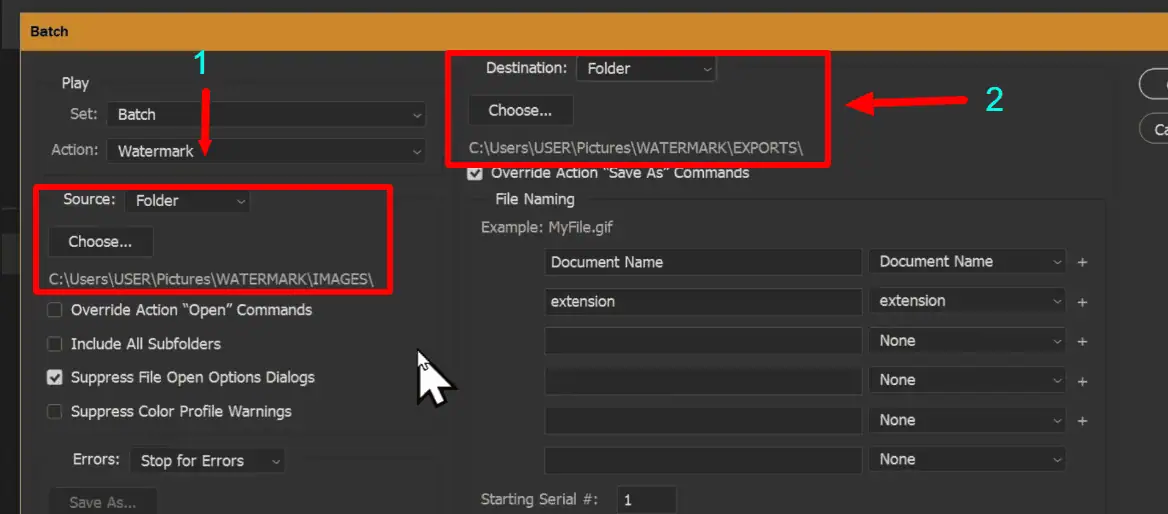
Once done, check these very important pointers.
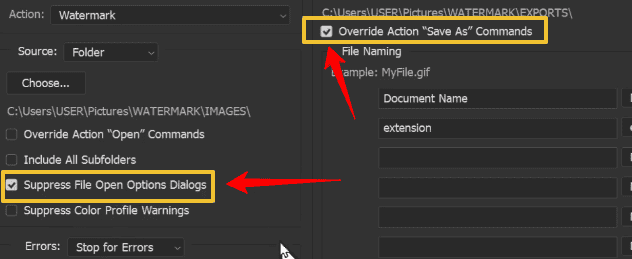
Click OK and let Photoshop watermark all your images automatically.
Limitation: Since each image may have a different resolution, your watermark size can appear inconsistent — too large on some, too tiny on others. There is a smarter way to get a better result.
If you prefer a tiled or repeating watermark like a grid of your logo across the image, Photoshop’s Pattern Overlay works best.
Open your watermark logo in Photoshop. Go to Edit → Define Pattern, name it (e.g., “Watermark”), and click OK.
Close the logo window in Photoshop.
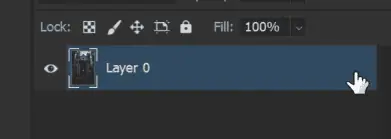
Open an image in Photoshop. Unlock the image layer.
Go to FX → Pattern Overlay in the Layers panel.
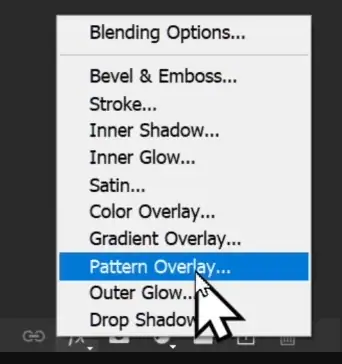
Choose your defined pattern from the list.
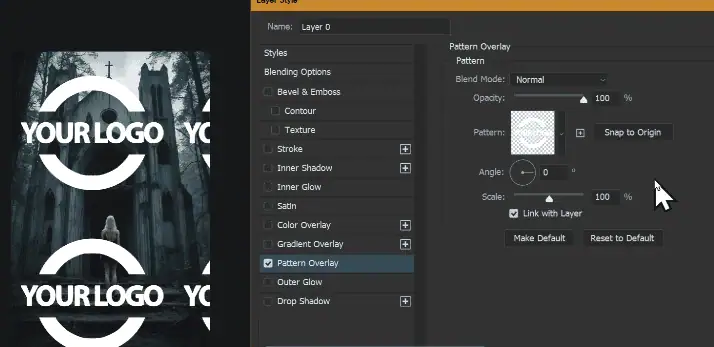
Adjust scale, angle, and opacity to control visibility and density.
You can repeat this effect or even include it in an Action for batch processing later. This method gives your images a “stock photo” feel — ideal for protecting previews online.
For consistent watermark placement across hundreds of images, Smart Object templates with Bulk Mockup is the most efficient and professional method.
Create a new Photoshop document with an aspect ratio similar to your images.
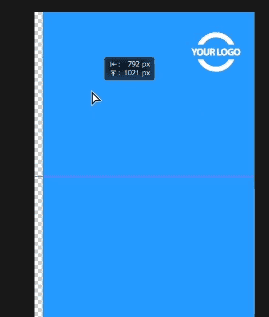
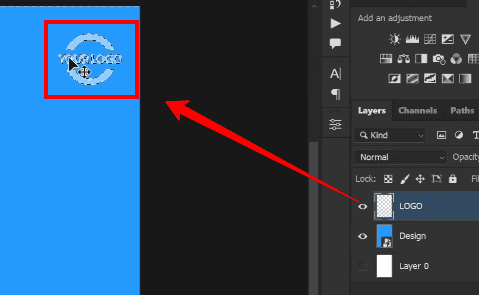
Drag and drop your watermark logo onto the canvas. Turn off the visibility of the new document and unlock it.
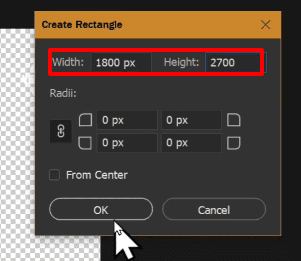
Create a new rectangle covering the entire canvas (1800×2700 pixels).
Click on the transform tool. Resize and place the new layer where you want it to appear.
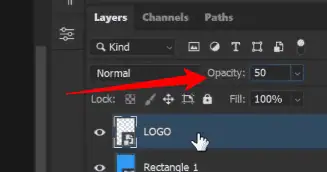
Reduce opacity to about 50%.
Rename it to Design. Right-click and select Convert to Smart Object.
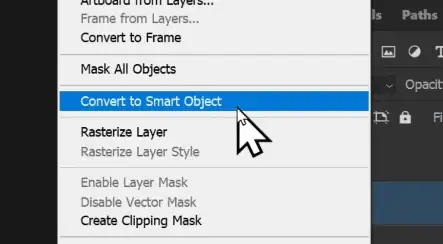
This will act as a placeholder for your images during batch processing. Right-click and Rasterize the watermark layer, as this is another smart object layer.
Save one version with a watermark light as a template in a new folder.
You may need a darker version of this watermark for light-colored images. To do so, press CTRL and then click on the watermark layer.
Duplicate the PSD, recolor the watermark to black by adding a Solid Color adjustment layer. Adjust the opacity to 50% and save as “Watermark Dark.”
These two templates will help when your image backgrounds vary from light to dark.
With these two variations, we will use Bulk Mockup to batch watermark images.
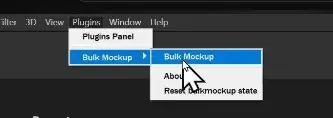
Open Photoshop → Go to Plugins → Bulk Mockup
Select
Export Folder: where you want the final watermarked images saved
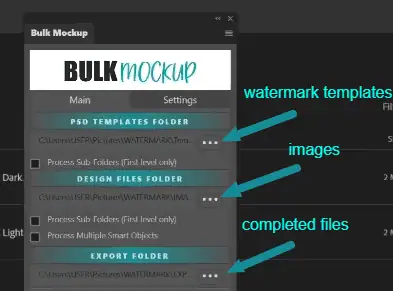
Check the PSD Mockup export option in the Settings for an organized output.
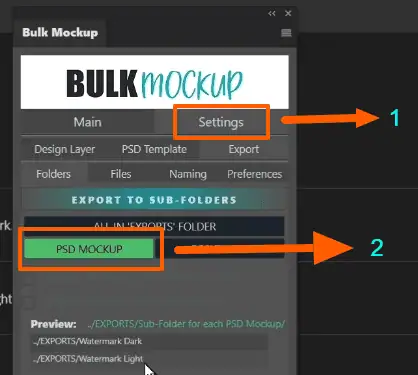
Go to the Main menu and click Start Generating. Bulk Mockup will:
All the images are perfectly aligned with consistent watermark placement. There will be no resizing issues or manual adjustments necessary.
| Method | Skill Level | Speed | Consistency | Best For |
| Photoshop Batch Action | Beginner | Moderate | Low | Small batches |
| Pattern Overlay | Beginner | Moderate | Medium | Repeating watermarks |
| Smart Object + Bulk Mockup | Intermediate | Very Fast | High | Large, professional batches |
If you handle product mockups, photography, or digital art, batch watermarking is crucial for protecting and branding your work.
While Photoshop’s built-in tools can handle small sets, Bulk Mockup’s Smart Object automation delivers the fastest, cleanest, and most consistent results — especially when working with hundreds of images.
Yes, Lightroom allows batch watermarking during export.
1. Go to File > Export.
2. Under the Watermarking section, check Watermark.
3. Choose or create a watermark preset.
4. Adjust settings like opacity, size, and position.
5. Click Export to apply the watermark to all selected images
Ensure your watermark is a Smart Object. This allows it to scale proportionally across various image sizes. Alternatively, use a Pattern Overlay for a tiled watermark effect
Consider using free tools like FastStone or ImageMagick. These offer batch watermarking capabilities without the need for Photoshop.
1. Design your watermark text or logo.
2. Go to Edit > Define Brush Preset.
3. Name your brush and click OK.
4. Use the Brush Tool to apply the watermark to images.
Yes, Photoshop supports scripting with JavaScript, AppleScript, and VBScript. Scripts can automate tasks like placing watermarks, resizing images, and saving files. For advanced automation, consider using scripts tailored for batch processing.
1. Position your watermark in a consistent location across all images.
2. Common placements include the bottom-right corner or center.
3. Ensure the watermark is visible but unobtrusive, adjusting opacity as needed.
Yes, Adobe Premiere Pro and After Effects allow for batch processing and watermarking of videos. Create a watermark graphic and overlay it onto your video timeline. Export the video with the watermark applied.
Watermarks protect your images and reinforce branding, but may reduce Etsy’s promotion eligibility, like Etsy Finds or Google Shopping. If protection matters most, watermark lightly. If visibility and exposure are priorities, avoid or use subtle branding instead.
Yes, watermarks can be removed using Photoshop or AI tools. They deter casual misuse but aren’t foolproof. Use semi-transparent, large, or repeated marks, or share only low-resolution previews for stronger protection.