


A Shopify Product CSV Import can save a lot of time when your catalogue starts growing. Instead of opening every product page and filling in the same types of details again and again, you can prepare the information in one file and upload it together.
The catch is that Shopify reads the file very literally. A misplaced value, the wrong handle, or an incorrect variant row can affect how a product appears after import. Updates to existing products also need extra care.
This guide covers the Shopify CSV template, how the file should be structured, what Shopify expects in each field, how to import it, and the errors that most often cause trouble.
If you are preparing a CSV for the first time, the next section is the one to get right before anything else.
For a Shopify product CSV import, the easiest starting point is Shopify’s official sample file. It gives you the correct column structure and helps reduce formatting mistakes before you upload anything.
You can download the current Shopify CSV template from the Shopify Help Center. The sample file includes example products, so delete those rows before adding your own catalogue data.
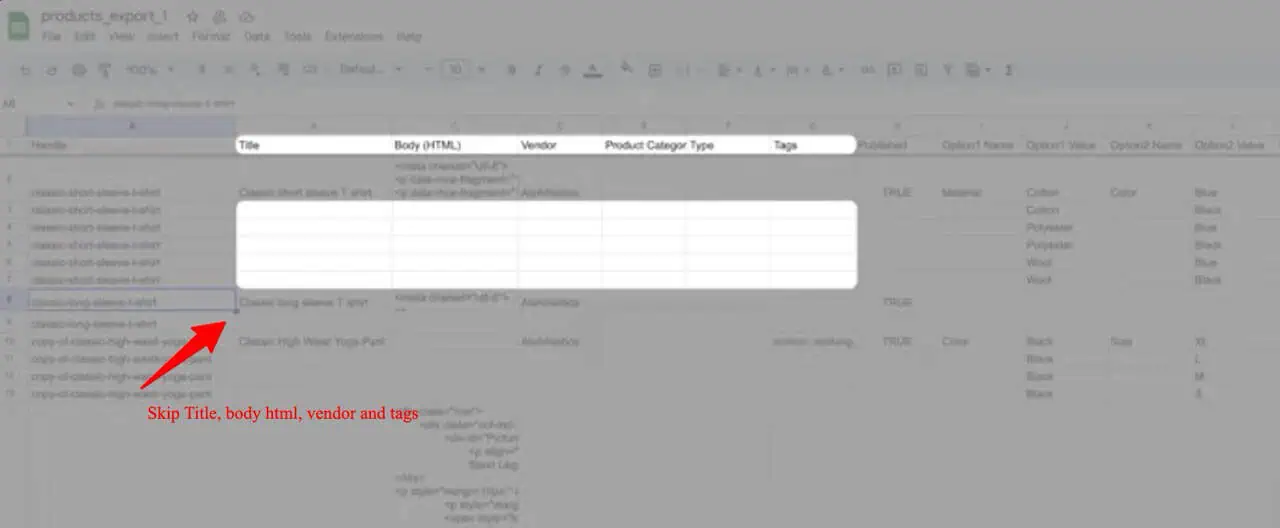
The annotated version should cover:
First, download the current sample product CSV from the Shopify Help Center. Shopify includes two example products in the file, so delete those sample rows before adding your own catalogue.
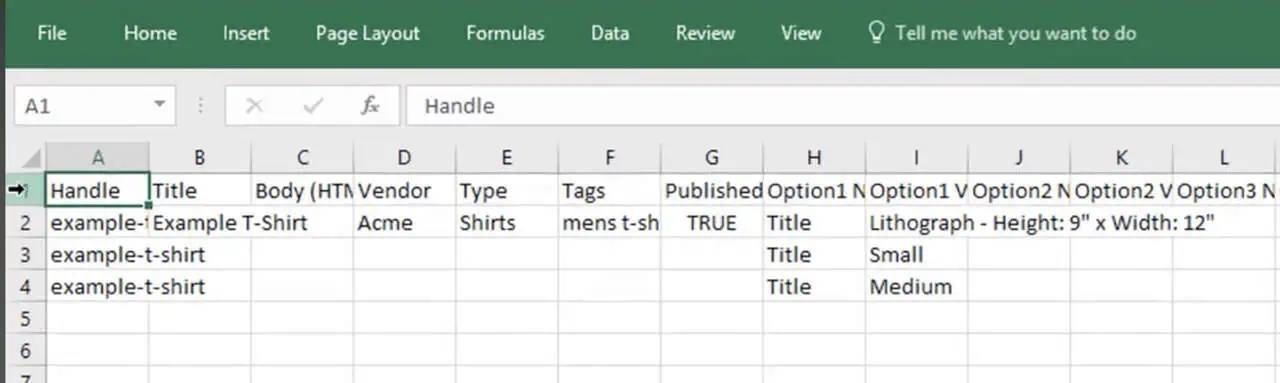
Then prepare the sheet:
Once the headers are ready, start adding your catalogue data row by row. The structure changes slightly depending on whether the item has variants.
For a simple product, enter the full product information in the first row.
You do not need to repeat all the product details on image-only rows.
If a product has options such as size or colour, give each variant its own row.
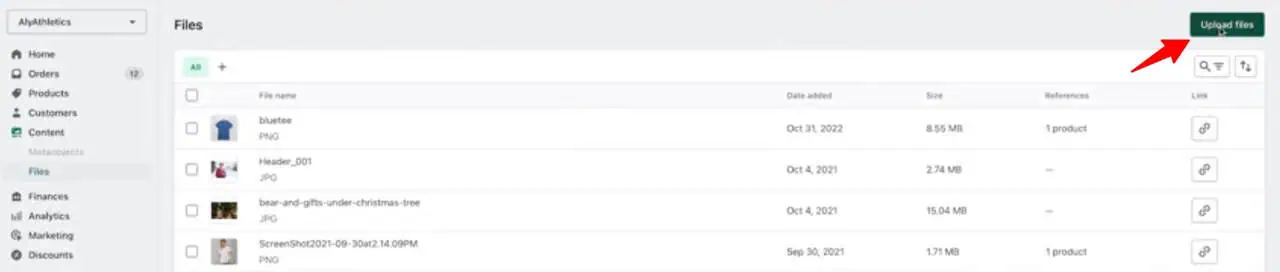
If the product images are saved on your computer, upload them to Shopify first.
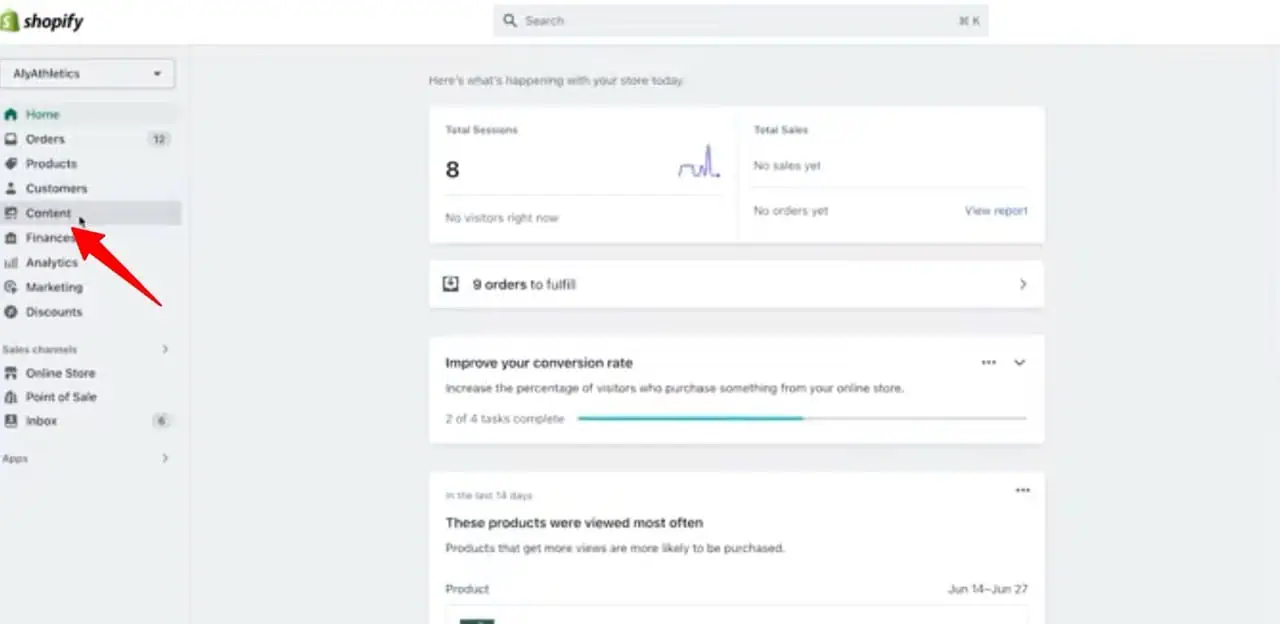
Go to:
Shopify Admin → Content → Files
Then:
Once the file is ready, you can upload it through the Products area in Shopify.
Follow these steps:
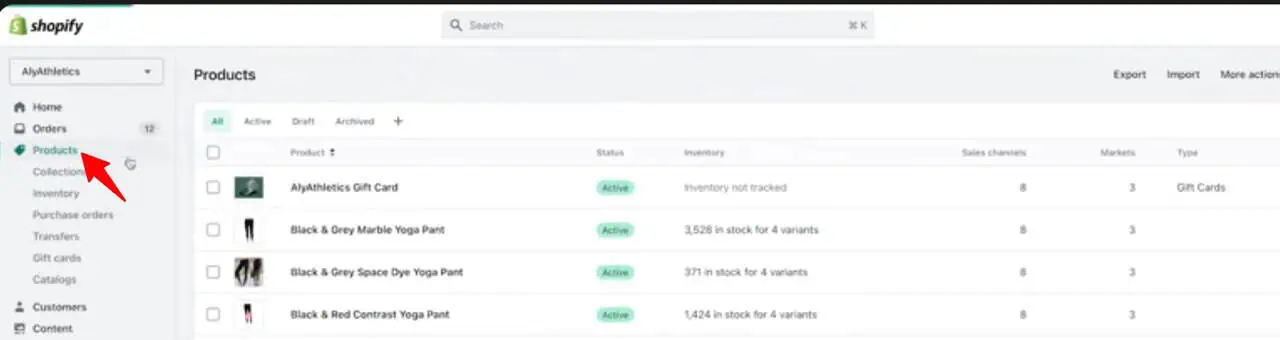
2. Click Import.
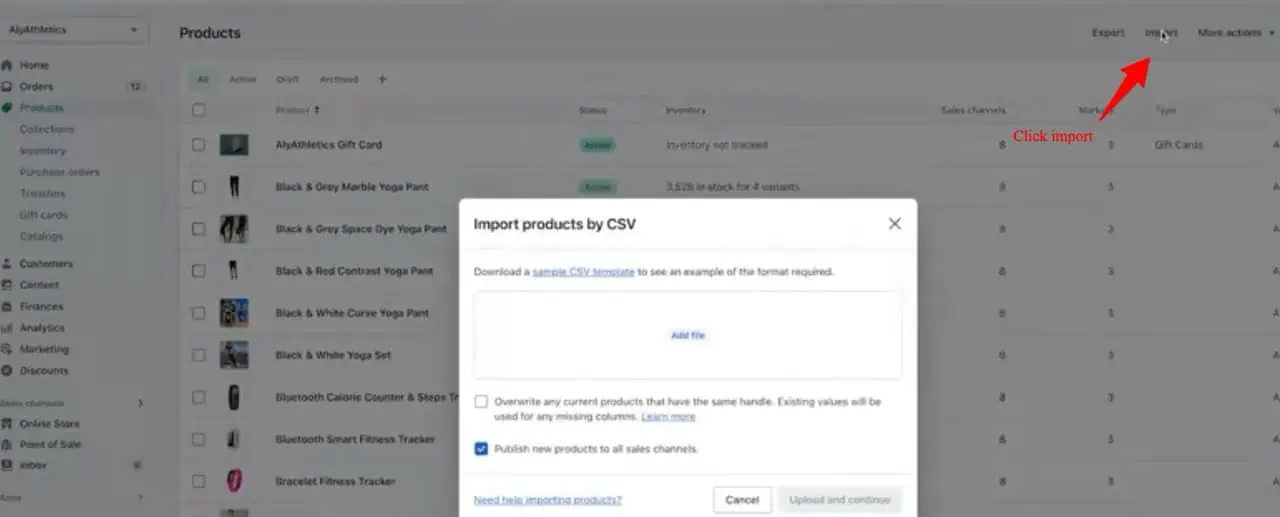
3. Upload the completed CSV file.
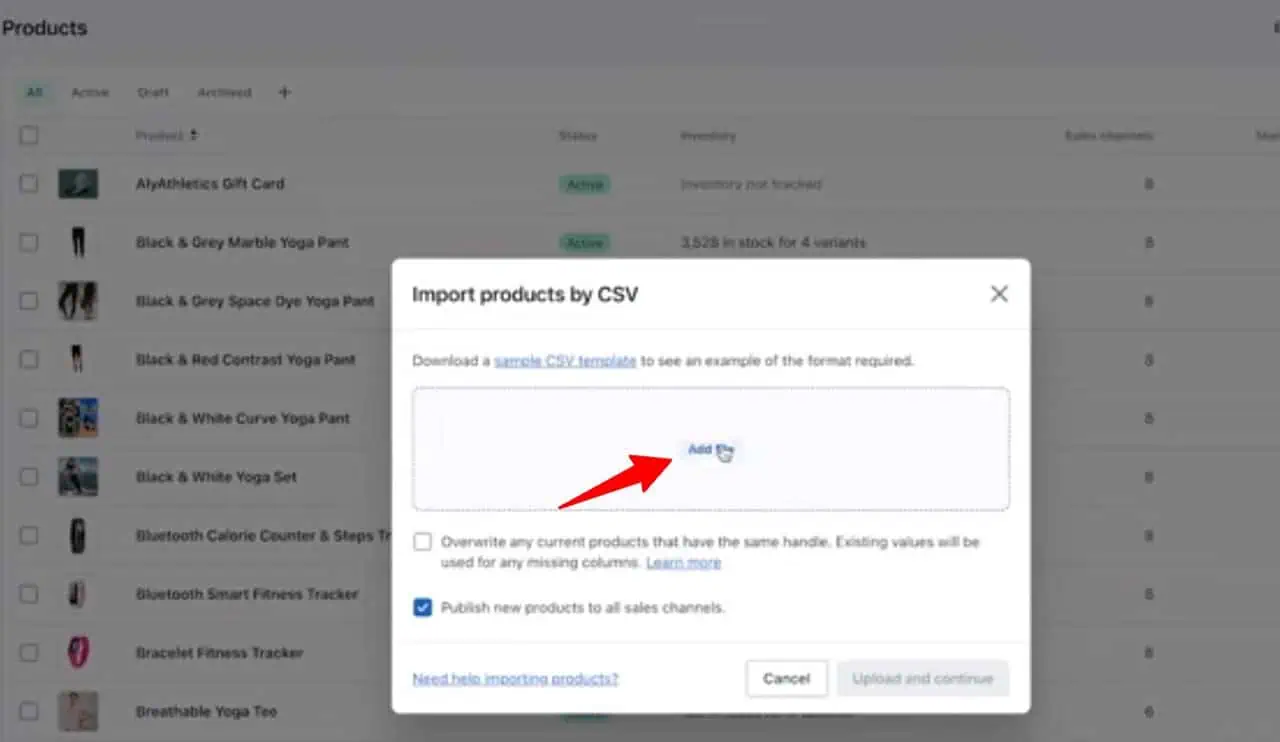
4. Choose whether Shopify should overwrite products that match existing handles.
5. Review the import preview carefully and check that the product information appears as expected.
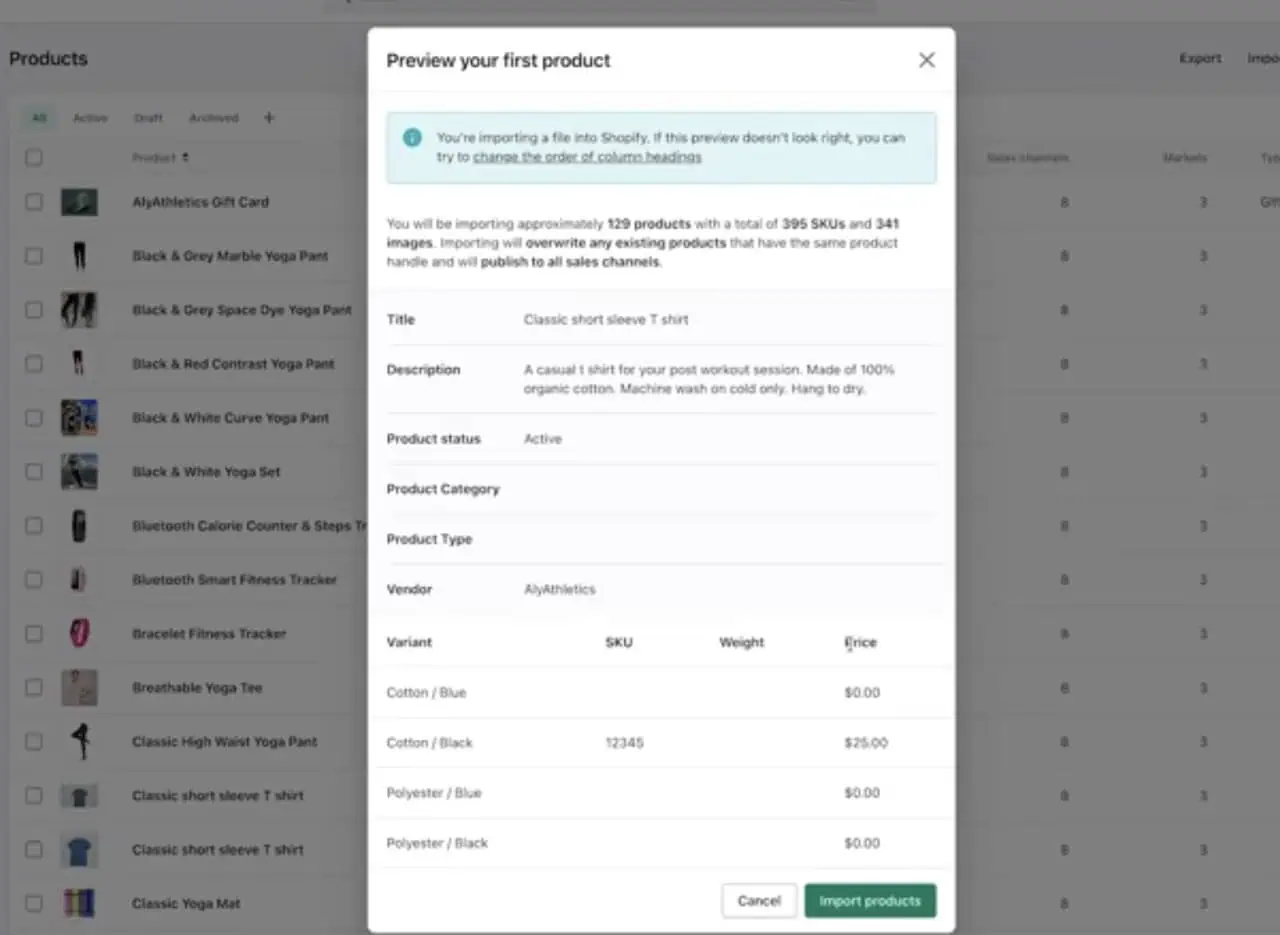
6. Start the import.
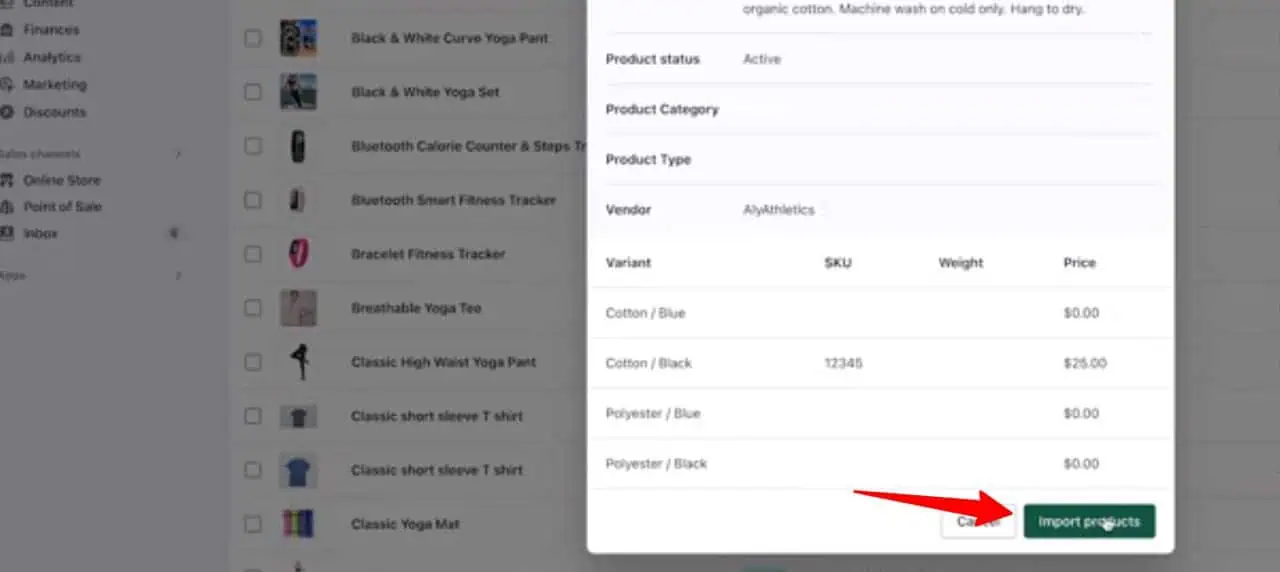
7. After Shopify finishes processing the file, open a few of the imported products and check the details, variants, prices, and images.
The preview is worth checking closely, especially when you are updating existing products rather than adding new ones.
After the import finishes, review the products in Shopify instead of assuming everything transferred correctly.
Check:
Most import problems come down to the way a value is written, how rows are connected, or whether Shopify can read the referenced data. When an upload fails, use the error message to narrow down the field that needs attention.
| Error or symptom | What to check |
| Invalid or missing CSV header | Compare the first row with Shopify’s current field names. Also check for extra spaces in the header row. |
| Illegal quoting on line | Save the file with UTF 8 encoding and look for stray or curly quotation marks. |
| Line did not contain product data | Check whether the row has a handle but no product title. |
| Options are not unique | Look for two variants that use the same option combination, or another row with the same handle and duplicate values. |
| Price can’t be blank | Add a price to the affected row. |
| Fulfillment service can’t be blank | Enter the fulfillment service name. Use manual when no third party fulfillment service is being used. |
| Error downloading image | Make sure the image URL is correct, publicly accessible, and points directly to the image. |
| Product reference is invalid | Make sure the referenced product already exists. If you are using a product reference metafield, import the products first and add the references in a later update. |
| Daily variant creation limit reached | Stores with 500,000 or more variants can create up to 10,000 new variants within 24 hours through CSV uploads or the API. This daily limit does not apply to Shopify Plus stores. |
| Line is invalid with no details | Check whether an existing variant option is being moved from one option position to another. |
Before working with a large catalogue, check the limits that apply to the product CSV format. Some relate to the file itself, while others apply to individual products or fields.
| Shopify Product CSV rule | Current limit |
| CSV file size | 15 MB per file |
| Product options | 3 per product |
| Variants per product | 2,048 |
| Product tags | 250 per product on standard plans |
| Product images | 250 per product |
| Barcodes | Up to 20 per product or variant |
| Image alt text | 512 characters maximum |
| SEO title | Up to 70 characters |
| SEO description | Up to 320 characters |
| Collection name | 255 characters maximum |
| Videos and 3D models through the product CSV | Not supported |
| Variant metafields through the product CSV | Not supported |
If your file is larger than 15 MB, split it into smaller files and import them separately. This is especially relevant when using a Shopify bulk product import for thousands of products or when moving product information between Shopify and another platform.
There is also a separate daily limit for very large stores. If a store already has 500,000 or more variants, Shopify can limit it to 10,000 newly created variants within a 24 hour period through CSV uploads or the API. Shopify Plus stores are exempt from this daily restriction.
This should not be confused with a general import cap. Shopify does not document a universal limit of 10,000 products or 10,000 CSV rows for every store. For most merchants, the more relevant restriction is the 15 MB file size, along with the per product limits shown above.
If you are preparing a very large catalogue, it is better to check the Shopify CSV format first and divide oversized files into manageable batches rather than assuming the number of rows itself is the problem.
Importing products with CSV can save time inside Shopify, but you still need to prepare the mockups and listing details before anything is ready to publish.
The Bulk Mockup Shopify app brings those two jobs into one workflow. You upload your artwork, Bulk Mockup generates the product mockups, prepares the listing information, and sends the completed products directly to Shopify.
It can handle:
For POD sellers working with dozens or hundreds of products, that can remove a large amount of repetitive setup from each launch.
Ready to cut down the manual work behind your next product launch? Book a Bulk Mockup demo to see the Shopify workflow in action.
You can download Shopify’s current sample product file from the official Help Center. It includes example data that shows the expected structure, headers, variants, and image fields before you replace the sample rows with your own catalogue.
For new products, Shopify requires the Title column. If you are adding variants, URL handle is also required. When updating existing products, both URL handle and Title must be included. Some fields also depend on related columns.
Give each variant its own row and use the same URL handle for every row belonging to that product. Add the relevant option values and variant details such as SKU, price, barcode, and image URL.
A product CSV file cannot exceed 15 MB. If your file is larger, Shopify recommends splitting it into smaller files and uploading them separately rather than trying to import the entire catalogue at once.
One Shopify product can have up to 2,048 variants and up to three product options. Each unique combination of option values, such as size, colour, and style, counts as a separate variant.