If you need to update many Smart Object layers at once, Photoshop’s default tools won’t save you much time. You can batch replace multiple Smart Objects in Photoshop using an automation plugin, since there’s no built-in one-click batch feature.
Manually replacing each Smart Object is time-consuming. Don’t worry. This guide will show you a faster solution. We’ll use the Bulk Mockup Photoshop plugin to automatically replace Smart Object content across your mockup files in just a few clicks, saving you hours of work.
Stop wasting time on manual mockup creation. Join the POD sellers who’ve already made the switch.
Make the switch todayBefore diving into the step-by-step tutorial, make sure you have your files organized. For all use cases, you’ll need to follow this basic folder structure to work with the Bulk Mockup plugin:
Note: If you’re not familiar with replacing Smart Object contents manually, Photoshop’s fastest method is by right-clicking on a Smart Object layer and choosing Replace Contents.
However, doing that for every design and every layer quickly becomes impractical. The Bulk Mockup plugin automates this entire process without any scripting or repetitive actions.
Let’s walk through how to use Bulk Mockup in eight common scenarios – from simple product mockups to complex animated templates. Follow these use cases to batch-replace Smart Object layers step by step.
This use case will explain the fastest way to replace the smart object layer with rug mockups.
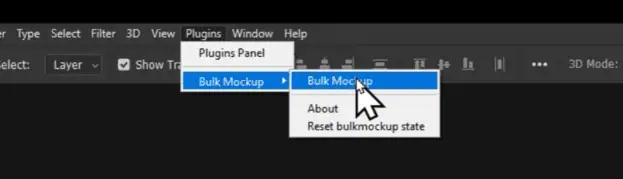
Open the Bulk Mockup plugin in Photoshop.
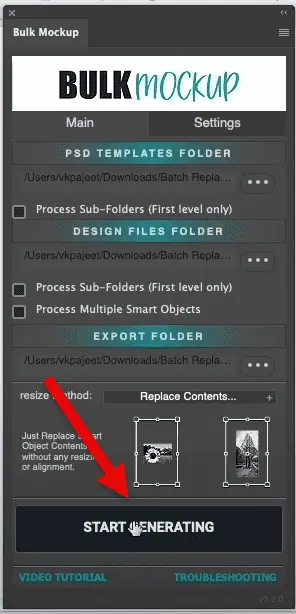
You have already created three main fields: PSD template folder, Design file folder, and Export folder.
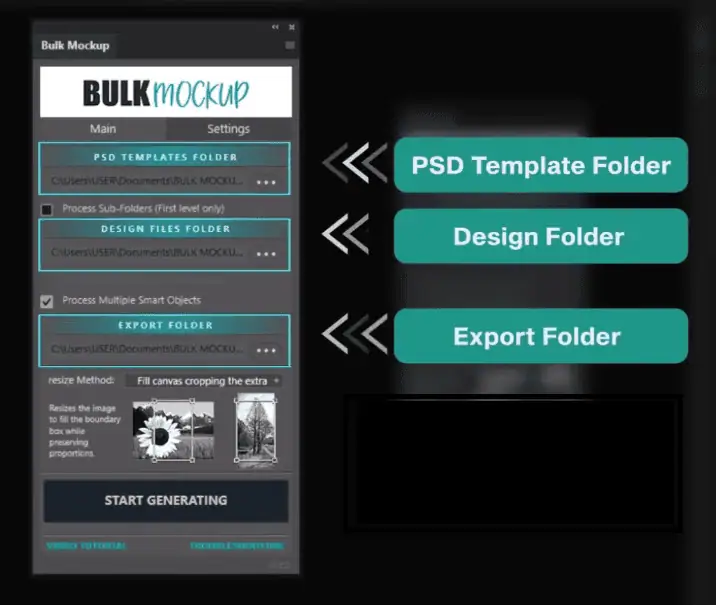
Click each field and select the corresponding folders you created.
Click on the Settings option in the plugin. Go to the export format section.
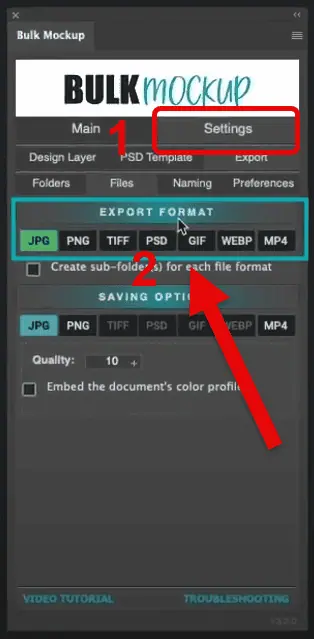
Choose your preferred format from: JPG, PNG, TIFF, PSD, GIF, WebP, or MP4. For this example, select the JPG format
Return to the main plugin window and click the “Start Generating” button.
The plugin will automatically replace the rug smart object with each design. Wait for the process to complete.

Check your export folder for the final files.
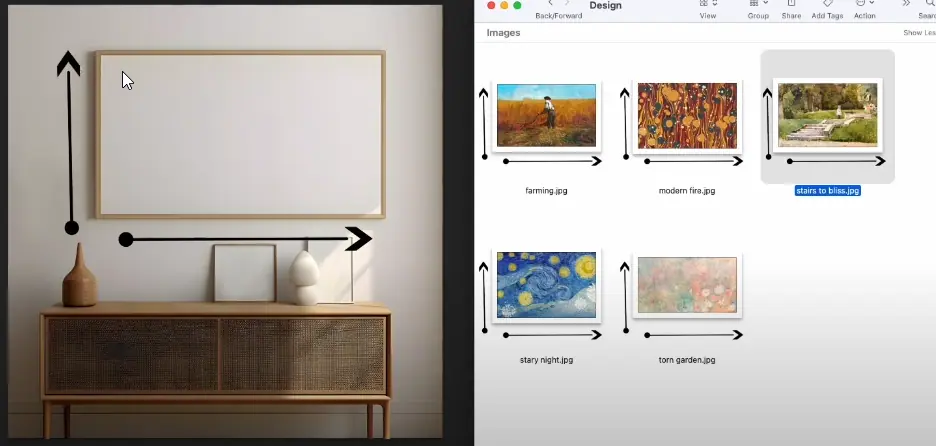
This use case explains how to handle different aspect ratios in wall art mockups.
First, understand the challenge in this use case. The aspect ratios of the wall art may not match the PSD template frame.
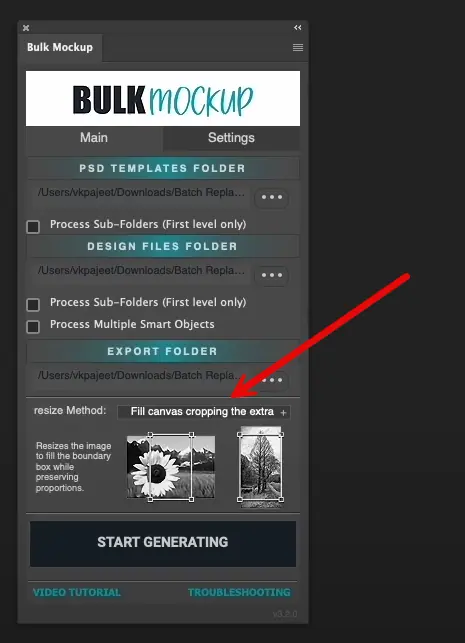
Bulk Mockup offers seven different resize methods. Each method fits your wall art design on the PSD template as per the description.
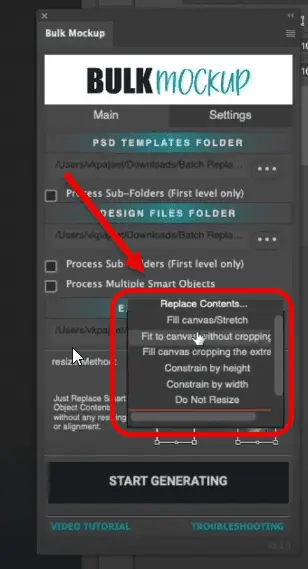
You can choose between seven different resize methods according to your wall art designs.
Create three folders as before, placing your wall art frame mockup templates in the template folder. Add all your artwork files to the design folder, and keep the export folder empty.
Choose your template, design files, and export folders in the plugin’s respective locations.
Go to Settings > Export folder. You will find three different options for exported files.
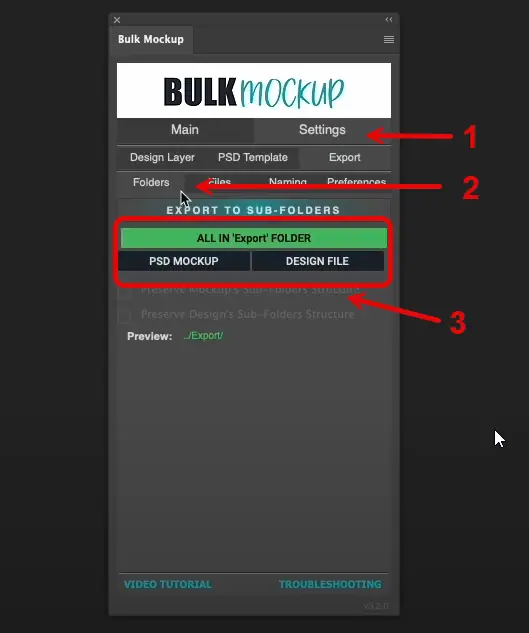
Choose how you want your files organized:
Return to the main plugin window and click “Start Generating”.
The plugin will create subfolders based on your selection. Each design will be properly fitted to the wall art PSD templates. Learn how to size printable wall art and use this process to batch-produce mockups.
This use case explains custom design alignment and positioning with t-shirt mockups.
You may encounter t-shirt designs of the following conventional shapes.
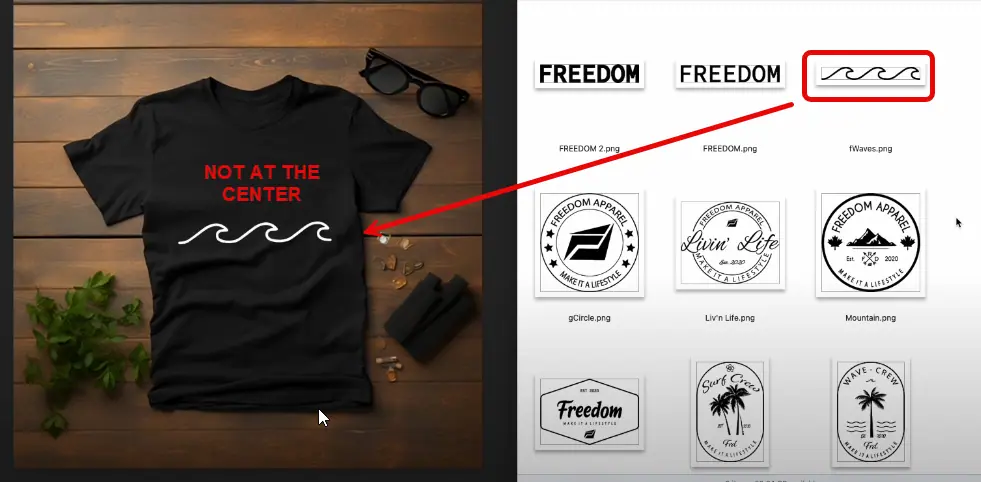
Our goal is to place each design correctly on the t-shirt’s print area. For instance, landscape designs should align with the top rather than the center.
To explain this, we will use a landscape design.
Create the three standard folders in the same way you have done before.
This step makes sure our design goes in the right place in the t-shirt PSD templates.
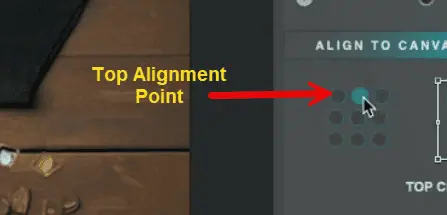
Navigate to Settings > Design Layer and locate the “Align to Canvas” option. Select from nine anchor points.
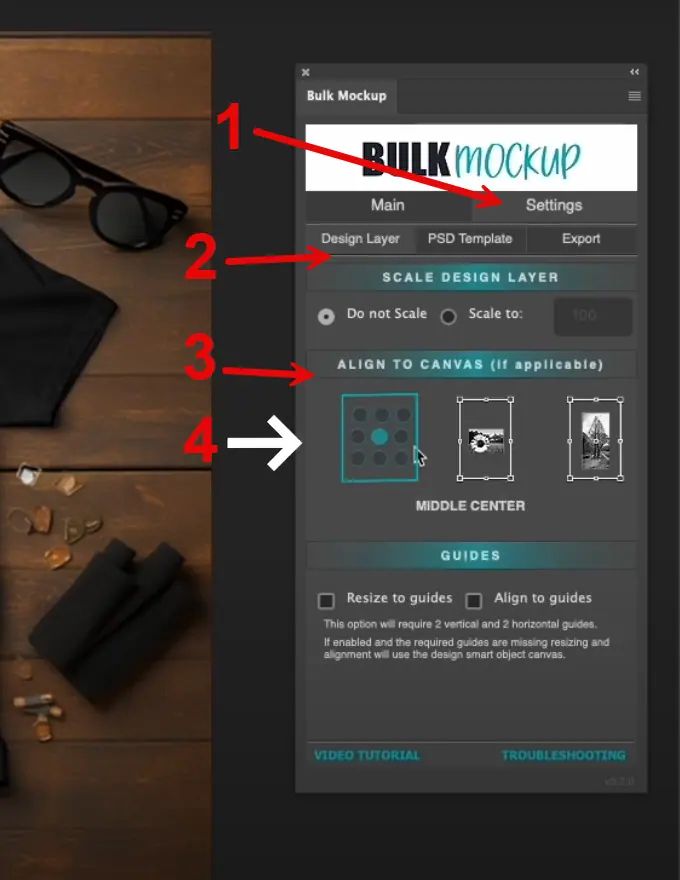
For this case, choose the top alignment point to ensure designs start from the top of the print area.
Select “Fit to Canvas without cropping” as your resize method. This ensures that designs maintain their proper proportions.
Go to Settings > Export. Use the naming parameters to set up your preferred file naming convention. This helps organize your final files systematically.
Return to the main window and click “Start Generating”.
The plugin will automatically generate t-shirt mockups by placing each design as per the settings made.
This use case will explain how to place an embroidery design in the confined space of a t-shirt template.

Open your t-shirt template with the embroidery region. Double-click on the smart object icon to open it in a new Photoshop window.
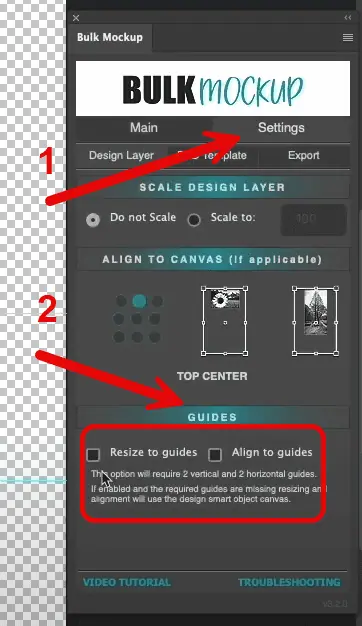
Add four guides to define your confined region:

These guides will create the intersection where designs will be placed.
Open the Bulk Mockup plugin and go to Settings.
Enable two crucial options:
Create the standard three folders by following the same process.
Input all three folder locations in the plugin. Double-check that both guide options are still enabled. Ensure your window settings are properly configured
Click “Start Generating” and watch as each design is done automatically.
Generate mockups in batches faster than the embroidery mockup generators available online.
This use case is a bit complex than the previous ones. I will explain it using a tumbler mockup template. You will see how this process can generate tumbler videos in bulk.
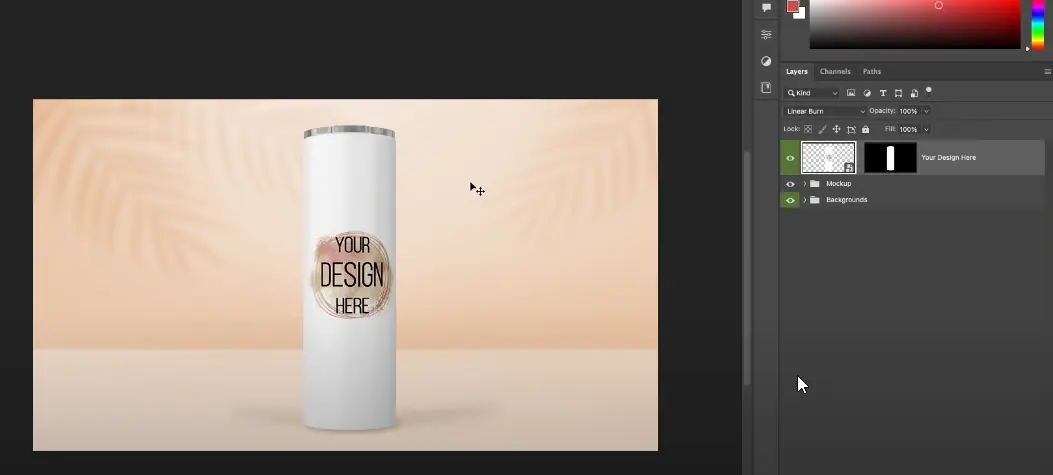
Open your tumbler mockup template in Photoshop. Go to Window > Timeline.

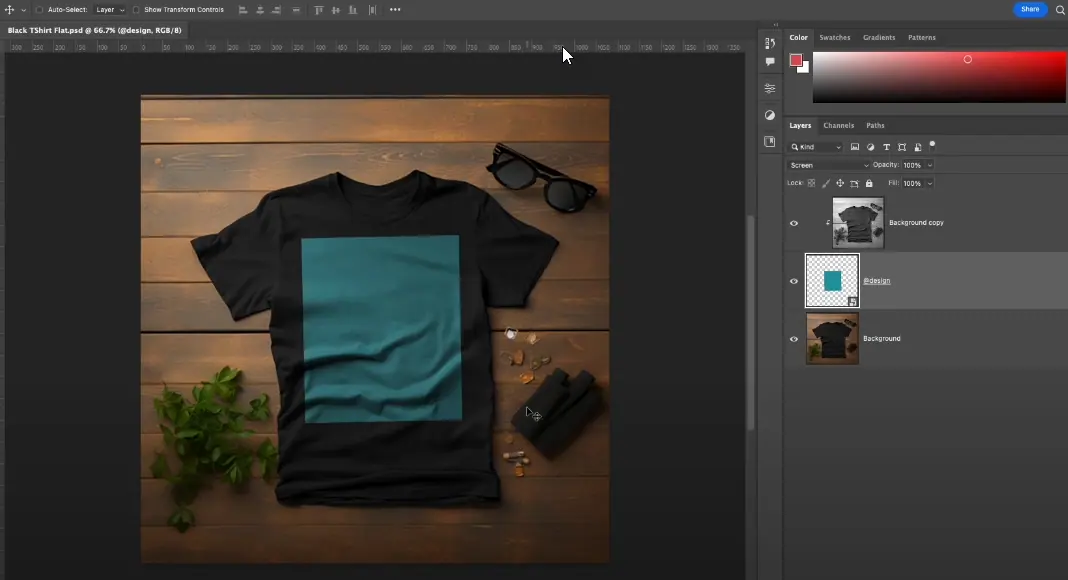
Verify the animation by clicking play. Note that this template has nested smart objects:
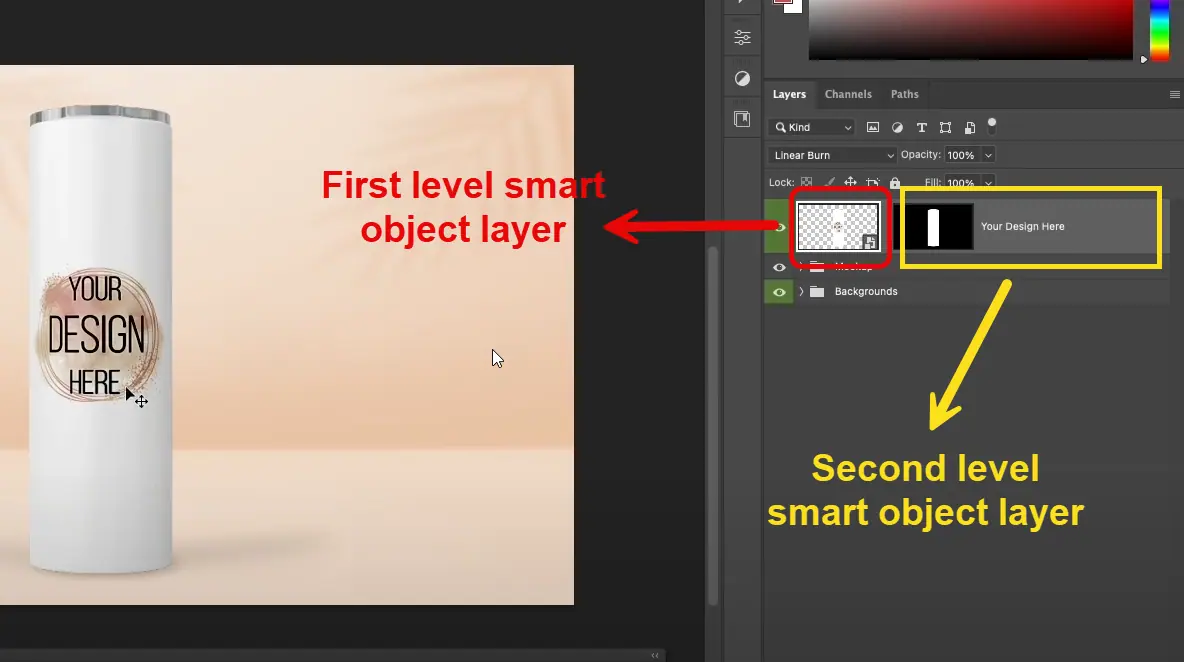
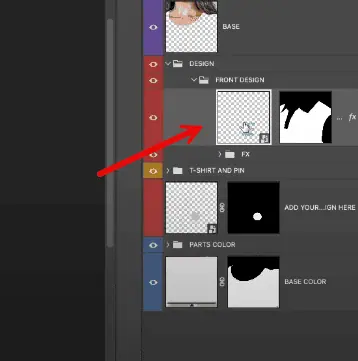
Double-click the first smart object layer and rename it to “@design”. Next, open this layer and find the nested smart object and rename it “@nested”. Save the changes for both layers.
Create your three standard folders. Place the animated tumbler template in the template folder. Add all design files to the design folder. Keep the export folder empty.
Input all three folder locations by following the same process.
Open the Bulk Mockup plugin. Go to Settings > Export. Select MP4 as your export format.

This ensures your animations are preserved in the MP4 format.
Return to the main plugin window and click “Start Generating”.
The plugin will:
Even advanced Etsy sellers use this simple process to generate such mockup videos in bulk in minutes.
While most tools focus on templates, we focus on speed. See how bulk automation changes everything.
See the speed differenceI will use a nursery kid’s room template to explain the pattern fill effect.
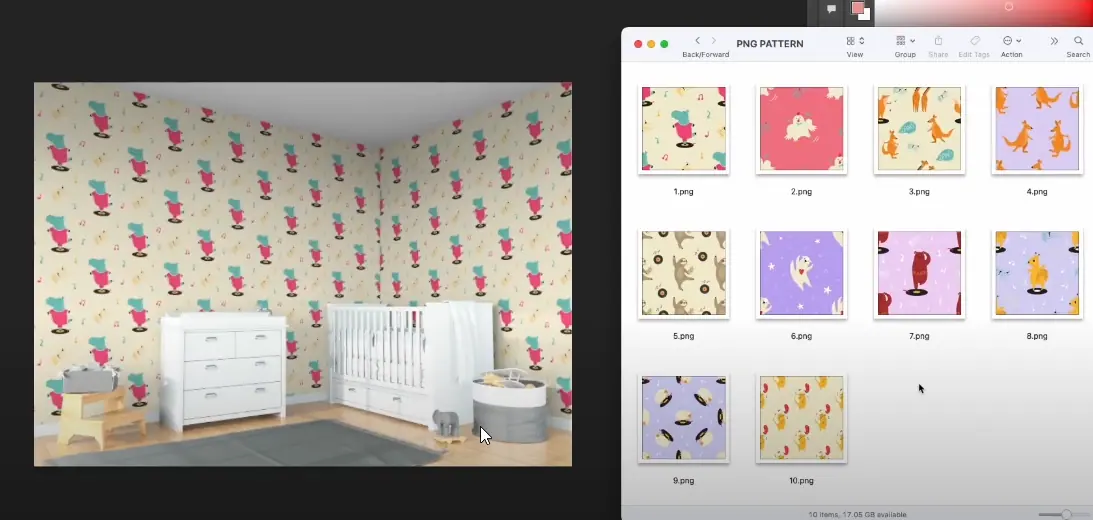
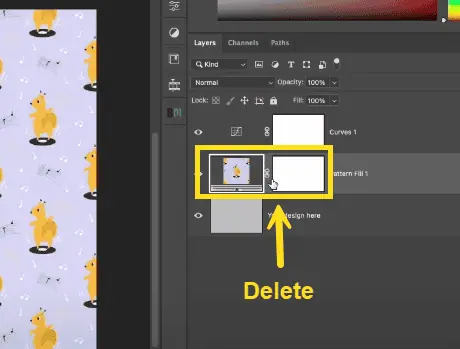
Open your nursery template and locate the smart object layer with the current pattern. Follow the same nested template concept here.
Rename this layer to “@design”.

Delete the existing pattern fill layer.
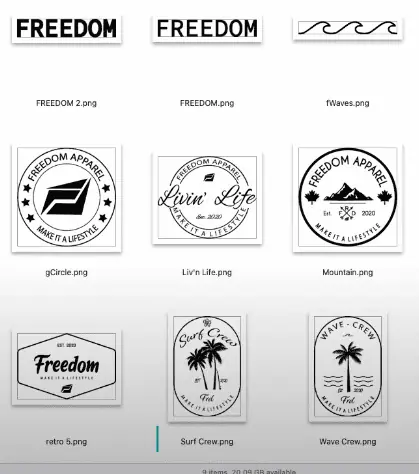
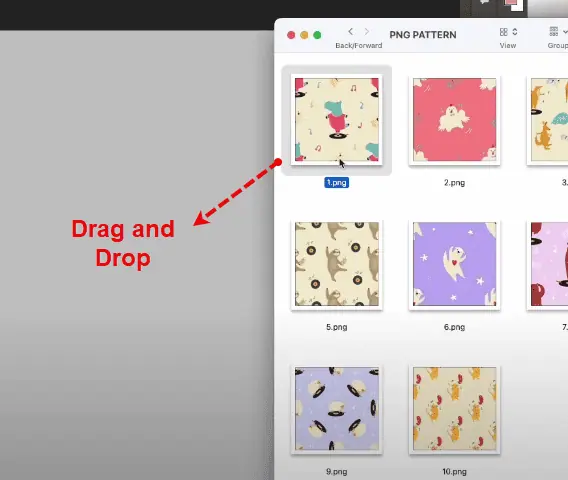
Select one pattern design from your collection.
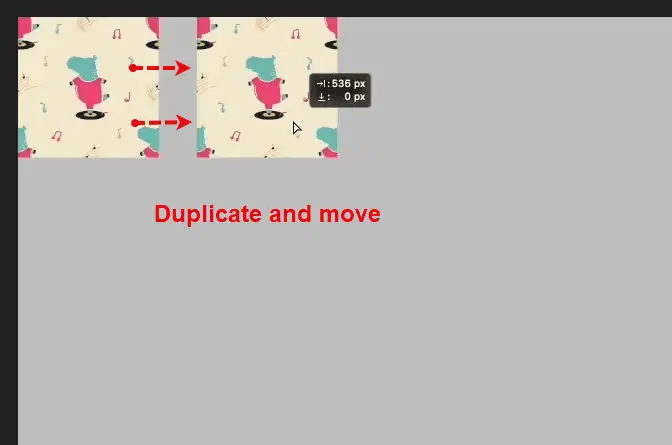
Place your selected pattern on the left. Press Ctrl+J to duplicate the pattern and move the duplicate to the right.
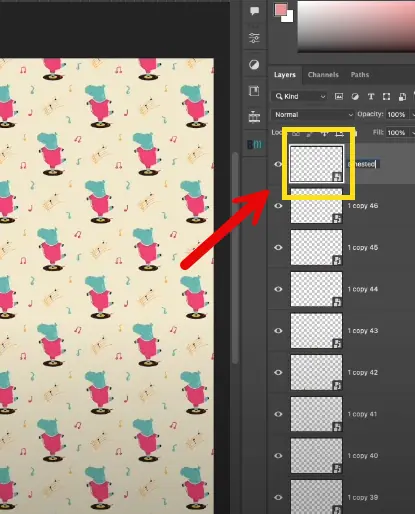
Continue the same to fill the artwork layer. Next, select the smart object layer and rename it to “@nested”. Once done, save and close all layers.
Follow the same process. Organize your PSD template, artwork or design, and export folders. Connect these file locations with the Bulk Mockup interface.
Open the Bulk Mockup plugin and click “Start Generating”. Watch as patterns are automatically applied across the wallpaper.
We will use a t-shirt mockup template with multiple smart object layers to explain how to batch-replace.
This time, we will create three folders differently.
In the template folder, place both front and back t-shirt templates and make sure both templates have the same settings.
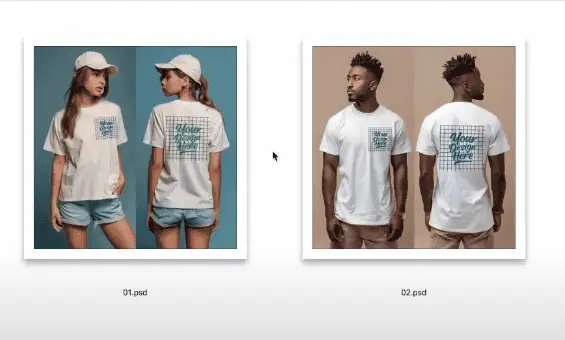
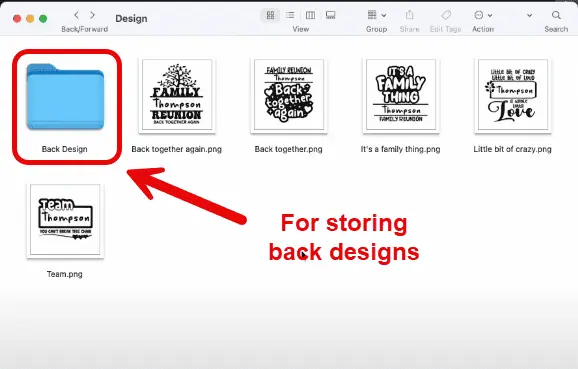
In the design folder, create a subfolder named “back design” and keep the back designs in this subfolder. Place front designs in the main “design” folder.
The “export” folder will remain empty.
Open Bulk Mockup plugin. Input all three folder locations.
Important: Check “Process multiple smart objects”.
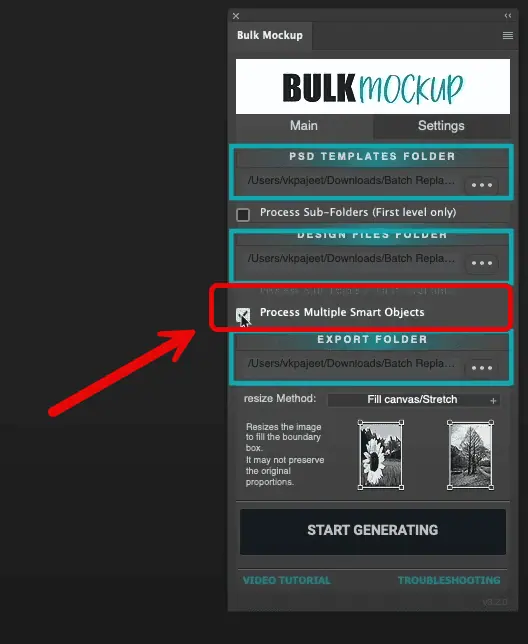
This setting allows handling both front and back designs simultaneously. Even if your template has more than two smart objects, Bulk Mockup can easily automate the batch-replace process.
Click “Start Generating” and the plugin will automatically:

In this use case, I will explain how to replace smart objects in video templates of table cards.
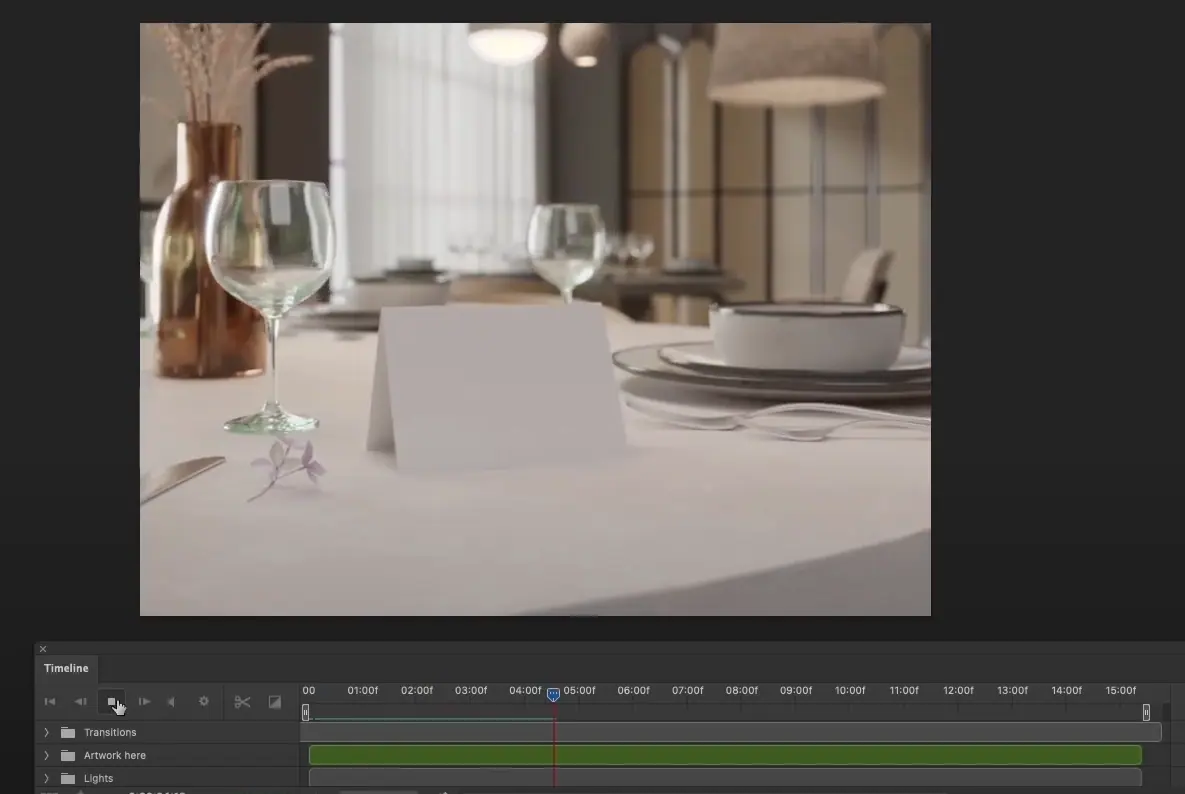
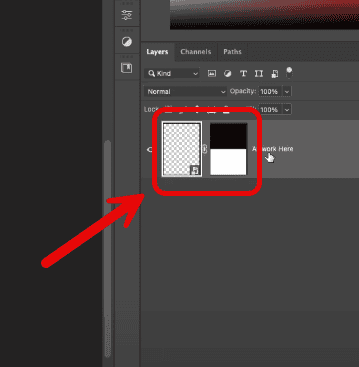
Open your table card video template and check the smart object structure and:
Locate the first “artwork here” layer.
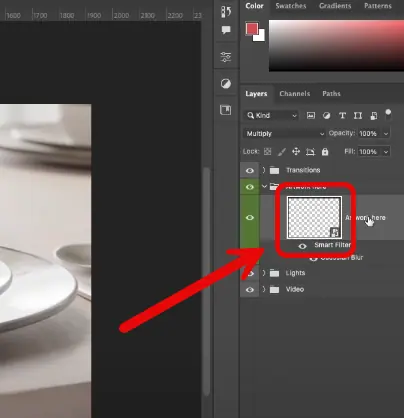
Double-click and open the “artwork here” layer to find the “nested artwork here” layer.
Double-click the first smart object layer and rename it to “@design”.
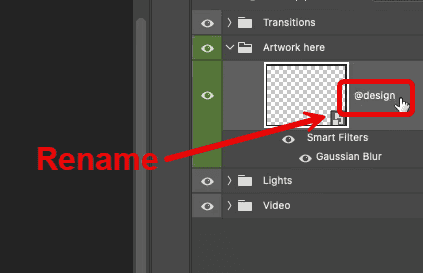
Next, open and locate the nested layer and rename it to “@nested”. Save all changes.

Create three standard folders and place the video template in the template folder. Add all design files to the design folder and keep the export folder empty.
Open the Bulk Mockup plugin and input all three folder locations. Ensure the video export settings are correct and click “Start Generating”. Your table card video mockups will be ready in no time.
Bulk Mockup is designed to handle any number of Smart Object layers and multiple templates in one batch. It intelligently detects how many Smart Object layers to replace based on your folder setup. For example:
In other words, Bulk Mockup can scale to templates containing multiple Smart Objects without breaking the layer structure. This makes it versatile for all kinds of products – business cards, posters, packaging, apparel, stationery, art prints, you name it.
All you have to do is avoid the common Smart Object mistakes and do these:
That’s it! You’re now ready to batch-replace Smart Object layers and create multiple mockups at a time with minimal effort.
Join 5,000+ POD sellers who’ve eliminated manual mockup creation. Get unlimited mockups, install on 2 devices, and access our incredible support team.
Photoshop doesn’t have a built-in feature to batch replace Smart Object layers. The “Replace Contents” option must be used manually on each Smart Object, which becomes extremely time-consuming when working with large batches. For high-volume workflows, this manual method is not practical.
You can partially automate Smart Object replacement using Actions, but it’s limited. Actions require consistent file names and Smart Object layers. While you can batch-run actions, setup is complex and easily breaks if anything changes. It’s not suited for diverse templates or multi-layer replacements.
Yes, batch replacement is possible using Photoshop scripting (like ExtendScript or JavaScript). However, this requires programming knowledge and comes with a steep learning curve. Scripts can be fragile, and Adobe’s documentation is sparse, making troubleshooting difficult for non-coders.
The most efficient solution is using a plugin like Bulk Mockup. It automates everything from inserting design files to exporting final mockups. Bulk Mockup can generate over 1,000 mockups in under 10 minutes, dramatically accelerating your workflow and eliminating manual effort.
Yes, it supports templates with multiple Smart Object layers. By organizing your input designs into subfolders, the plugin matches each folder to its corresponding Smart Object layer. You just need to enable the “Process multiple smart objects” option to activate this capability.
Bulk Mockup can save hours or even days, depending on the number of templates and designs. Users have reported cutting production time by over 90%. It not only speeds up repetitive tasks but also reduces human error, making it ideal for print-on-demand sellers and designers.
As you can see, this batch replacement process of smart objects on PSD templates with our plugin has a nominal learning curve. Feel free to contact us for assistance related to installation or batch mockup processing.
Omit hours of tedious work by following this batch replace smart objects Photoshop guide to uplift your mockup shop or print-on-demand business to a new level.