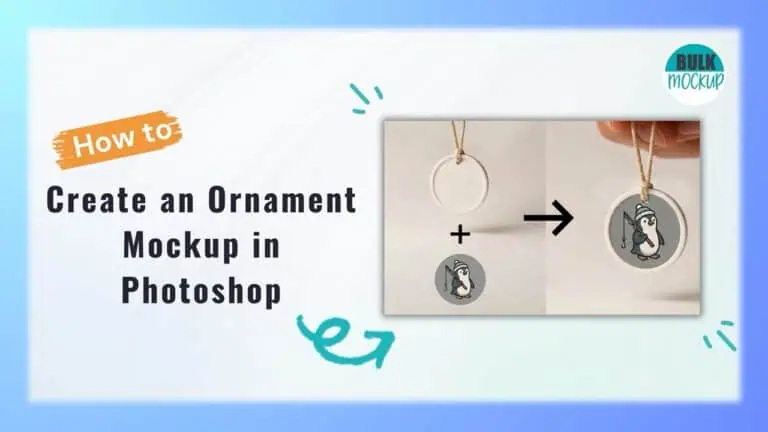


A realistic ornament mockup should make the design look printed onto the surface, not pasted over a photograph. Small mistakes in scale, placement, curvature, or lighting can make even strong artwork feel unconvincing.
Smart Objects give you a cleaner way to build the effect. Once the template is prepared, you can swap designs while keeping the ornament’s shape, depth, and reflections intact.
This tutorial shows you how to turn a blank ornament photo into a reusable Photoshop mockup that looks polished, editable, and ready for repeated use.
Follow these steps to turn a circular ornament image into a reusable Photoshop mockup.
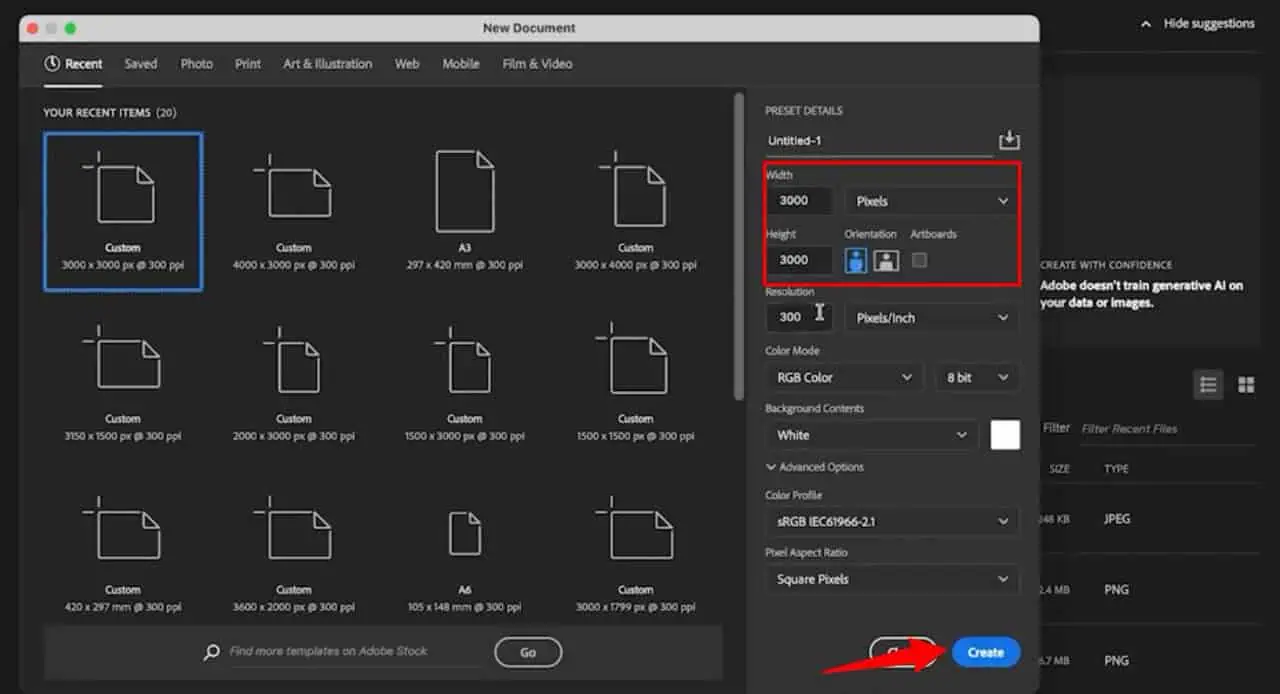
Open Adobe Photoshop and create a new document measuring 3000 by 3000 pixels with a resolution of 300 pixels per inch. Then click Create.
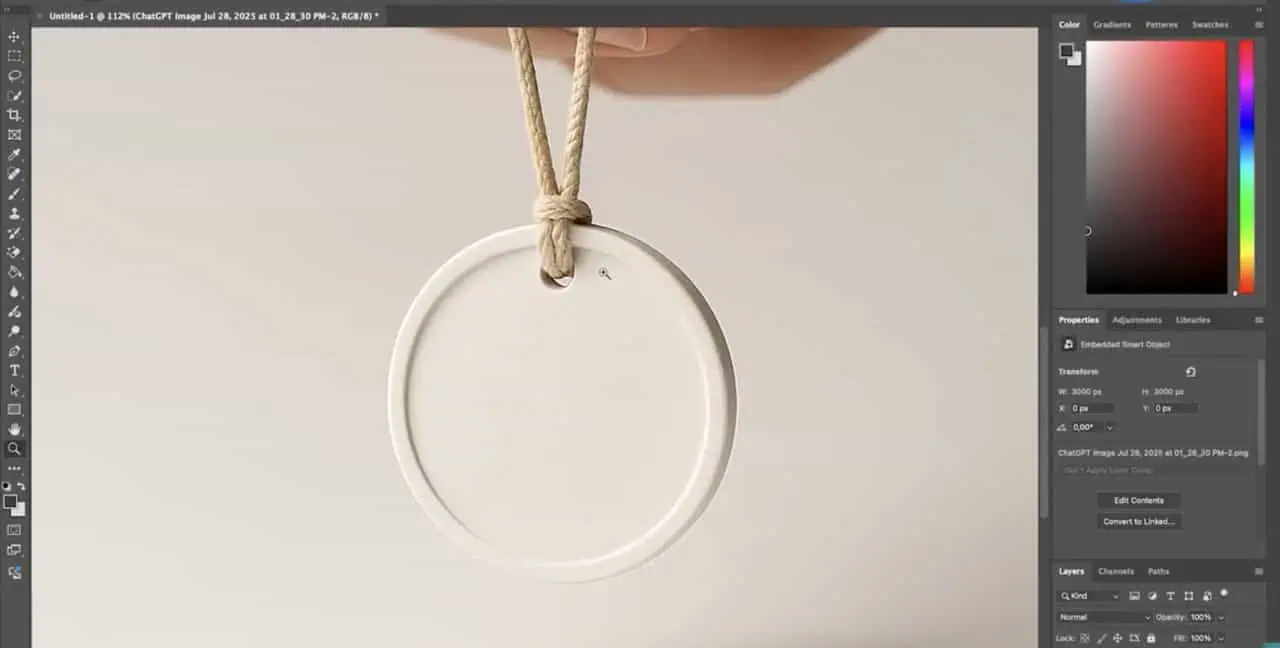
Place your base image into the document. Choose a photograph or AI generated image with a clearly visible circular ornament that will hold the final artwork.
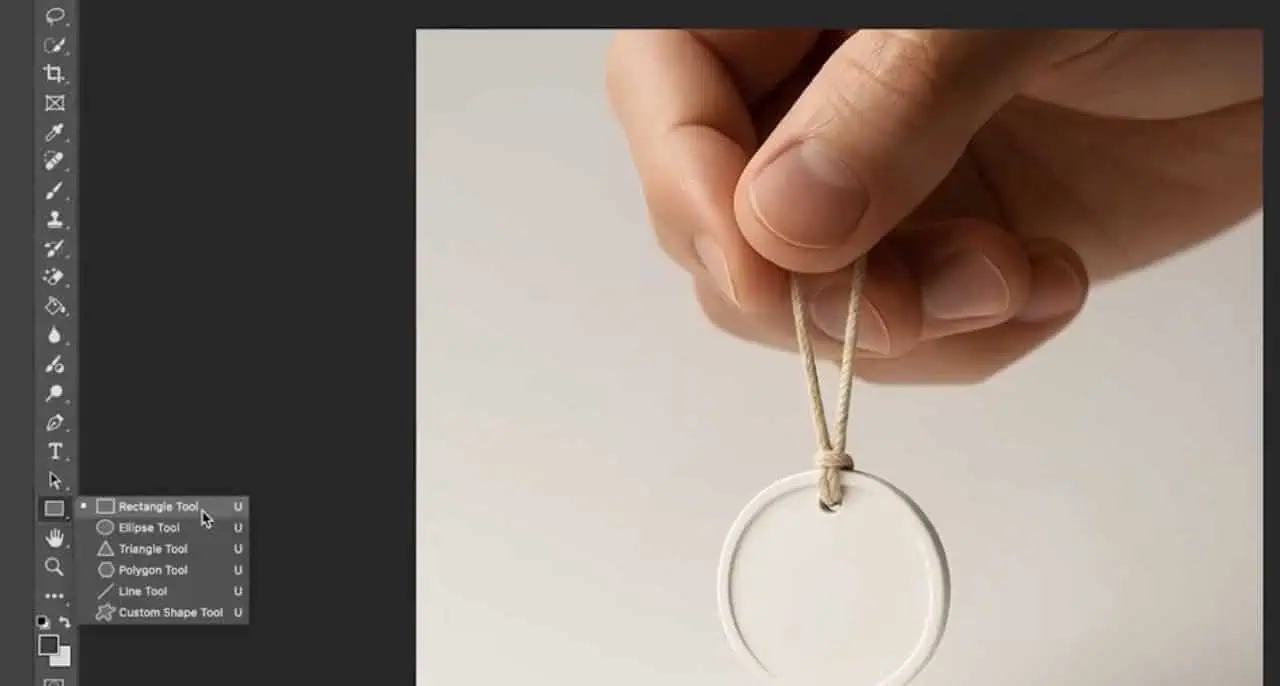
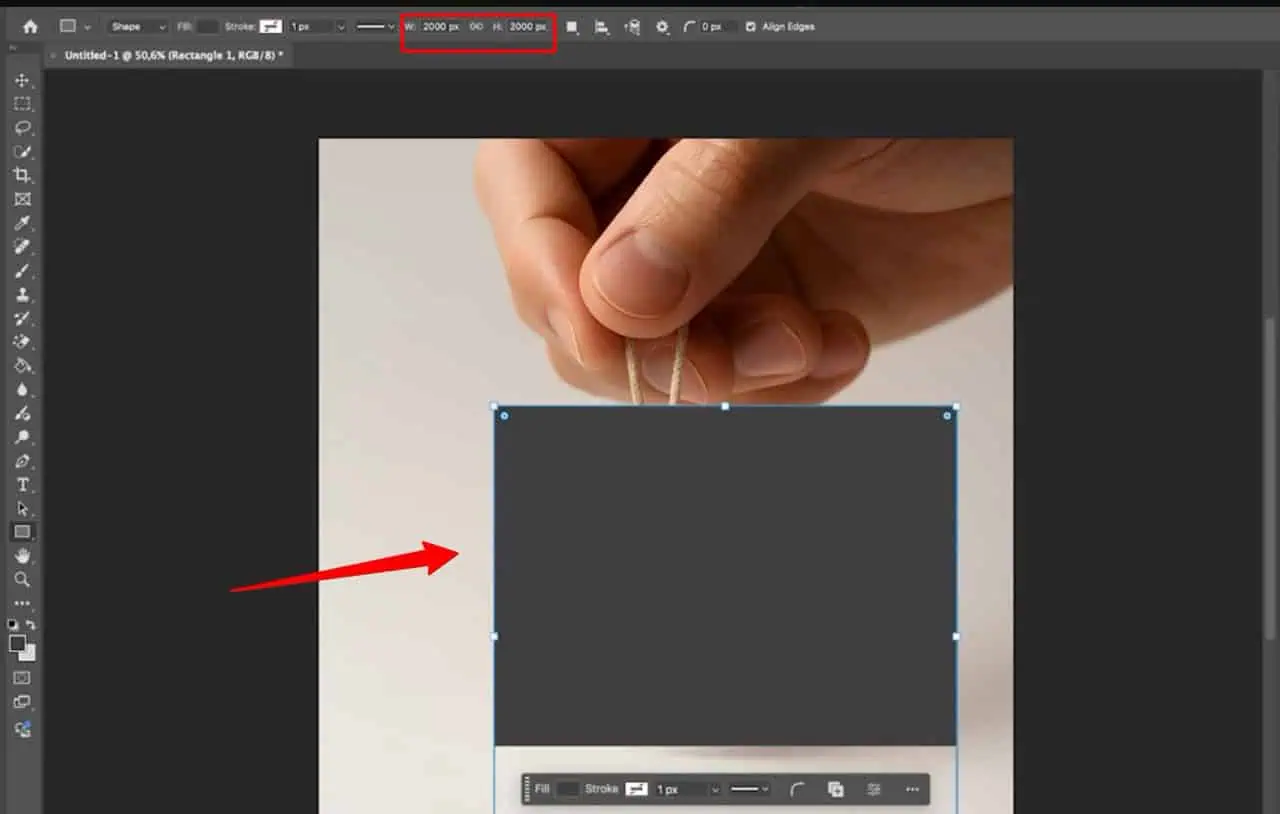
Select the Rectangle Tool and draw a square measuring 2000 by 2000 pixels. Position it over the ornament and rename the layer (@design).
A square placeholder makes future artwork easier to arrange because the Smart Object opens on a standard square canvas. The circular shape will be created later with a layer mask.
Right-click the Design layer and choose Convert to Smart Object.
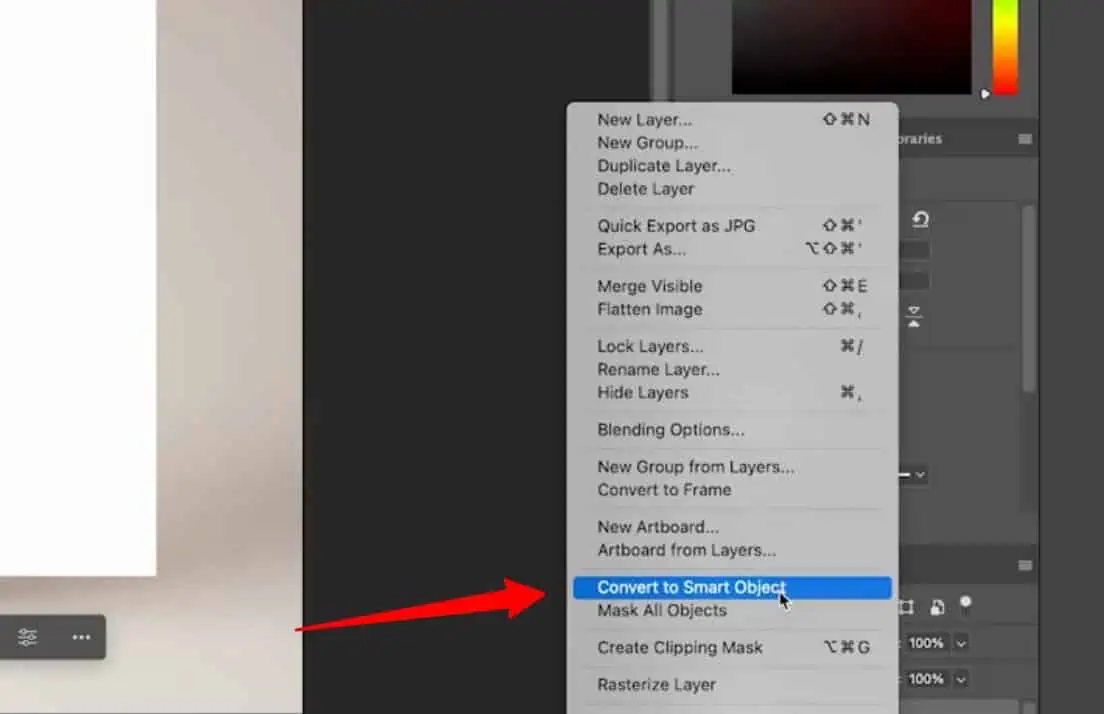
This Smart Object will hold every replacement design added to the mockup. Once the template is complete, you can update the artwork without rebuilding the shape, mask or shadow.
Lower the opacity of the Smart Object to approximately 50% so you can see the ornament beneath it.
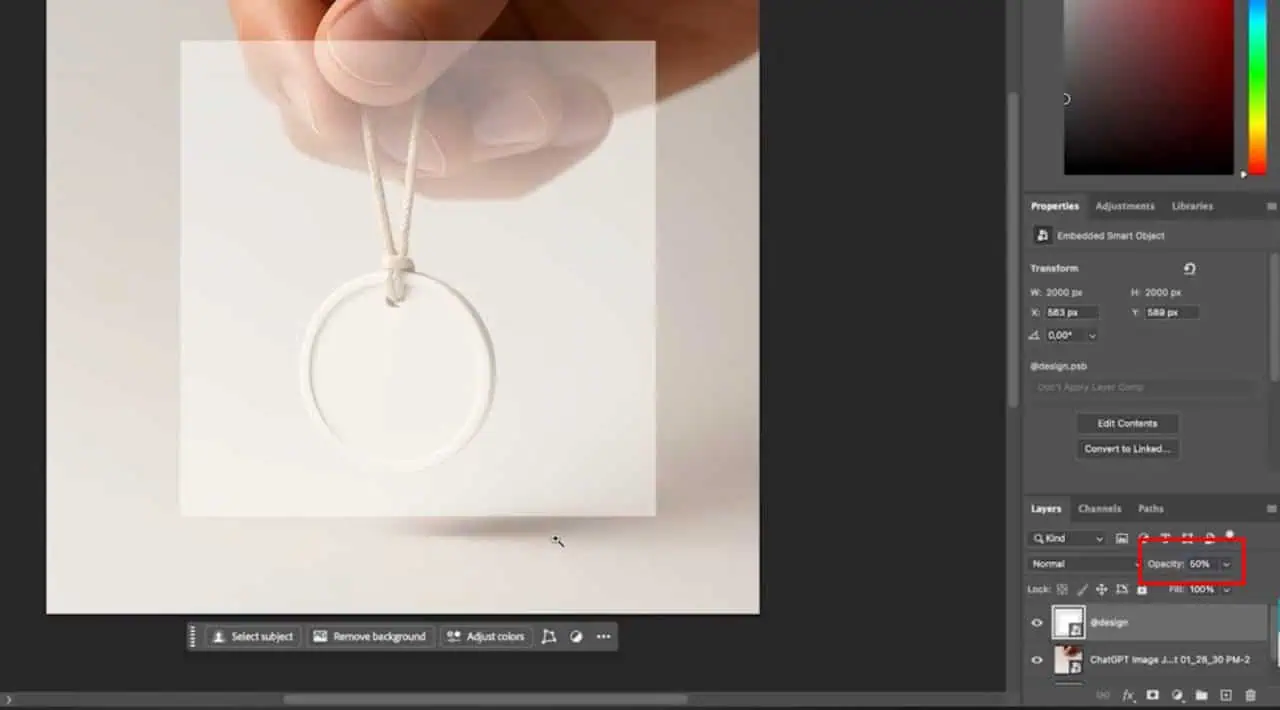
Press Command + T on macOS or Ctrl + T on Windows to open Free Transform. Resize the square until its width matches the ornament, then adjust the top and bottom edges until the full circular surface is covered.
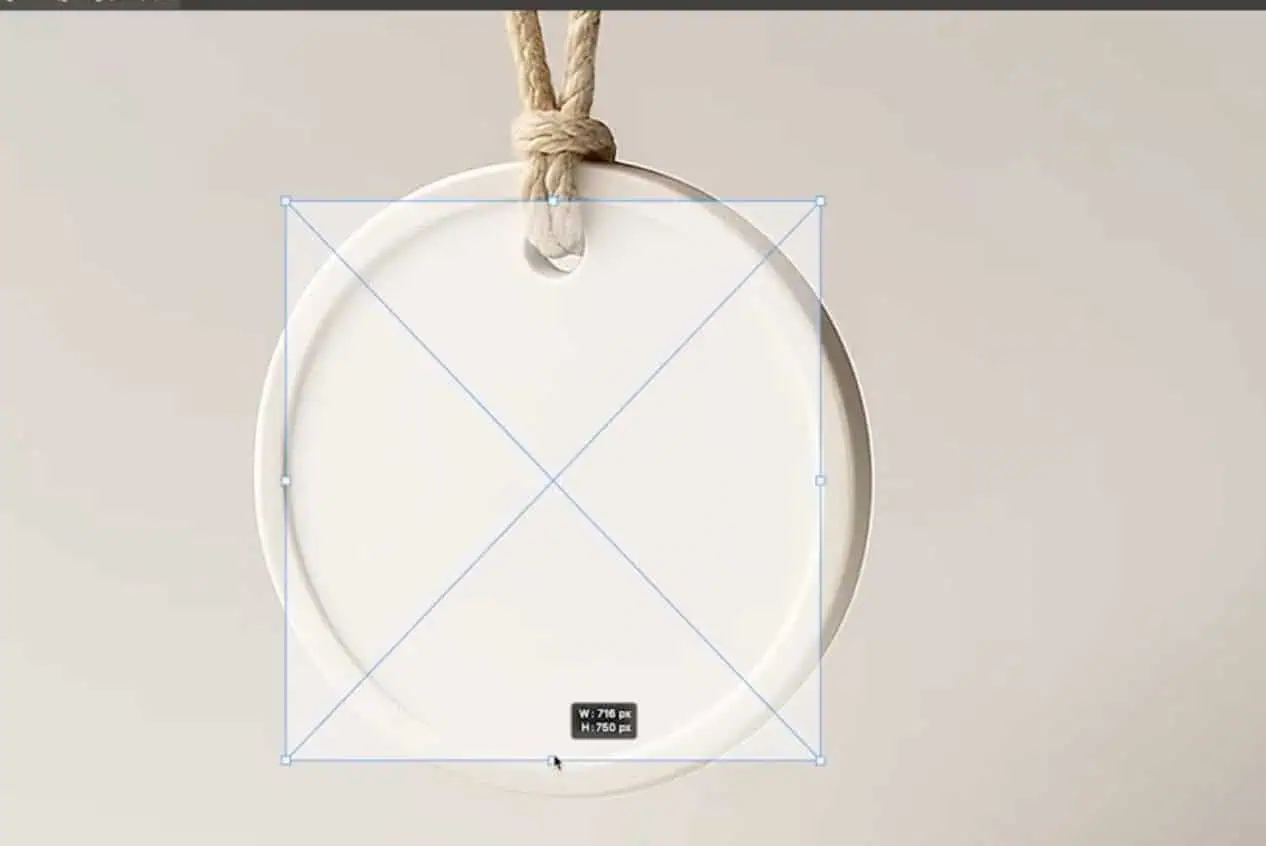
Choose the Pen Tool and begin tracing the outer edge of the ornament. Click and drag as you add points to create smooth curves around the circular shape.
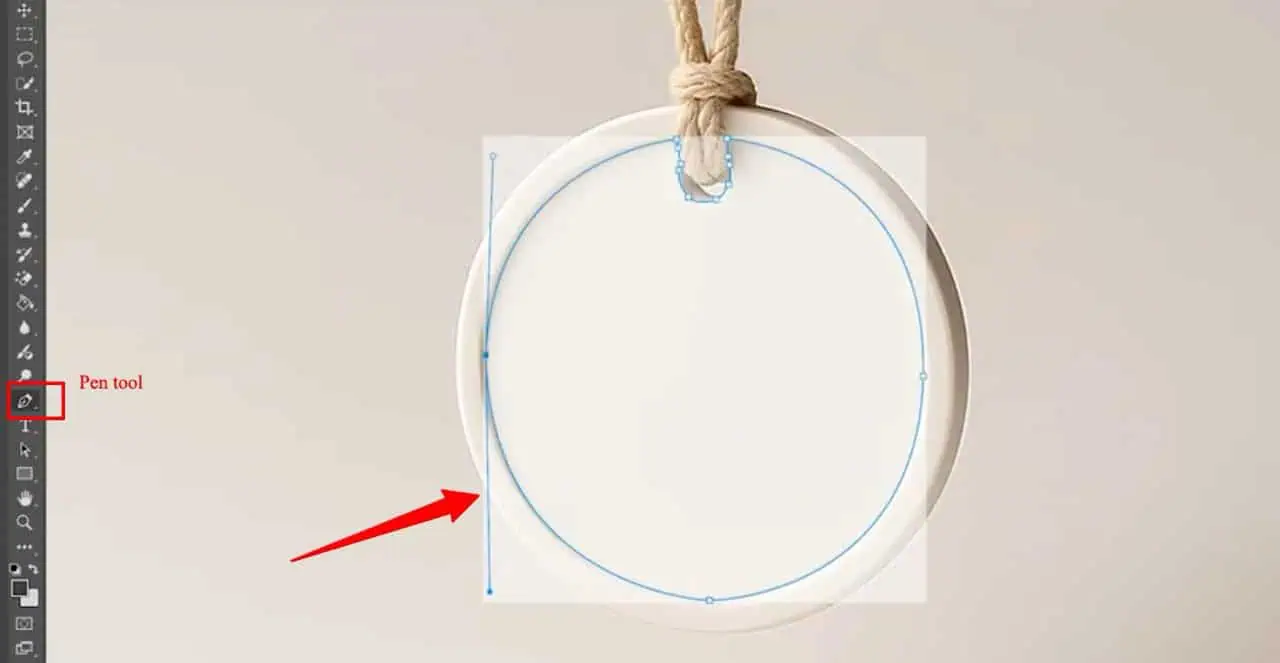
Adjust the anchor points until the path follows the edge accurately. Convert the completed path into a selection, select the Smart Object layer and click the Add Layer Mask icon.
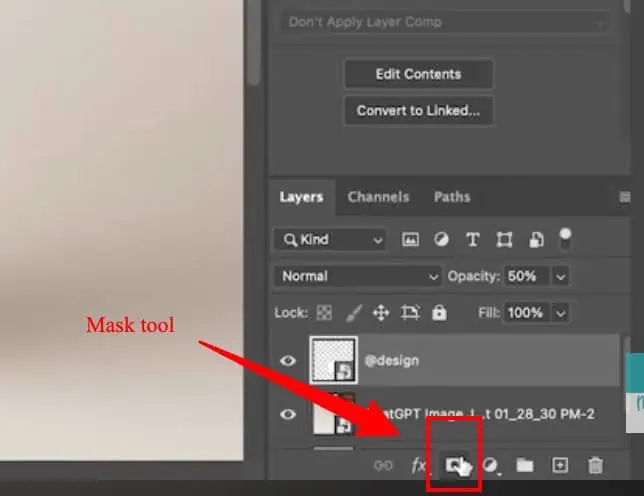
The square artwork layer will now appear only inside the ornament.
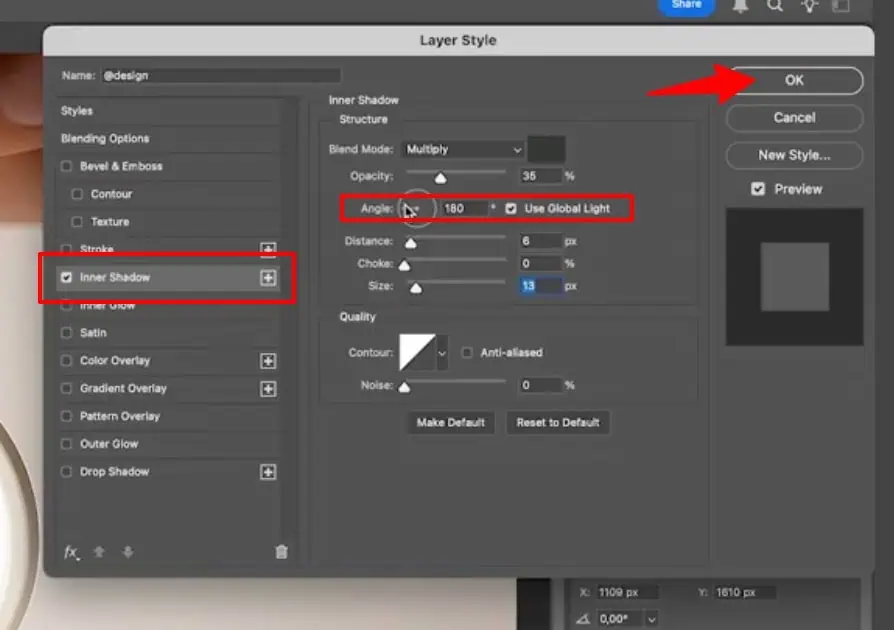
Double-click the Smart Object layer to open the Layer Style window. Select Inner Shadow and set the angle to approximately minus 190 degrees.
Reduce the distance and adjust the size until the shadow follows the inner edge of the ornament. The result should add depth without making the artwork look dark or heavily outlined.
Click OK to apply the effect.
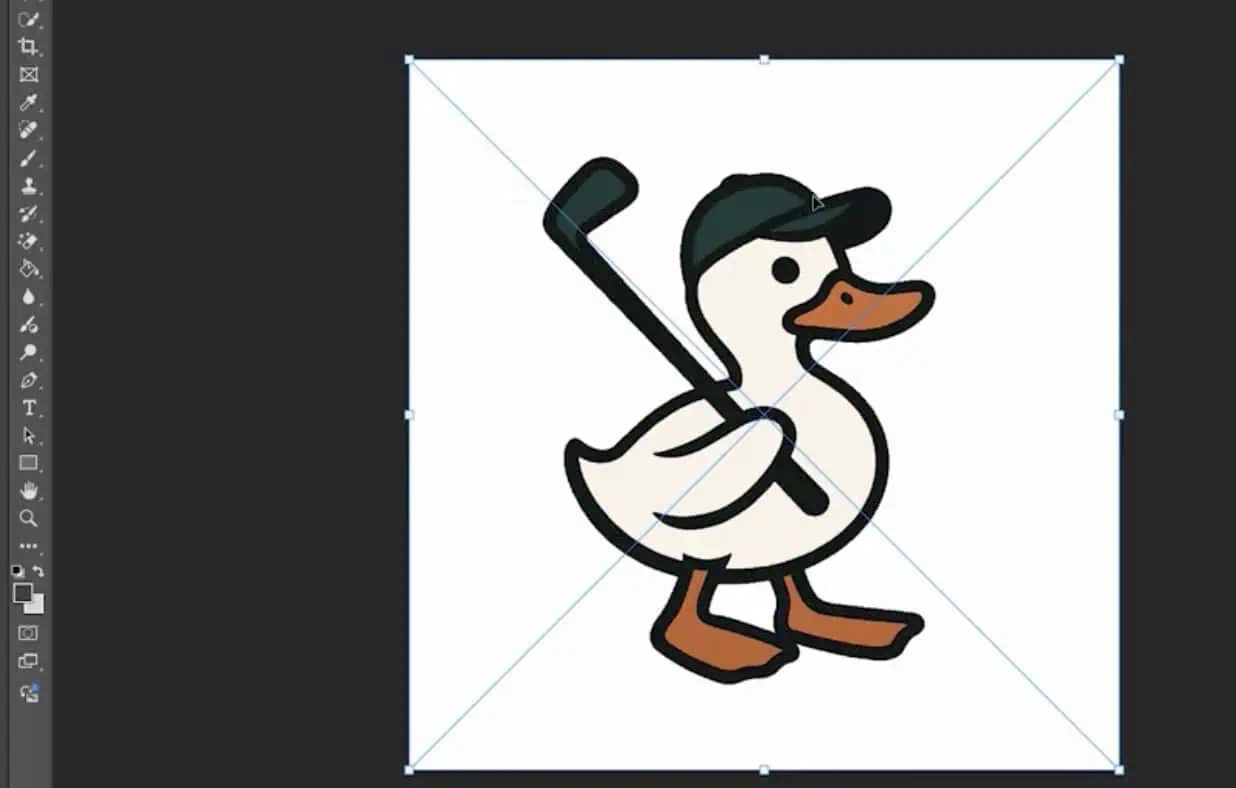
Double-click the Smart Object thumbnail in the Layers panel. Photoshop will open the contents in a separate document.
Place your design inside the Smart Object and remove its background when transparency is needed. You can also add a colour layer behind the design. Choose a suitable shade, save the Smart Object again and close it to view the updated result.
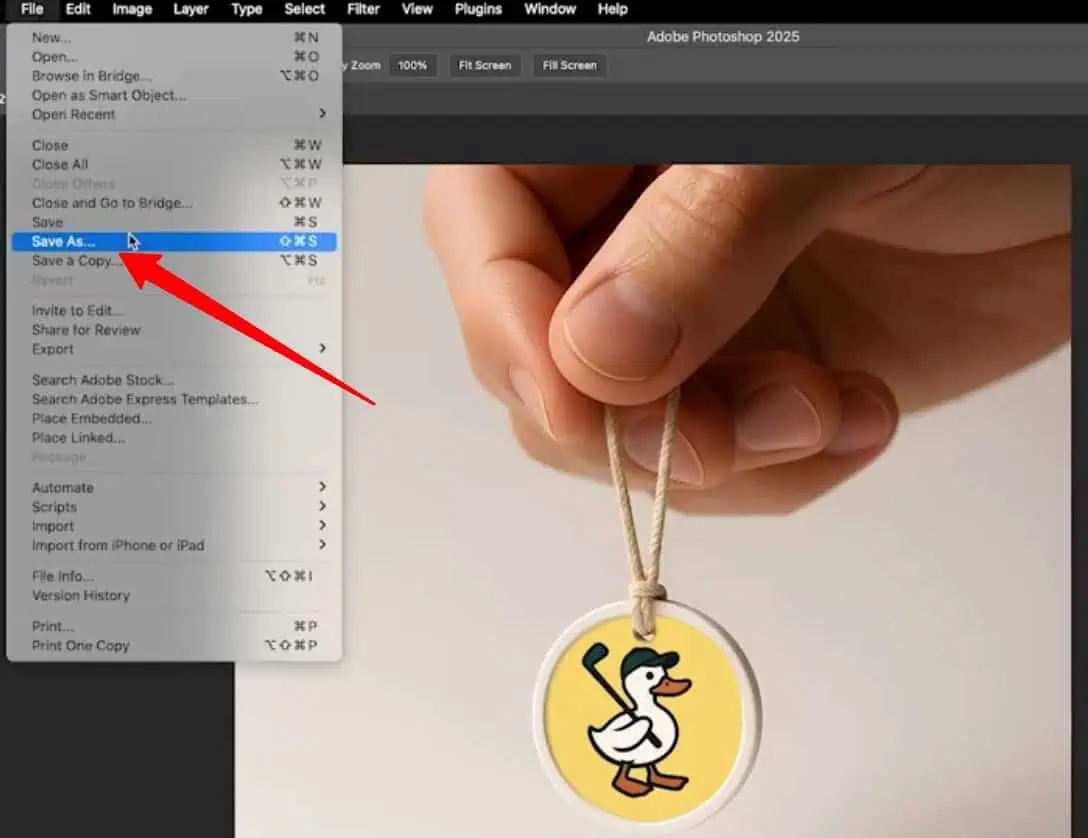
Once the design placement, mask and shadow look correct, save the main Photoshop document as a PSD.
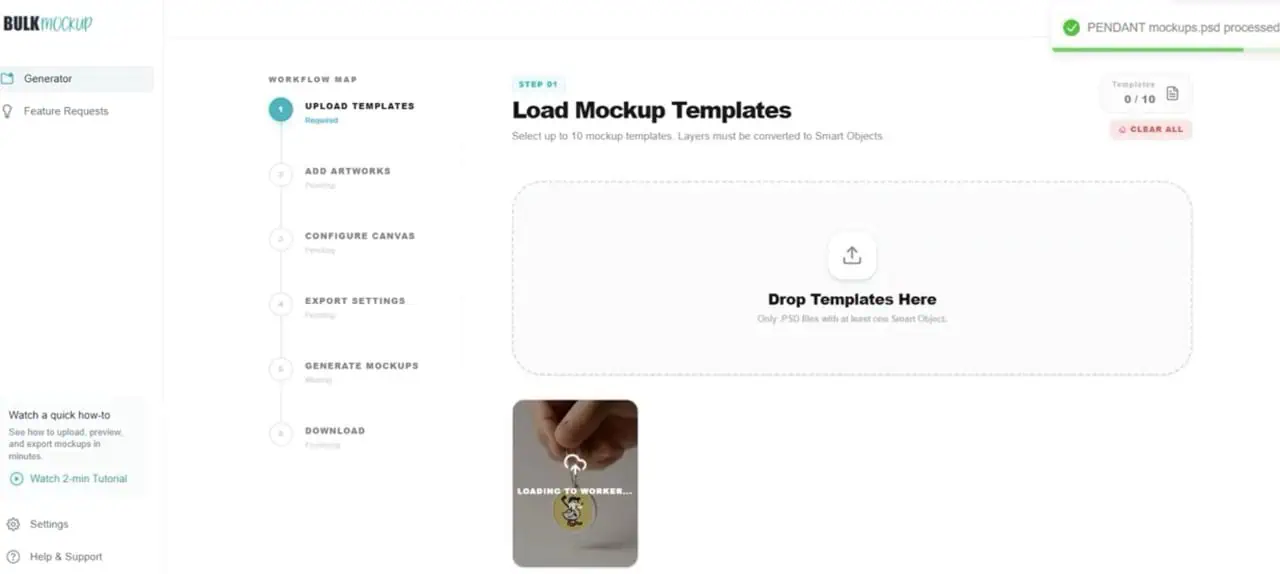
Once your ornament mockup template is ready, you can use it for much more than one design at a time. Manual Smart Object replacement works for a small batch, but it becomes slow when you need to create a large number of product images.
At that stage, you can pair your PSD with the Bulk Mockup Photoshop plugin or bulk Mockup Webapp to generate many ornament mockups much faster.
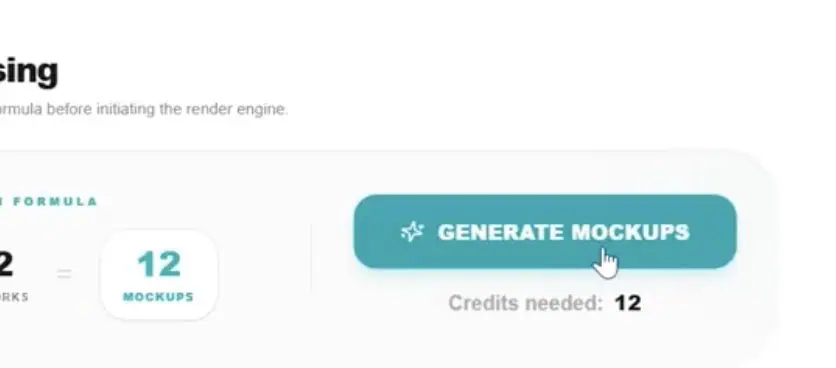
Upload your PSD template first, then upload the folder that contains your design files. After both are in place, scroll down and click Generate Mockups, then select Start Bulk Generation. Keep the page open until the process finishes. Bulk Mockup will place each design into the Smart Object and generate the finished mockups automatically.
“The video below shows the complete ornament mockup process in Photoshop, from creating the Smart Object to adding the final artwork. Follow each stage on screen while building your own reusable template.”
| Problem | Likely cause | Recommended fix |
| Smart Object does not update | The .psb was closed without saving or saved as a separate file | Reopen the Smart Object, edit it, then press Ctrl + S or Cmd + S |
| Artwork looks blurry | The source design is too small | Replace it with a larger raster image or vector file |
| Text bends unnaturally | Warp is too strong | Reduce Warp and use Distort for a flat ornament |
| Logo becomes oval | The transform is uneven or side compression is excessive | Reset the transform and rebuild it with a test grid |
| Design does not reach the edge | The artwork lacks bleed | Extend the artwork beyond the visible mask |
| White artwork disappears | Multiply blending mode is affecting the design | Keep the artwork on Normal blend mode and use separate shadow layers |
| Dark artwork loses detail | Highlight or contrast layers are too strong | Reduce their opacity or refine the masks |
| Artwork covers the hole or ribbon | Foreground elements sit below the artwork | Move the cap, hole, and ribbon group above the Smart Object |
| Surface looks muddy | Texture and shadow layers are too strong | Lower their opacity and separate texture from broad shading |
| Every duplicated ornament changes | The Smart Objects share the same source | Use New Smart Object via Copy for independent designs |
| Photoshop reports a missing link | The Smart Object uses an unavailable external file | Relink the source or embed the Smart Object |
| Batch exports are misaligned | Smart Object names, canvas sizes, or PSD structures vary | Standardise the template before running automation |
Photoshop does not support a circular Smart Object canvas, so the editable artwork remains square or rectangular. A circular layer mask hides the unwanted outer area and makes the design fit the ornament. This setup also gives you more room to position, resize and replace different designs inside the Smart Object.
Open the PSD and locate the Smart Object in the Layers panel. Double-click its thumbnail, or right-click the layer and choose Edit Contents. In the new tab, hide or delete the existing artwork layer, then place and position the new design. Keep any background or template layers you still need. Save with Ctrl + S on Windows or Command + S on macOS, then close the tab. Photoshop will update the ornament while preserving its mask, size and layer effects.
The Smart Object probably does not have an accurate layer mask. Check the Pen Tool path and adjust its anchor points so the selection follows the ornament edge. Apply the corrected selection to the Smart Object as a mask rather than deleting the surrounding artwork.
Yes, provided the ornament has a clear circular edge and enough image quality for accurate tracing. Strong blur, hidden edges or complicated overlapping objects can make the mask harder to create. A simple image with a clearly visible ornament will produce a cleaner template.
Yes. Save the finished Photoshop file as a PSD with the editable Smart Object intact. You can then upload the template and your design folder to Bulk Mockup, which replaces the artwork and produces multiple mockups without requiring you to edit every file manually.