Learn to replace smart object layers in Photoshop quickly. Discover manual methods and bulk replacement using our BulkMockup plugin for efficiency.


In this tutorial, we will be learning how to replace smart object layers in Photoshop and their use cases.
As a bonus, we will show you how to do it in bulk using our photoshop plugin Bulkmockup.
Smart Object layers represent a unique category within Photoshop, designed to retain the original attributes of layered content.
You can scale or edit the smart object without losing the original data or quality and revert it back to exactly how it was.
Smart object layers are the backbone of the mockup template system we use to market our products.
Without it, we will have to put hours of work onto every single product image for the same results we’re getting in seconds.
There is three traditional straight forward ways to replace a smart object layer.
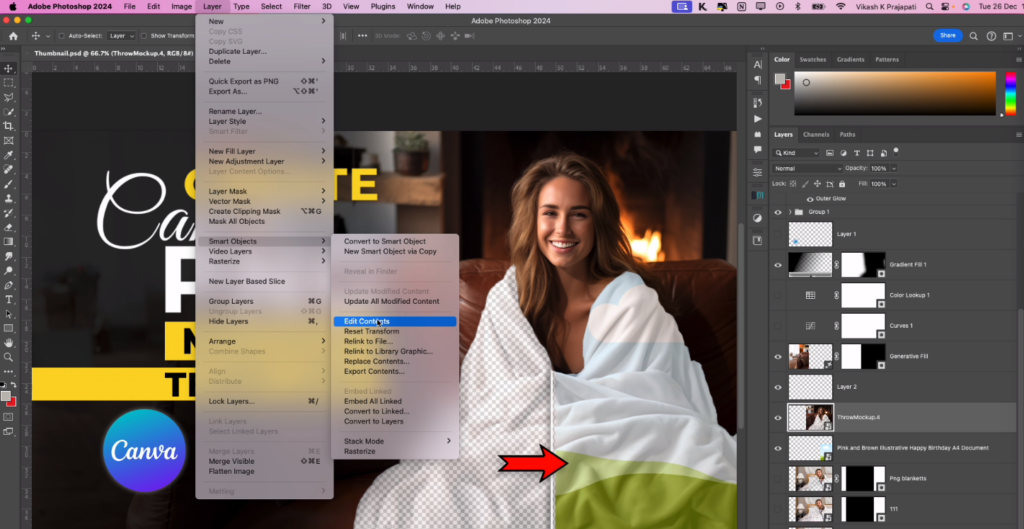
For this method, first choose the smart object layer in the layer panel. Then go Layer –> Smart Objects –> Edit Contents.
This will open the smart object layer into a new document. In this document you can make changes or replace the entire image or element of the smart object layer.
Next save and close the new document. The smart object in the original file will be replaced by then.
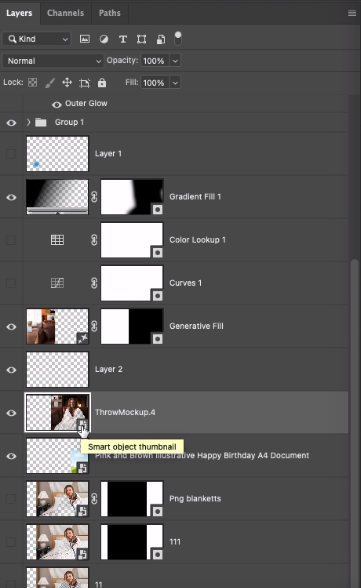
Go to the layers panel. Double click the smart object layer icon and the smart object image or element will open as another document in a new tab.
The rest of the process is same.
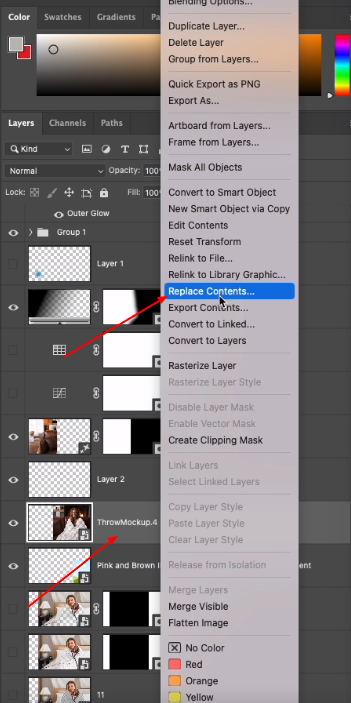
This is the fastest method. Go to the layer panel, select the smart object layer and right click, then choose the “Replace Contents” option.
With this option, the smart object won’t open in a new file, Instead it will open a dialog box with explorer(in windows) or finder (in mac). You can directly select any image file to replace the smart object layer.
When you use replace content option you could get some inconsistency in the finished result for different size design. Illustrated example below
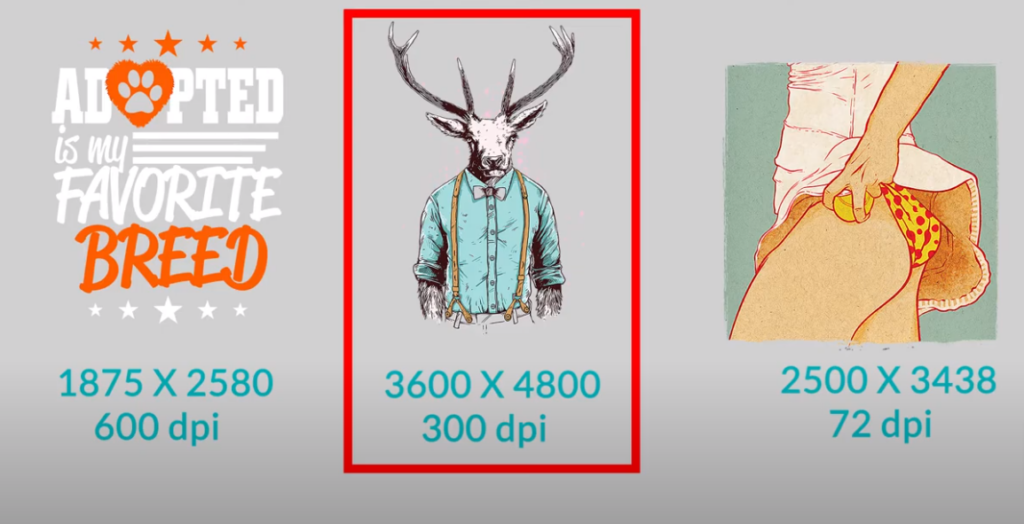
If you use these three designs to replace the same smart object layer on a same t-shirt mockup template, the results will be vastly different.
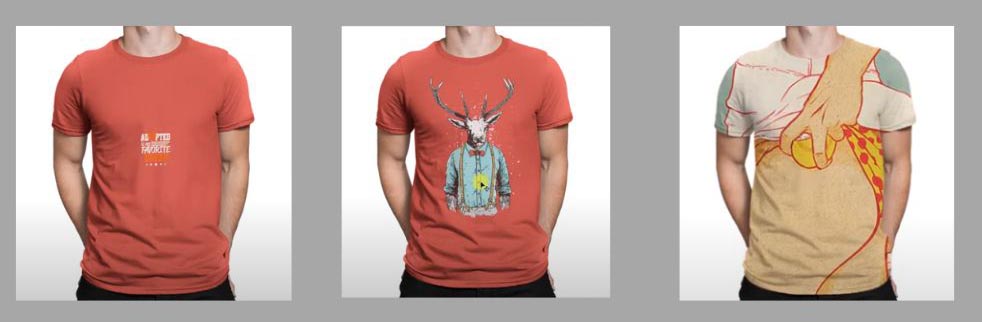
You might think, we just have to make everything the same size as the middle design and it will be perfect but sadly that’s not true.
There is no right or wrong size, it all depends on the size of the smart object layer. Our second design fits perfectly because it’s size matches the size of the smart object perfectly.
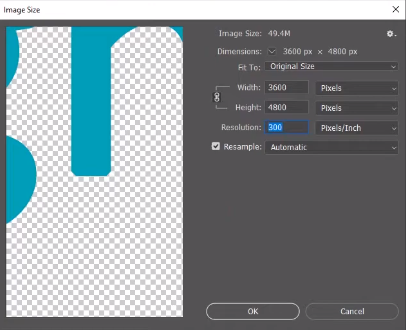
The width, height and resolution of the design file needs to perfectly match that to smart object layer to get perfect fit.
If you want to learn more about it in details, checkout this video.
So, doing this again and again for all the designs is a hassle we all would like to avoid. Don’t worry, we got you guys covered on the next section.
If you’re a visual learner, you can watch the video in our official youtube channel about this topic or you can just follow along with this article.
Now, let’s give you a rundown of this video.
It has three main options that we’re gonna work with today.
The design layer is where you keep all your designs that you want replaced and saved on the smart object layer, the PSD file option is for the folder where you keep all the mockups with smart objects in them and Export option is where Bulkmockup will automatically save the finished products.
To set it up correctly, we need to understand a few more options that Bulkmockup provides.
If you want to know about them in detail, please read this article where our founder Vikash Kumar Prajapati talks about them in full detail.
After this few options are set up and calibrated to your liking, just click the start button and you’re done.
Bulkmockup will take each PSD file with a smart object, replace the smart object with a design from your design folder and save the file in a different folder. Bulkmockup will keep doing it till it runs out of designs and smart objects.
If you want to batch replace multiple smart objects, try out our this video.
Or if you want to read along with a written tutorial with great details, check our How to Batch Replace Multiple Smart Objects in Photoshop article.
Replacing one or a few smart objects is easy enough that we can do it manually and as we’ve shown, the process is quite simple and straightforward.
But if you want to do it for hundreds or thousands, Bulkmockup is the only viable option.