Learn to separate shadows and highlights into different layers in Photoshop with this quick tutorial. Elevate your mockup skills from hobbyist to pro.


In this quick tutorial, we’ll show how you can separate shadows and highlights from an image so they are in separate layers. This will level up your mockup game from a hobbyist to a pro in just five minutes.
The process will work on all kinds of images: t-shirts, tumblers, blankets etc.
There are two methods to extract the Shadows.First is using Photoshop action. Second one is manual work.
If you’re a visual learner, you can watch the video below or follow the article if that’s more of your liking.
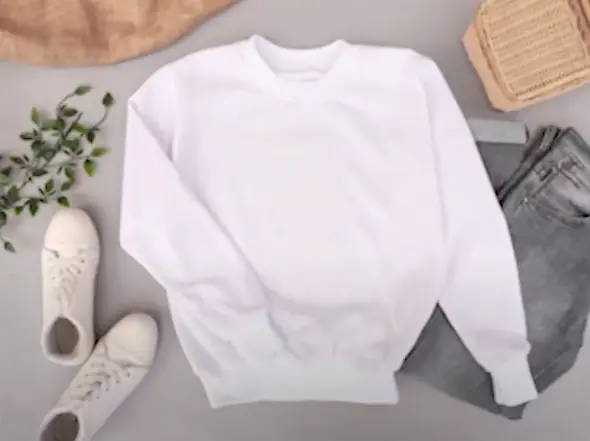
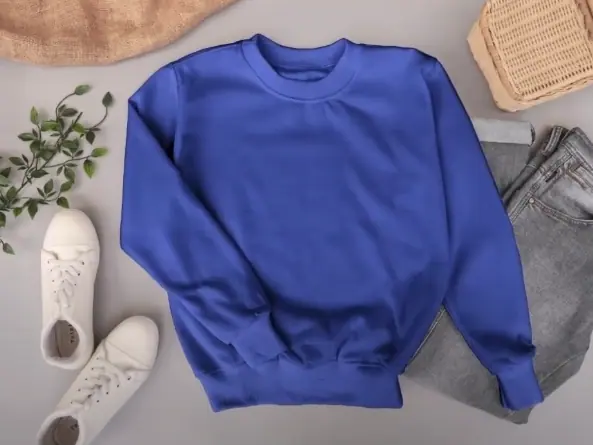
This method is really easy and fast. We’re going to work on the sweatshirt sample given below. If you want to follow through the process, you can get the action pack from here.
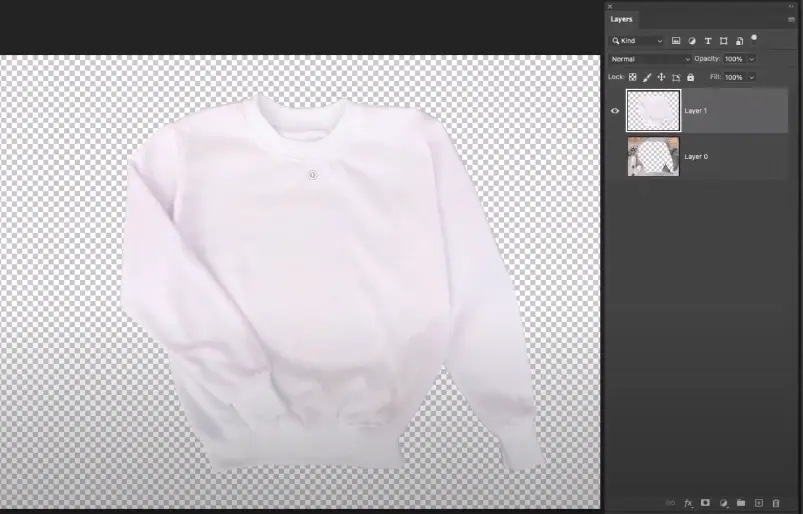
First, select the quick selection tool and select the sweatshirt image like this.

Unlock the background layer and press ctrl + shift + J and turn off the visibility of the underneath background layer.
Select the shadow action and click on play.
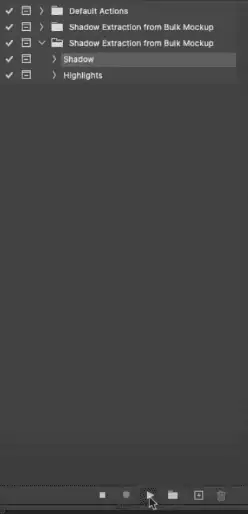
Now adjust the level slider to bring out the Shadows of the image. I will adjust the slider to show contrast between the Saturated red color and the light red color like this.

Then click okay and here I have the shadow layer separated into a new layer. Then we have to turn off the visibility of the Shadow layer.
Select the short layer and click on Highlights action.
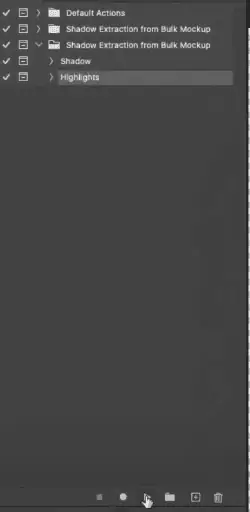
Now the process is the same as before. We have to adjust the sliders on the left this time the idea is to adjust it to bring out more contrast in the t-shirt region.
Once satisfied with the adjustment hit on okay and you’ll have a result like this.
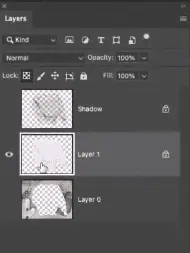
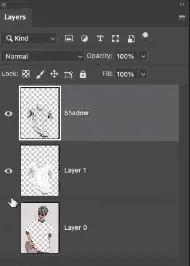
Now as we have the highlights separated into a new layer, both shadows and highlights in a new layer.
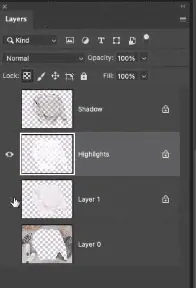
To show them in effect, create a solid fill color and place it underneath the background layer. Change the color to anything you like, we’re going to leave it to Blue. Then turn on the shadow layer, turn on the Highlight layer as well.
We need to reduce the opacity of the Highlight layer to give it a better look. We can change it to any color to produce different color sweatshirts.
Now lets jump to the manual method of extracting the shadows and highlights. We’ll be using this image for the manual process.
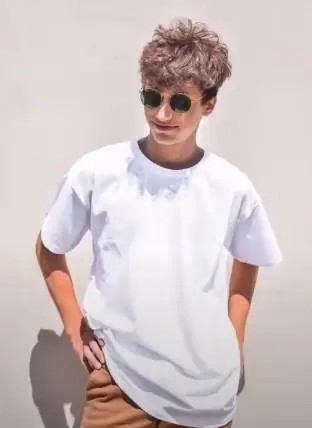
We first need to unlock the background and make a selection of the T-shirt. Just like before, press Ctrl + shift + J and then turn off the visibility of the underneath layer.
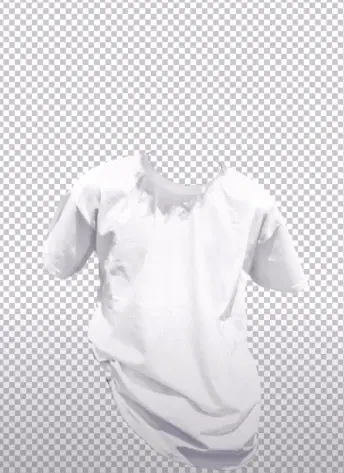
You’ll get a result like this.
Now press control and left click on the RGB Channel.
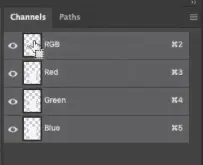
Now we have to make a selection on the canvas and then on the keyboard press Q to activate the quick mask.
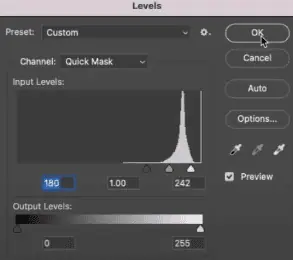
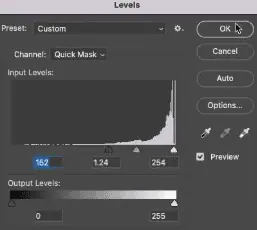
Press ctrl + I to invert the selection. Then to bring out the levels press ctrl + L.
Now do the same drill as we did earlier. Rear adjust the slider and press okay for a result like this.
Now press Q again to create a new layer and then go to edit fill.
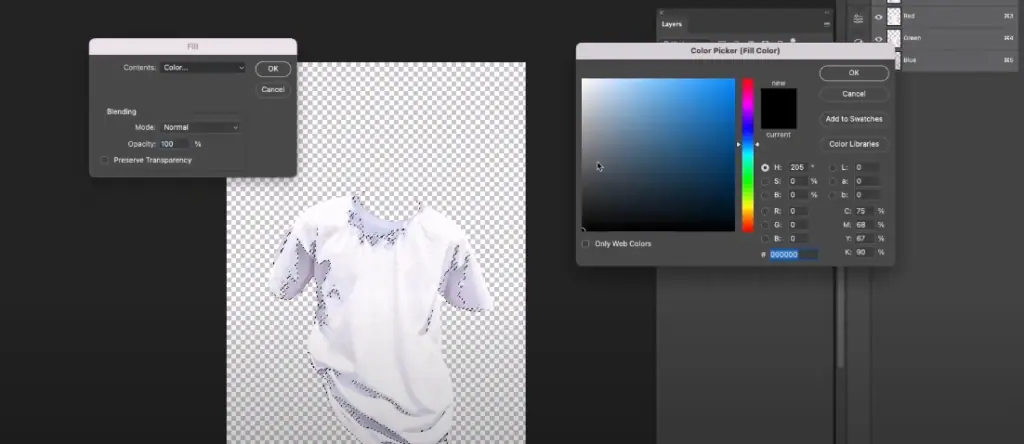
Fill it with black color and this is our shadow layer.
Now to separate the Highlight, select the T-shirt layer again while pressing control on your keyboard.
Press on the RGB Channel next press Q on your keyboard and then press ctrl + L to bring the levels just like before.
Then adjust the sliders forcing out more contrast and click on okay and press Q again.

Now let’s start with the tricky part.
Press ctrl + J then pressing control on the keyboard left click on the duplicated layer.
Go to Edit → Fill and fill in white color.

This is our highlight.
Now our highlights and shadows are separated into a new layer.
This method will bring your mockup game to a whole new level. We have shown you the process of doing it manually, which is not that tough.
But if you want to save time and hassle, you can have the Photoshop action made by us just for $5. Click here to get the action pack.