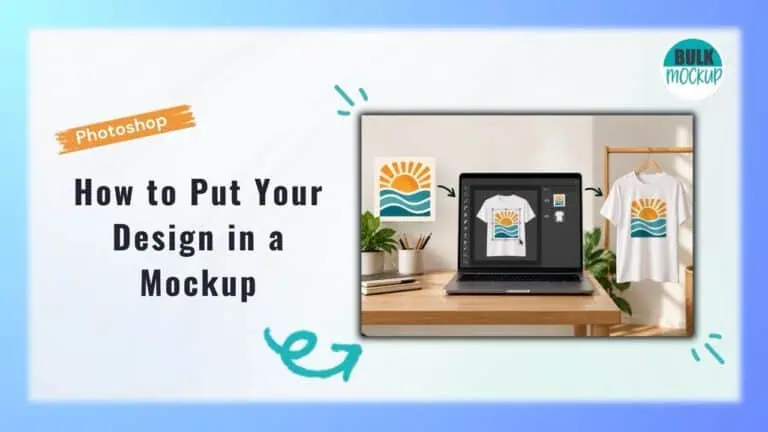


You have your design ready, and a PSD mockup open in Photoshop, but getting the artwork onto the product can feel confusing when you are looking at many layers and folders.
The good news is that most professional mockup templates are built to make customization easier. You do not need to rebuild the product image or manually recreate every shadow, angle, or surface detail just to see how your graphic will look.
Whether you are adding a logo, illustration, pattern, or print design, this guide will help you place it correctly and avoid common issues such as blurry images, poor sizing, stretched artwork, or a mockup that does not update as expected.
By the end, you will know how to create a clean design and how to put your design in a mockup in Photoshop.
A Photoshop mockup is a layered PSD file that shows how a design may look on a real product or surface. Common examples include T-shirts, hoodies, mugs, tote bags, packaging, books, posters, bottles, phone cases, and signage.
Most editable mockup templates use a Smart Object as the area where you place your artwork. The mockup creator usually prepares a flat design area, converts it into a Smart Object, then adjusts its perspective, shape, or curve to match the product. Shadows, highlights, masks, and textures are added separately to make the result look realistic.
When you replace the artwork inside that Smart Object, Photoshop keeps the existing transformations and updates the mockup automatically. This is how a flat design can appear correctly on an angled box, folded shirt, or curved mug.
Start by opening the editable PSD mockup in Photoshop. Some mockup downloads include a JPG preview alongside the main file, so make sure you select the PSD rather than the flattened preview image. The JPG can show you what the template looks like, but it does not contain the editable layers needed to customize the mockup.
Next, check that the Layers panel is visible. If you cannot see it, go to Window > Layers. Photoshop uses this panel to display and organize the editable parts of the document.
Depending on the mockup template, you may see separate layer groups for product colors, backgrounds, lighting, shadows, effects, and artwork placement.
Before editing a detailed PSD, save a separate copy of the original file. This gives you an untouched version to return to if you accidentally change or remove an important layer.
Look through the Layers panel and open any groups that appear to contain the editable artwork. Mockup creators often use names such as Your Design Here, Place Your Design, Insert Artwork, Replace Me, Placeholder, or simply Artwork.
A Smart Object has a small Smart Object symbol on its layer thumbnail. Photoshop also lets you filter the Layers panel to show Smart Objects, which can make larger PSD templates easier to navigate.
Some product mockups contain more than one Smart Object. For example, an apparel template may have separate areas for the front, back, sleeve, or label. Check the layer names carefully so you edit the correct print area.
In the Layers panel, double click the Smart Object thumbnail, not the layer name. Photoshop will open the Smart Object contents so you can edit the artwork inside it. You can also select the layer and go to Layer > Smart Objects > Edit Contents.
The opened document may contain placeholder artwork, text, guides, masks, or other editable layers. For layered Smart Objects, Photoshop commonly opens the contents as a PSB file.
With the Smart Object document open, go to File > Place Embedded and select your design file. Photoshop adds the artwork as an embedded Smart Object, which keeps its original image data intact while you resize or transform it.
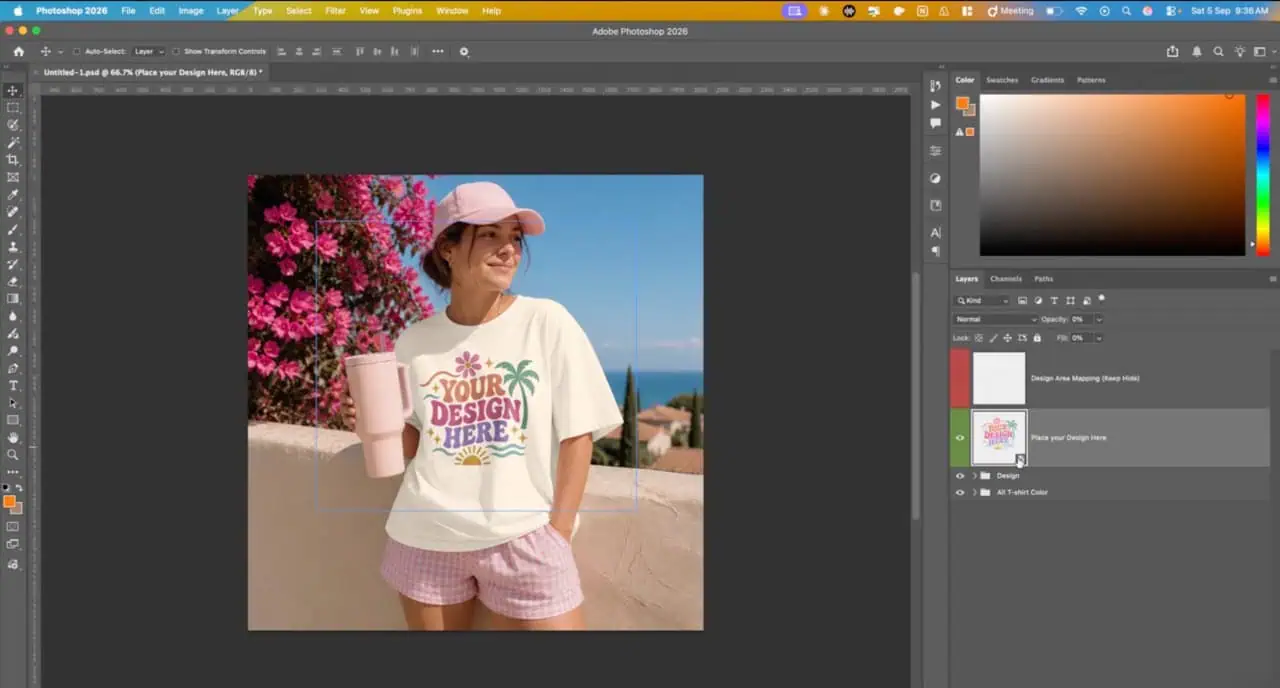
Place your design above the existing sample artwork and position it within the intended print area. Once the placement looks correct, hide or remove only the placeholder artwork that your design replaces.
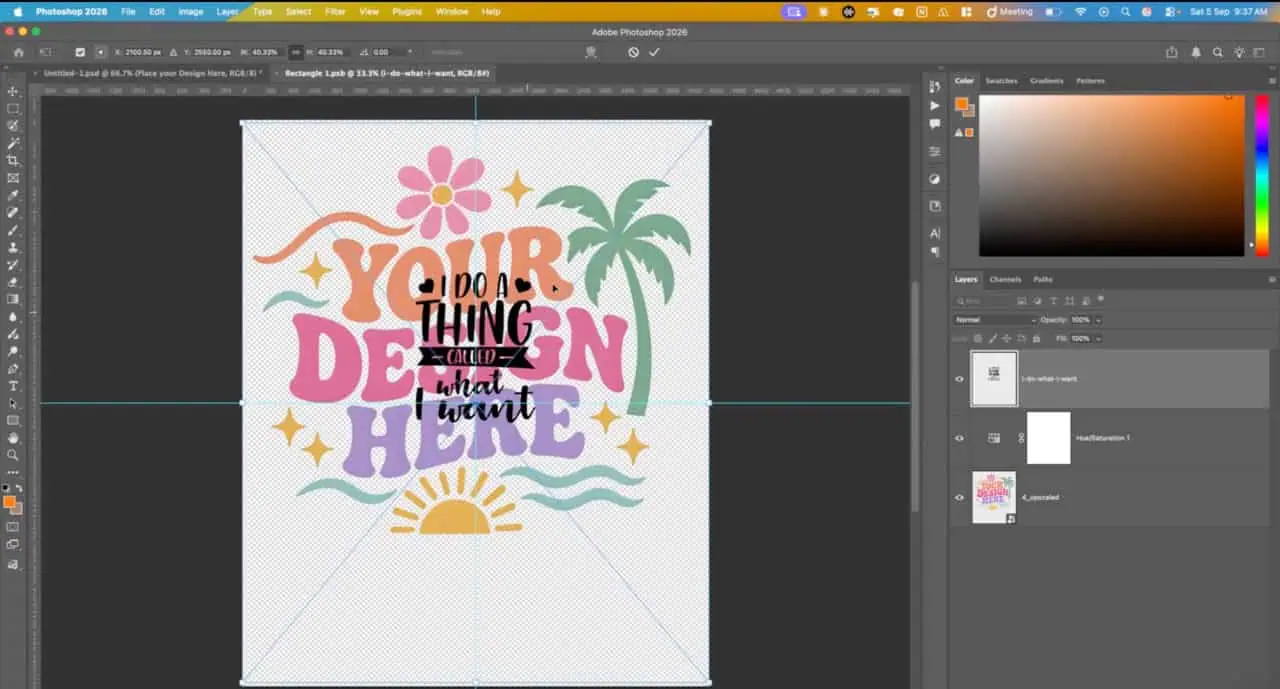
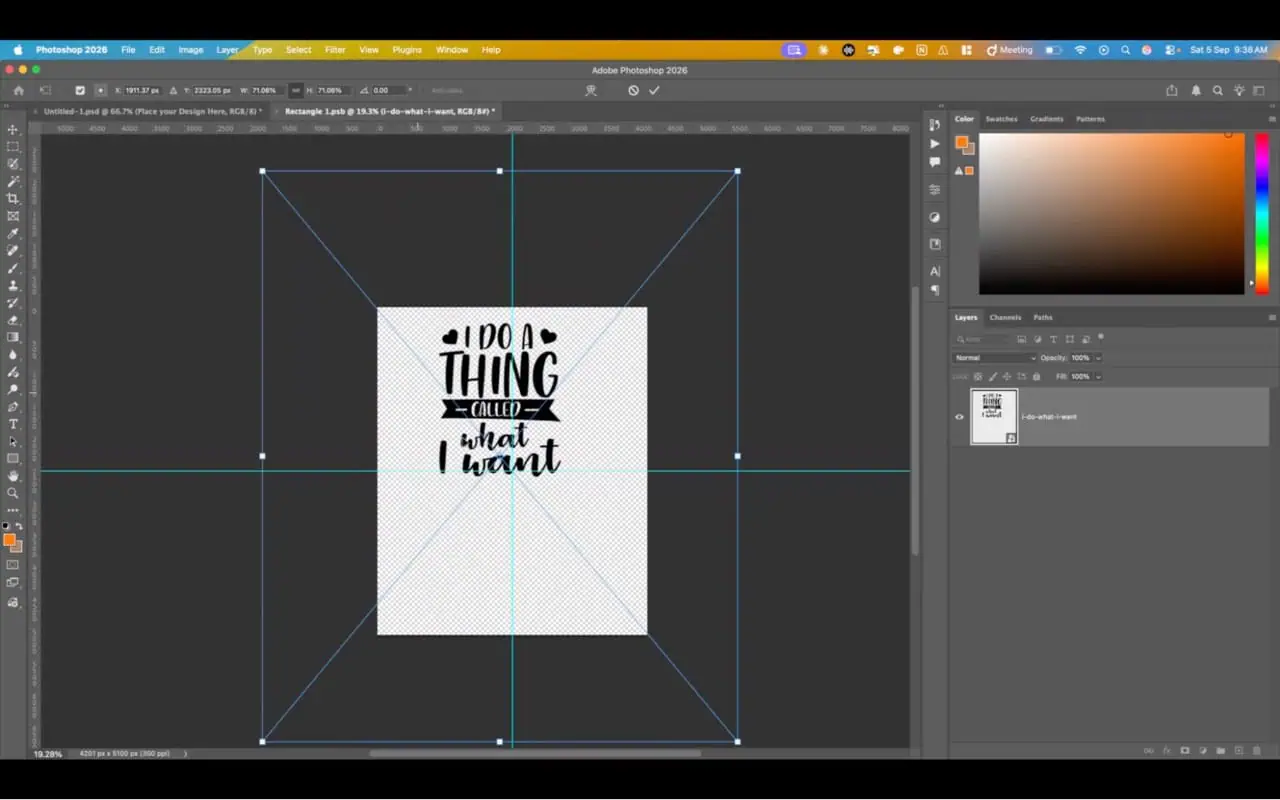
Select your artwork layer and use Edit > Free Transform if you need to resize or reposition it. Keep the aspect ratio locked so logos, photographs, text, and illustrations do not become stretched. In current Photoshop versions, proportional scaling is enabled by default when you drag a corner handle.
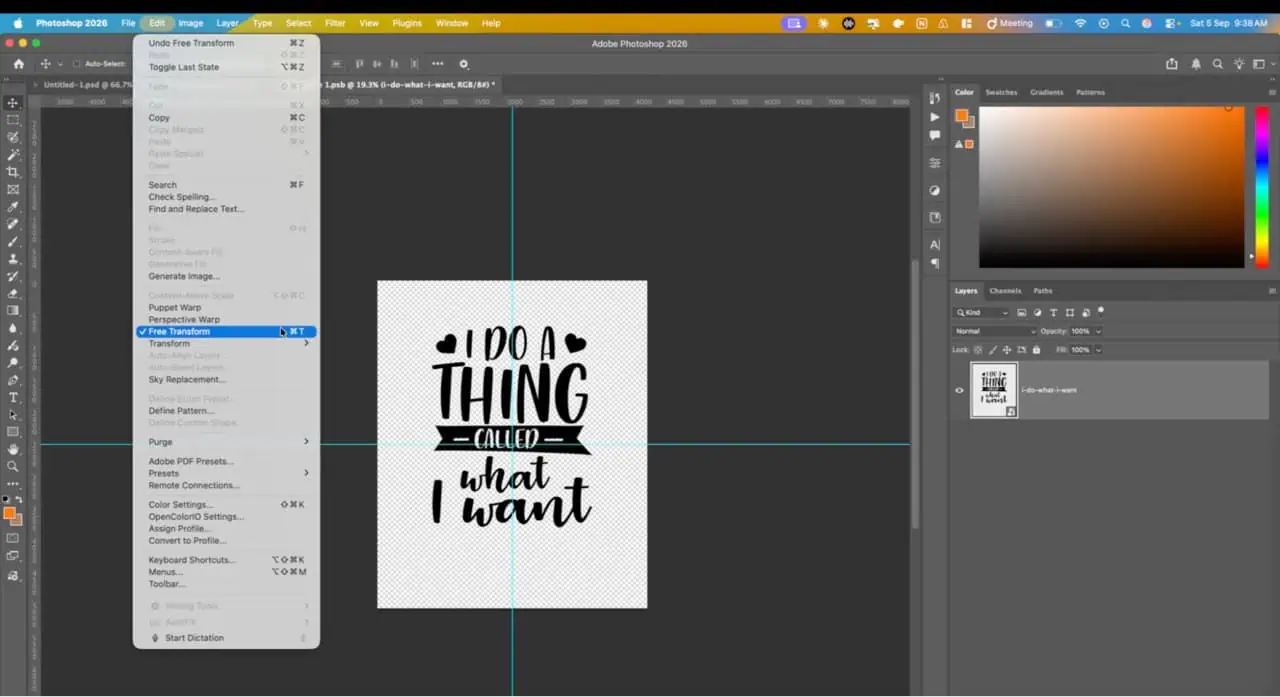
Adjust the design inside the flat Smart Object canvas until it sits where you want it to appear on the product.
Avoid resizing the outer Smart Object layer in the main PSD unless the template specifically requires it. That layer may already contain perspective, warp, distortion, masks, or other transformations that control how the artwork fits the product surface.
Aspect ratio is the relationship between an image’s width and height. Before resizing your artwork, compare its proportions with the Smart Object canvas.
For example:
Smart Object canvas: 3000 × 2000 px
Aspect ratio: 3:2
If your design is 2000 × 2000 px, it has a square 1:1 ratio. It cannot fill a 3:2 canvas without changing the composition.
You can either crop part of the artwork, leave some space around it, or adjust the design layout to suit the available area.
Avoid stretching the artwork just to fill the canvas. Changing width and height independently distorts the image, which is especially noticeable in logos, typography, and geometric graphics. Photoshop provides a Maintain Aspect Ratio option when scaling, which keeps the original proportions intact.
Once your artwork is positioned correctly, save the Smart Object document.
Use: Ctrl + S on Windows, Cmd + S on Mac
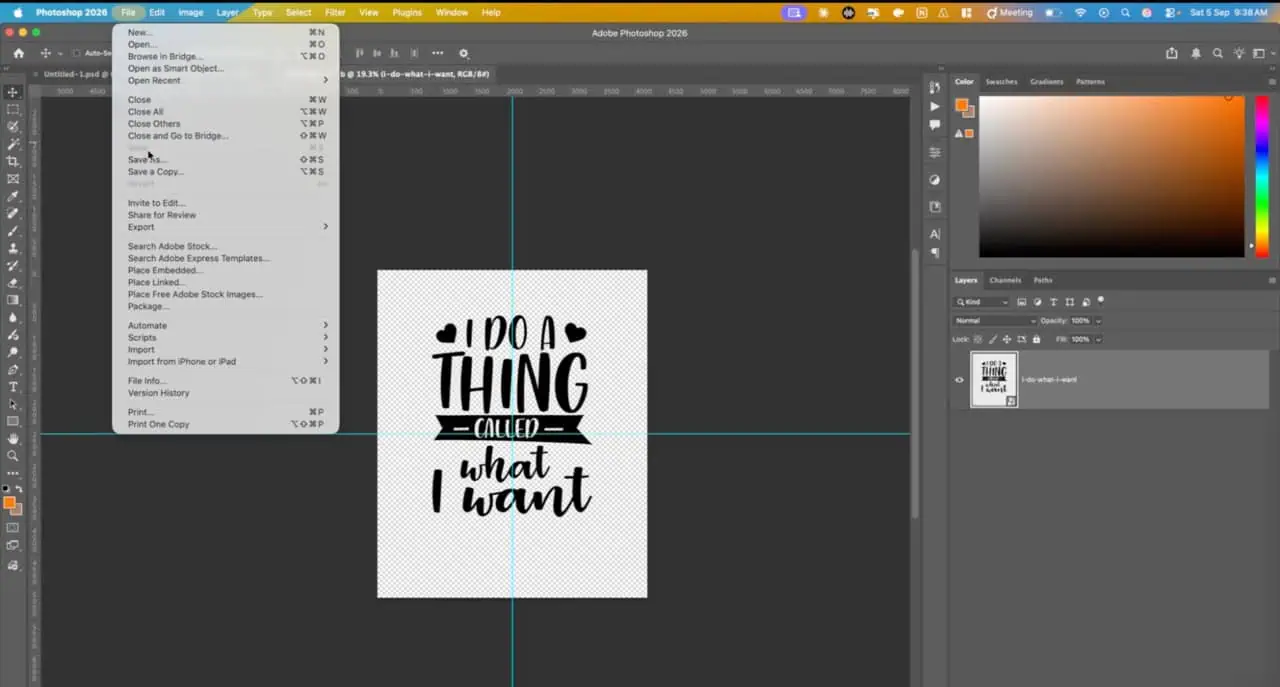
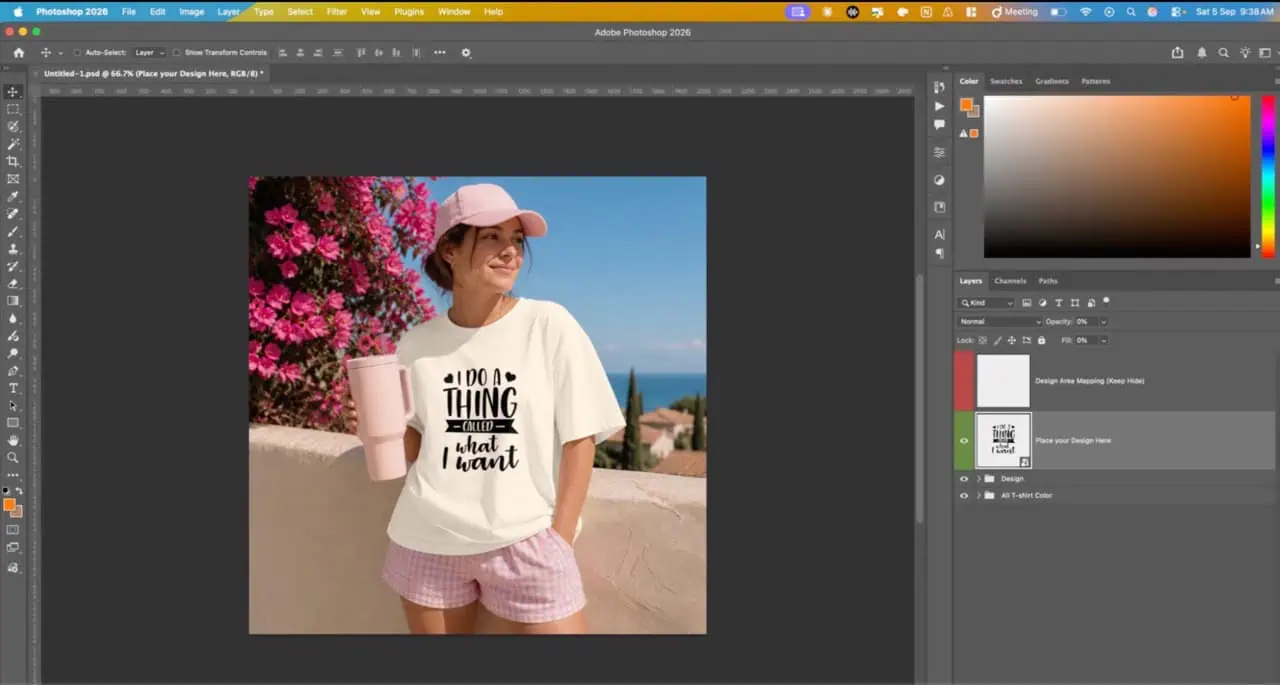
Photoshop gives you 2 practical ways to change artwork in a Smart Object: Edit Contents and Replace Contents. Both update the design, but they serve different purposes and should not be used interchangeably. Adobe treats them as separate Smart Object actions.
Edit Contents is the better choice when you need to adjust the artwork inside the Smart Object rather than simply swap one file for another.
Use it when:
Select the Smart Object and choose Layer > Smart Objects > Edit Contents, or double-click its thumbnail. Photoshop opens the source document, where you can place, customize, resize, crop, or reposition the artwork before saving it. Once saved, the main product mockup updates automatically.
Use Replace Contents when the new artwork is already prepared and you only need to swap the file.
Select the Smart Object layer, right-click it, choose Replace Contents, then select the new file and click Place. Photoshop replaces the source artwork while keeping the transformations already applied to the Smart Object.
This option works best when you are replacing several designs with similar dimensions and proportions.
Use the guides, masks, placeholder artwork, or visible boundaries inside the Smart Object to judge where your design should sit. Keep important text, logos, and other focal elements within the usable area so they are not cut off when Photoshop applies the mockup perspective or masking.
For apparel, packaging, signage, and similar product mockups, avoid placing important details too close to the edge unless the composition specifically calls for it.
Resize the artwork proportionally rather than forcing it to match a differently shaped placeholder. Photoshop Smart Objects support scaling and other transformations without permanently altering the original image data.
If the artwork and canvas have different proportions, crop the image or adjust the composition instead. Stretching is especially noticeable in typography, circular logos, faces, and geometric designs.
If the PSD includes several product views, inspect each one before exporting the final mockup. A design that looks balanced from the front may appear oversized or too close to an edge in an angled view.
Some templates use separate Smart Objects for different views or print areas. When that happens, customize each relevant Smart Object individually rather than assuming one placement will suit every angle.
Some mockup issues are caused by hidden layers, missing effects, or the wrong source file rather than the design itself.
Learning the manual process first helps you understand what a Photoshop mockup is actually doing. Once the artwork is inside the correct Smart Object, your main job is to check its proportions, image quality, placement, and how it interacts with the template’s existing texture and lighting.
For a small number of mockups, editing each PSD manually is perfectly workable. The repetitive part becomes more noticeable when you have many designs and multiple PSD templates to process for an ecommerce store or print-on-demand catalog.
At that point, you can use Bulk Mockup inside Photoshop to process Smart Object-based PSD templates in bulk. You select your template folder, design folder, export location, and resizing method, then the plugin handles the repeated design replacement and output process for you.
If you regularly create large batches of Photoshop mockups, explore Bulk Mockup to reduce the amount of repetitive Smart Object editing involved.
Open the Layers panel and expand any nested groups. Look for names such as Your Design Here, Artwork, or Placeholder. Smart Objects also display a small Smart Object icon on the layer thumbnail.
The most common cause is that the Smart Object source was edited but not saved. Save the open source document, then return to the main PSD. Also confirm that you changed the correct Smart Object when the template contains several editable layers.
Open the Smart Object contents and resize the artwork there. Keep the original proportions while scaling so text, logos, and illustrations do not become distorted. Avoid changing the outer Smart Object unless the template specifically requires it.
Choose PNG when your design needs transparency, such as a logo or isolated graphic. JPG works well for photographs or rectangular artwork that already includes a background. Make sure the source image has enough resolution for the required output size.
Use a layered PSD that preserves the shirt’s folds, shadows, highlights, and texture. Better templates may also use warp or displacement effects so the print follows the fabric instead of appearing flat on top of it.