This step-by-step guide will help you learn how to create a smart object in Photoshop. Power up this process with Bulk Mockup’s Photoshop automation.


In this tutorial, you’ll learn how to create a smart object mockup in Photoshop. It is a technique that lets you place your designs onto any image surface with perfect perspective.
I’ll show you how to transform a simple frame image into a reusable smart mockup template, add realistic shadows, and easily swap artwork. This skill is essential for displaying your designs professionally for POD businesses or client presentations.
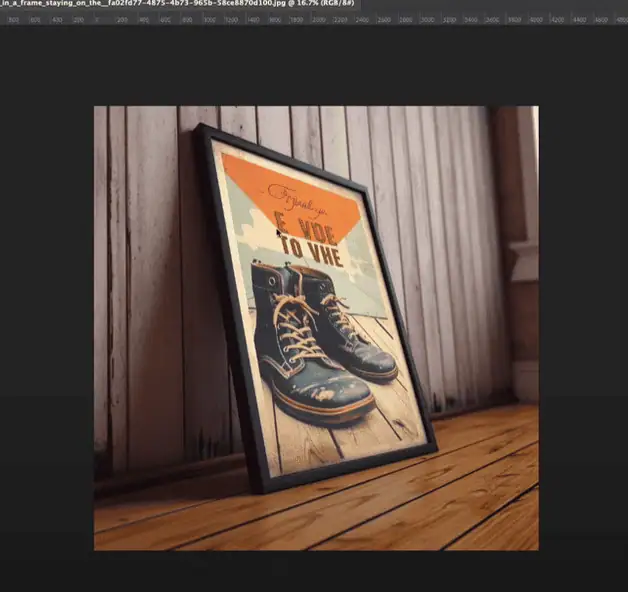
Open the frame image in Photoshop. This can be any image with a flat surface where you want to display your artwork.
Select the Rectangle Tool from the toolbar.
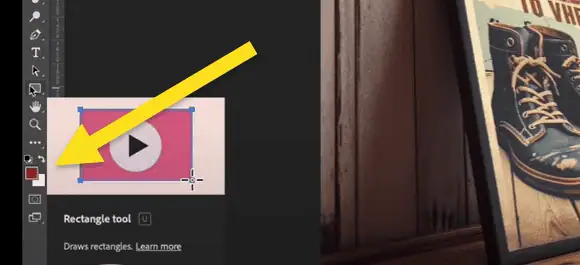
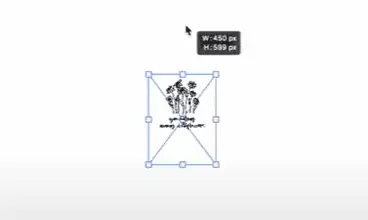
Draw a rectangle over the area where you want your artwork to appear.
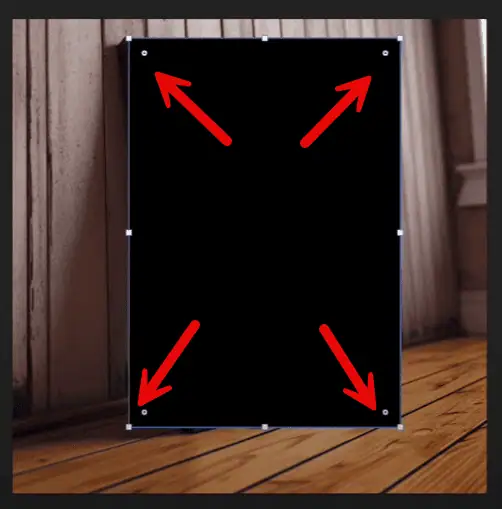
It appears in black. You must change its properties first.
In the Properties panel, change the Fill color to white.
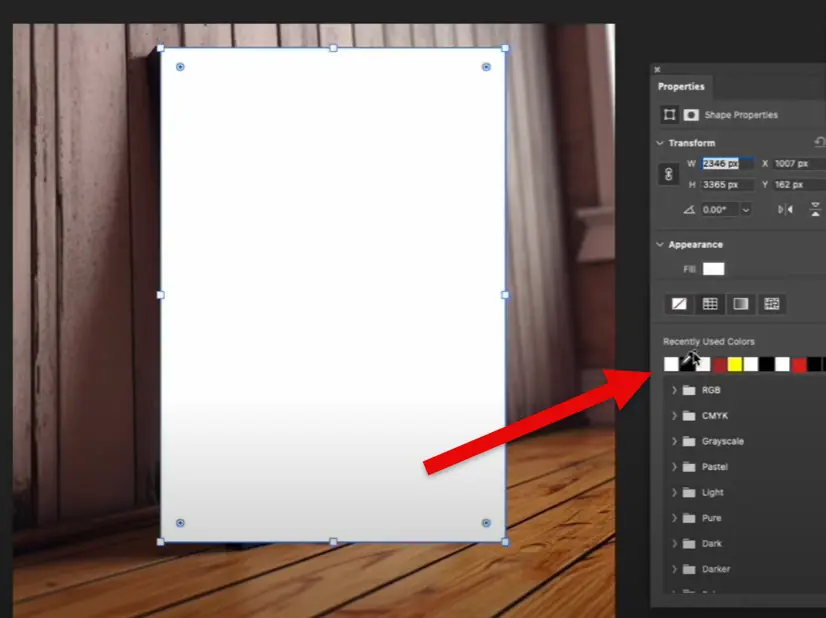
Remove if any stroke is present.
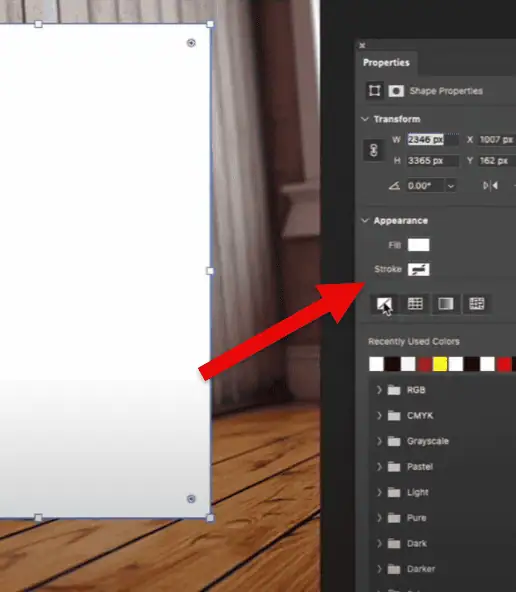
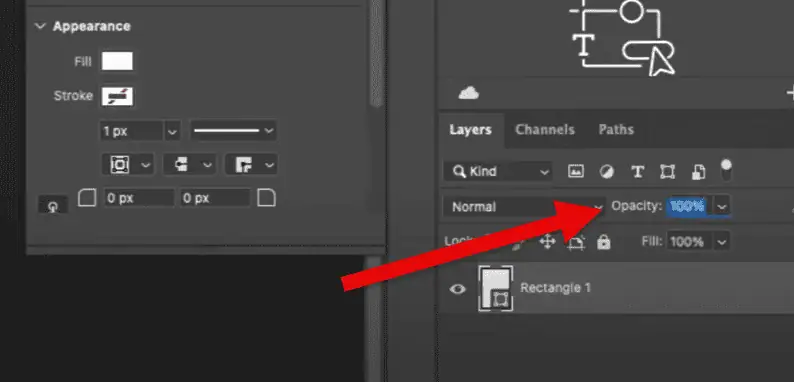
Select the Move Tool and reduce the opacity of your rectangle layer to around 50%.

Once done, you will be able to see the frame underneath.
This step helps you set the rectangle frame on your frame template.
Go to the rectangle layer in the Layers panel.
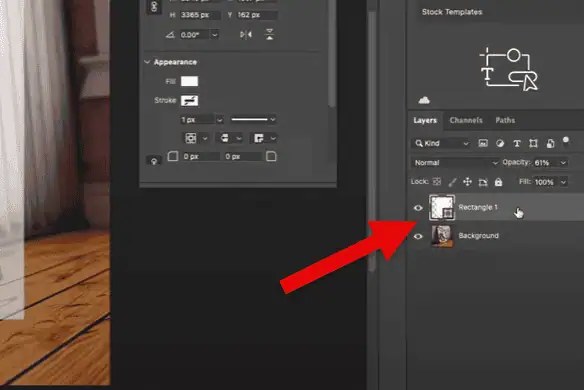
Right click and select “Convert to Smart Object.”
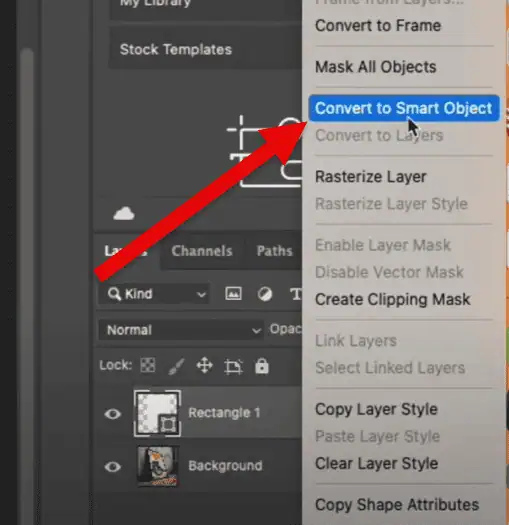
This step is crucial for the mockup to work properly.
Press Ctrl + T (Command + T on Mac) to enter Free Transform mode.
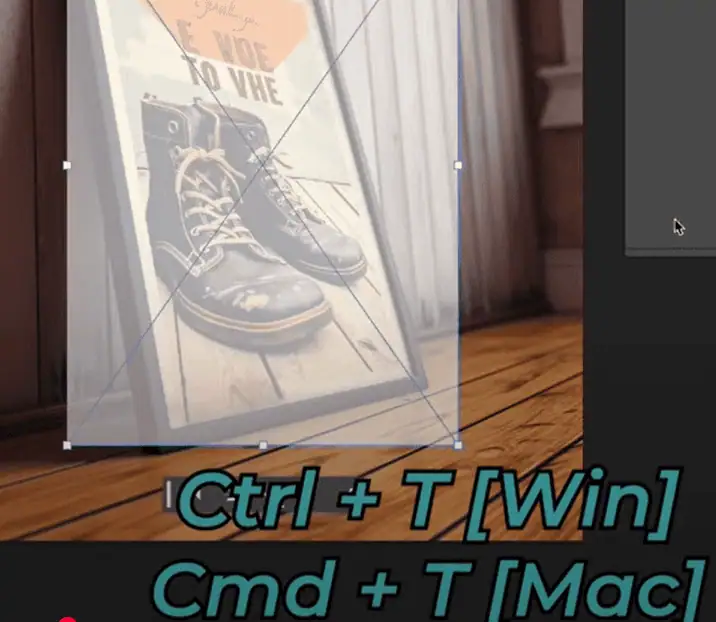
To zoom in, press Alt + Spacebar, then click and drag to adjust your view.
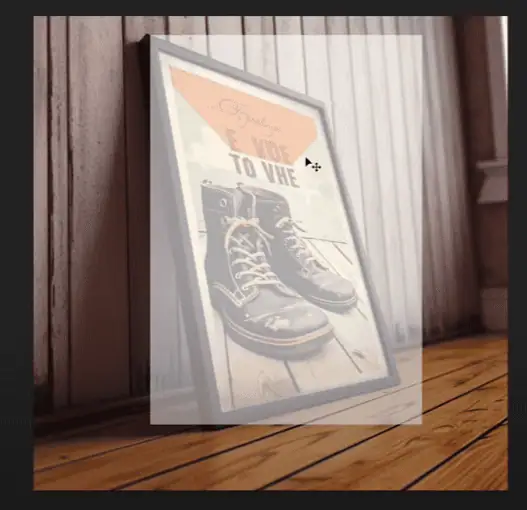
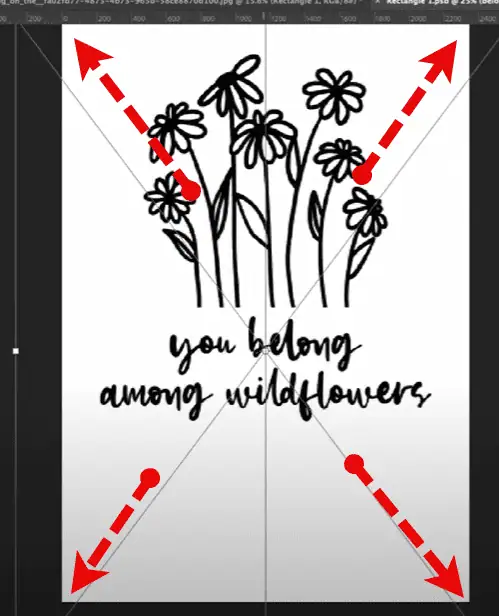
Right-click on the rectangle and select “Distort” from the context menu.
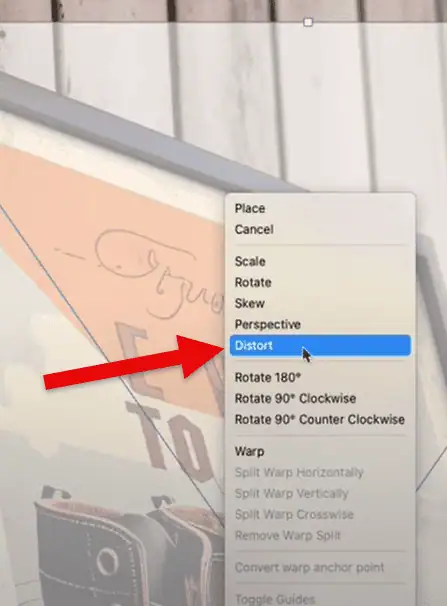
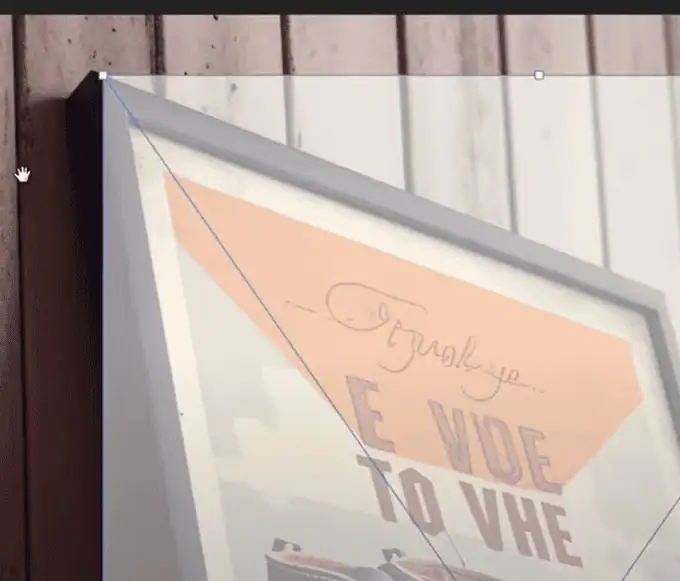
Then, grab each corner anchor point and position it precisely at each corner of your frame.

Press Enter to apply the transformation once all four corners are properly aligned.
Change the opacity back to 100%.
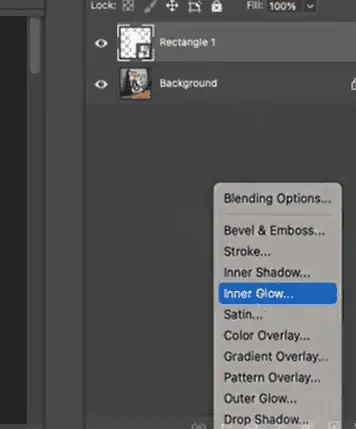
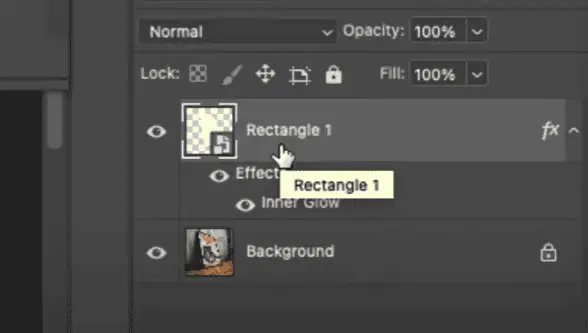
Until now, you are all set with the smart object layer created on your frame template. But it won’t look realistic until you add an inner glow effect. Here’s what you need to do.
Select the smart object layer, go to Layer > Layer Style > Inner Glow (or click the “fx” icon at the bottom of the Layers panel).
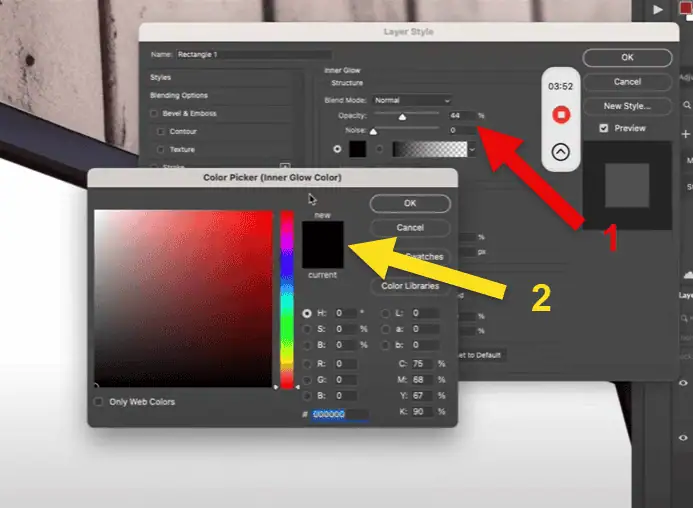
Set the opacity to 40%, change the color to black, and adjust other settings as needed to match your frame’s shadows.
It’s all set. Now, you will learn how to add your design to the smart object layer.
Double-click on the smart object layer thumbnail to open it in a new document.
Place your artwork in this document (File > Place Embedded).
Stretch the artwork to fit on the smart object layer.
Press Ctrl + S (Command + S on Mac) to save the smart object, then close it.
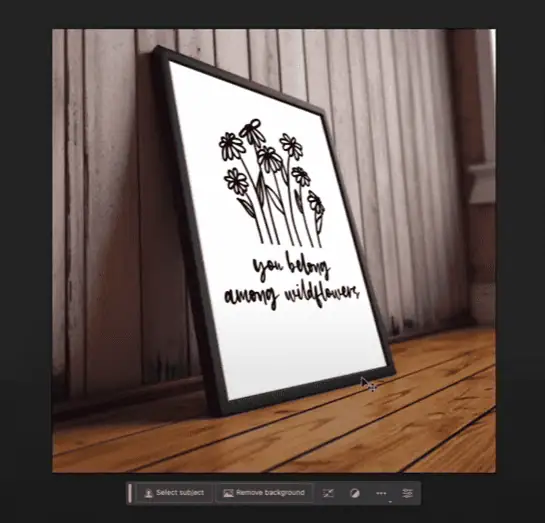
The artwork will automatically update in your main document with the correct perspective.
Save the file as a PSD to preserve the smart object functionality for future use.
This technique works with frames at any angle and can be used for various mockup needs. You can create multiple templates with different frames and reuse them by simply changing the artwork in the smart object.
You have learned how to make a smart object mockup in Photoshop. Now, where can you use one? Let’s find out.
Smart mocks serve the purpose of visualizing a design on chosen templates. It can be for print-on-demand (POD) products or even a website. Let’s see the categories of smart object mockups with examples.
A print media mockup is a visual representation or design that simulates how a printed piece, like a book, magazine, or business card, would look in real life
A POD mockup is a visual representation of how a design will look on a product, allowing customers to visualize the final product before it’s printed.
The best examples of POD products that require smart object mockups are:
A digital mockup is a virtual representation of a product, design, or system, typically displayed as a 3D model or a realistic visual representation.
For example, you use a website mockup as a representation of your thoughts and UI design.
A 3D mockup is a realistic, often digital, representation of a design or product, typically used for presentations, design evaluation, and promotion.
For instance, the mockups you see in Shopify and Etsy are 2D or video mockups. These mockups can be interacted with. You can see a t-shirt 3D mockup from any angle and understand how the design sits.
You can now create a smart object on any frame or image. The best part is that you can use Midjourney to create such frames and convert them into smart object mockups with the help of this guide.
But replacing the smart object layer with your design will take a lot of your time. Worry not, as Bulk Mockup, our mockup plugin for Photoshop, can replace smart object layers automatically.
All you need is to install Bulk Mockup and follow these steps.
Bulk Mockup will automatically put your artwork on smart object Photoshop mockup templates, name them, and export to specific folders.
You can also:
You can create 240 mockups with 6 designs and 40 PSD templates in three minutes and save hours of manual work.
To understand how our plugin works, check our tutorial videos on YouTube. You can also seek personal assistance.
“Rasterize” refers to the process of converting a vector or editable object (like a Smart Object or text layer) into a bitmap image with fixed resolution, meaning it becomes a regular pixel layer.
A Smart Object, on the other hand, is a layer that preserves the original image data (either raster or vector) and allows for non-destructive editing, meaning you can resize or transform it without losing quality.
As of now, Canva can partially do smart object layer mapping with its apps. But the results are not accurate. The results are erroneous.
As we are adding another layer to an image file, smart objects increase the file size. This editing is done without losing the image quality.
Go to the app section in Canva and select ‘Mockups’. This Canva app identifies the best places to place your product design on an image. To learn how to make a mockup with smart objects in Canva, follow this tutorial.