Tired of replacing smart objects one by one in Photoshop? Automate everything—resize, align, and export 100s of PSDs in minutes using Bulk Mockup


Manually updating one mockup at a time is painfully slow and error-prone for print-on-demand sellers. You end up clicking through each Photoshop file, replacing layers one by one.
The fastest solution is Bulk Mockup, a Photoshop plugin that automatically swaps out smart object contents across hundreds of files in minutes.
This plugin automates all those steps – resizing, aligning, and exporting – so you can generate 100s of mockups with a single click.
In this guide, you’ll learn why manual replacement doesn’t scale and how to automate the process step by step to save hours.
Stop wasting time on manual mockup creation. Join the POD sellers who’ve already made the switch.
Make the switch todayA smart object in Photoshop is a special layer that preserves an image’s original data for non-destructive editing. You can resize, transform, or apply filters to a smart object without permanently affecting the original image quality.
Double-clicking a smart object layer opens its source content (often a PSB file) so you can update it; when you save, all instances of that smart object update in your main document.
In practice, smart objects are what make PSD mockup templates work. The product image (e.g. a blank t-shirt or mug) is a static layer, and the design layer is a smart object you can replace with your own artwork.
This lets you create realistic product photos by simply swapping out the smart layer content.

Photoshop lets you replace a smart object’s contents manually in a couple of ways. These methods work for one-off edits, but neither was built for production-level volume:
This “double-click and replace” method is straightforward, but doing it hundreds of times gets old fast. You have to repeat these steps for each design and each template, which doesn’t scale when your print-on-demand business grows.
This right-click method can be a bit faster since it skips opening a separate window. But it has its own annoyance: Photoshop often stretches the replacement image to fill the space, which can distort your design. You’ll still need to tweak the sizing and positioning for each file.
Neither manual method is “wrong” – they’re fine for a handful of mockups. But if you’re repeating these steps across hundreds of SKUs or templates, it becomes a huge time sink. You’re essentially doing busywork that could be automated.
In short, Photoshop’s native tools aren’t designed for bulk replacements. For a high-volume seller, clicking through each file is simply not feasible. Enters Bulk Mockup.
Bulk Mockup is a Photoshop automation tool specifically built to batch-replace smart object layers for print-on-demand mockups. It works inside Photoshop, automating exactly what you’d do by hand – but much faster and with no mistakes.
Bulk Mockup opens each PSD, swaps in your new design, handles any resizing/alignment, and then exports the final images to your drive.
Bulk Mockup lets print-on-demand sellers generate product images at scale without the drudgery. You can focus on designing and marketing, while the plugin handles the repetitive image production. Here’s how Artjag, a user, benefited from this Photoshop automation.
The Bulk Mockup Generator plugin for Photoshop has been a life saver. The Version 3 update now gives you the ability to generate artwork/mockups with two or more smart layers. I’ve just generated 400 mockups with 2 smart layers without any glitches whatsoever in record time. The support for the app is also amazing. I’d highly recommend this app!
While most tools focus on templates, we focus on speed. See how bulk automation changes everything.
See the speed differencePlease note, Bulk Mockup works on Adobe Photoshop CC 2022 or higher and is available for Mac and Windows OS.
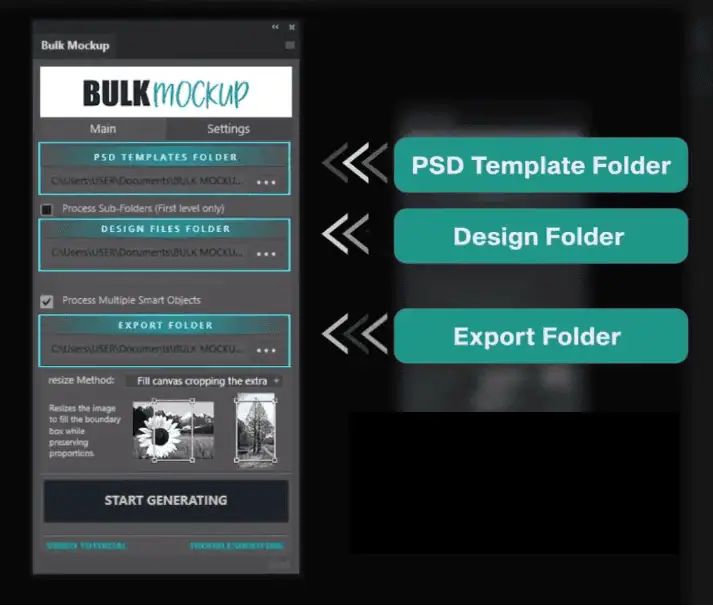
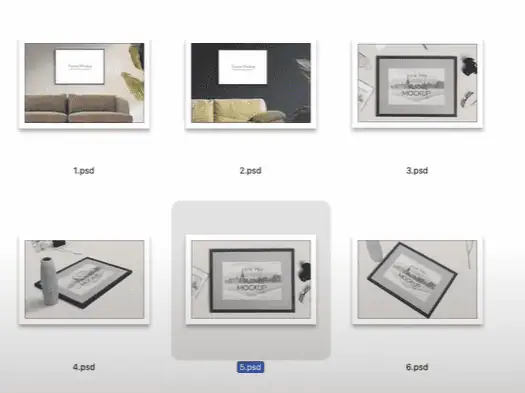
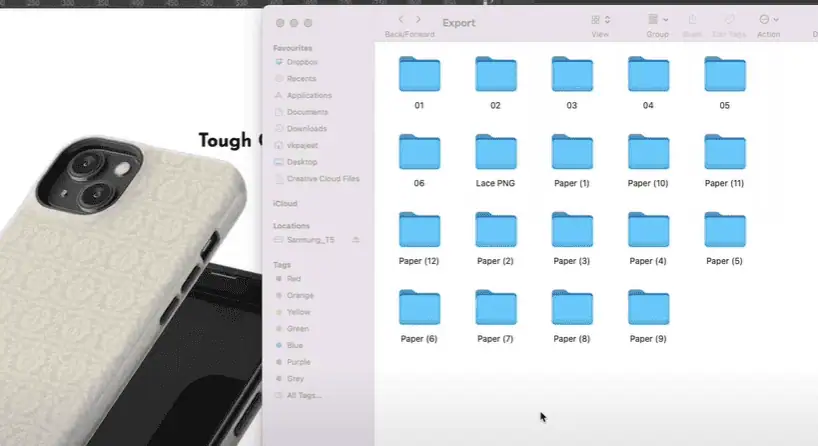
Prepare three folders to connect with Bulk Mockup.
Connect these folders accordingly to the Bulk Mockup interface.
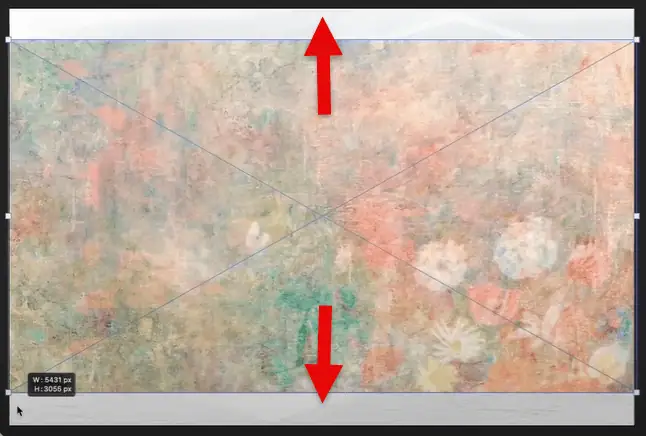
Bulk Mockup offers seven resizing methods that fit your smart object layer and requirements.
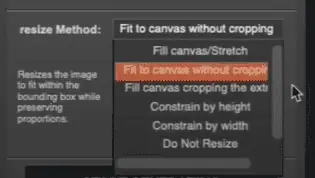
For resizing wall art mockups, I have chosen the ‘Fill canvas cropping the extra’ option.
After choosing a resizing method, go to the Settings tab. Select the export format, and go to the PSD template section. You will have multiple file format options.
Select a file format as per your requirement.
After selecting the export file format, select the pixel size for the outputs. Remember, the export size should be of higher quality. Change the resolution to 72 DPI.
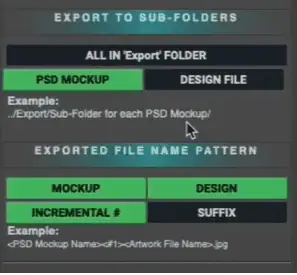
Go to Export and select the export naming option. If you choose ‘PSD MOCKUP’, then export files will be created in subfolders for every PSD template used and named accordingly.
If you choose ‘DESIGN FILE’, then subfolders will be created for every design file used and named accordingly.
Go back to the main settings page and select ‘Start Generating’. Bulk Mockup will automatically pull PSD templates and put designs by replacing smart object layers to create mockups.
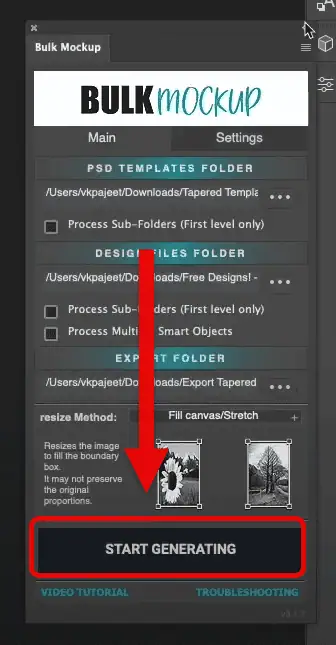
These mockups will be automatically named and exported to the respective subfolders.
We had 4 PSD templates for framed wall art (all portrait orientation), and 7 artwork designs to apply. Doing this manually would mean 4 × 7 = 28 individual replacements and saves.
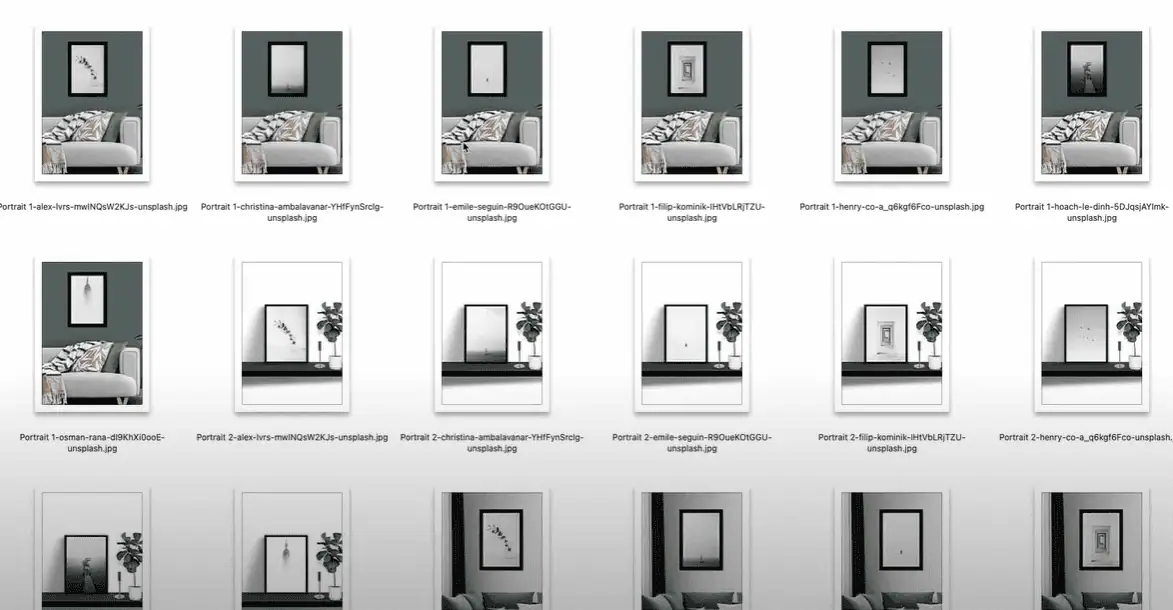
We loaded the 4 frame PSDs and 7 design files. Bulk Mockup generated 28 print-ready images in under 2 minutes – every design placed into every frame template, exported as high-quality JPEGs.
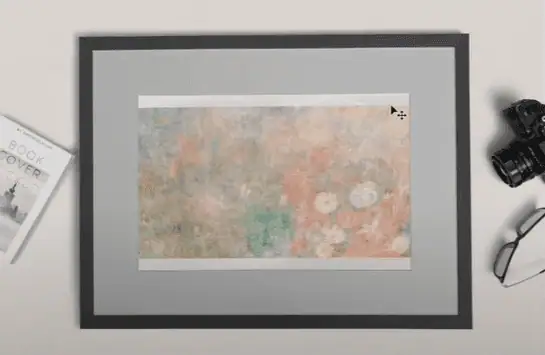
The frames included different sizes, but because we chose the “Fill Canvas and Crop Extra” resize method, each artwork was scaled to cover the frame area without distorting the aspect ratio.
The output was 4 folders (one per template), each containing 7 images of that frame with each artwork. Total time saving was enormous compared to manual.
We tested 8 designs with different ratios across 7 landscape PSD templates. Bulk Mockup handled resizing and aspect matching automatically.
We have 8 design files with different aspect ratios to explain how versatile Bulk Mockup works in every case.

Manually placing these files will create mockups where the artwork fits on the smart object well.
Hence, if the image aspect ratio is not adjusted with the PSD smart object aspect ratio, the mockup turns out to be undesirable.
To avoid such issues, you can choose any of the seven resizing methods for a uniform output.
Bulk Mockup will follow the instructions and fit the designs on the smart object layer to create mockups.
After choosing a resizing method, make sure you go to the ‘Design Layer’ section. Check the resizing and aligning guides. You will get four guiding lines to set.
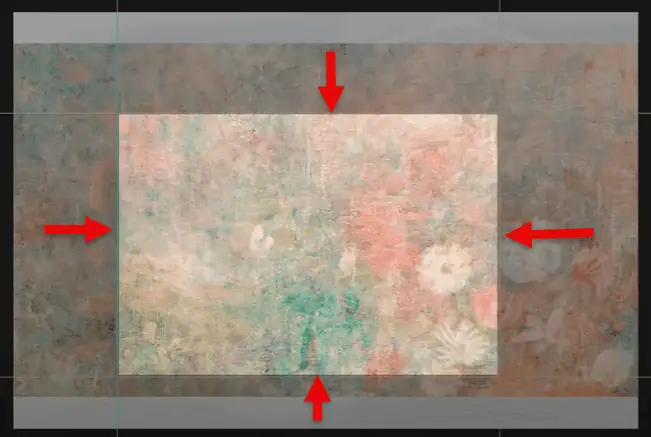
Bulk Mockup will follow these guiding lines to place the designs. Rest, follow the same steps mentioned in the above guide and start generating mockups. They will be automatically named and stored in subfolders as per your chosen export options.
The next use case of phone cases will explain two different sets of designs (paper and marble) for phone cases. We have chosen five phone case PSD templates.
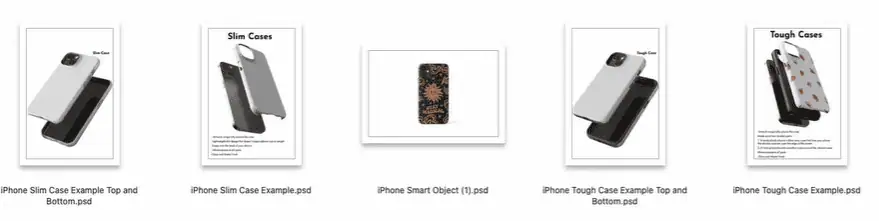
On the other hand, we have 19 textured design files in a separate folder. These designs are of different resolutions. Here, you can use the stretch resizing method for all the designs.

Connect the three folders, as guided earlier, to the Bulk Mockup interface. Once done, we go to the export settings and choose ‘Fill Canvas Stretch’ as the resizing method.
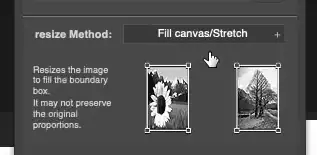
Select ‘Start Generating’ and let the magic happen. Bulk Mockup’ will create 95 mockup files out of 19 designs and 5 PSD mobile case templates automatically in a few minutes.
No need to learn how to export multiple files in Photoshop, as Bulk Mockup will do it for you.
These advanced features offer full control and the highest flexibility in creating POD mockups with smart layer replacement automation.
Choose from options like Fill Canvas – Crop Extra, Stretch, Do Not Resize, Replace Content, Constrain by Width/Height, and more. Each method helps you adapt your design to different mockup styles, whether landscape, portrait, or phone case.
Bulk Mockup can automatically replace all smart object layers in a PSD file, even if there are several in one template.
Use the guides to control where your design is placed. Just set up four guides and enable “Resize to Guides” and “Align to Guides”. Your design will sit perfectly within that space.
Rename exported files using combinations of template names, design names, and numbers. Choose how folders are organized by design or mockup.
Export in JPG, PNG, TIFF, PSD, or GIF. Resize output files (e.g., 1000px width, 72 DPI) for optimized performance online. These features make Bulk Mockup the most versatile smart object automation tool available, whether you’re creating 20 or 2,000 mockups.
Manually replacing smart object content one by one isn’t just tedious – it becomes impossible at scale. Your business can grow, but manual Photoshop methods won’t grow with it. That’s where Bulk Mockup comes in:
Instead of fighting Photoshop’s one-by-one limitation, let Bulk Mockup streamline your workflow. Focus on designing new products and marketing, while the plugin churns out the visuals.
Join 5,000+ POD sellers who’ve eliminated manual mockup creation. Get unlimited mockups, install on 2 devices, and access our incredible support team.
To update a smart object layer:
1. Double-click its thumbnail in the Layers panel.
2. Place or paste your new image in the PSB window.
3. Resize as needed → Save → Close.
Your main PSD updates automatically. (If it’s linked externally, use Right-click > Replace Contents.)
Rasterizing lets you edit pixels directly. You might do this when:
1. You need to use brushes, erasers, or filters that don’t work on smart objects.
2. You no longer need non-destructive scaling.
After rasterizing, the layer becomes editable, but you lose the ability to swap content easily.
Photoshop doesn’t have a built-in shortcut, but you can create one:
1. Go to Edit > Keyboard Shortcuts.
2. Find Layer > Smart Objects > Convert to Smart Object.
3. Assign a custom key combo.
Otherwise, right-click the layer and choose Convert to Smart Object.
To swap the design or photo:
1. Right-click the smart object layer → Replace Contents → select new file.
2. Photoshop inserts your new design.
Or,
1. Double-click the smart layer → open PSB → place new artwork → save and close.
Both instantly update your main mockup.
Use one of these batch options:
1. Image Processor: File > Scripts > Image Processor → select folder → choose format → Run.
2. Batch Command: File > Automate > Batch → apply recorded action to a folder.
For mockups, Bulk Mockup automates both replacement and export in one go.
To convert it back to a normal layer:
Right-click the smart object → Convert to Layers (returns original content).
Or,
Choose Layer > Smart Objects > Rasterize to flatten it.
After conversion, you can edit or delete it like any regular layer.