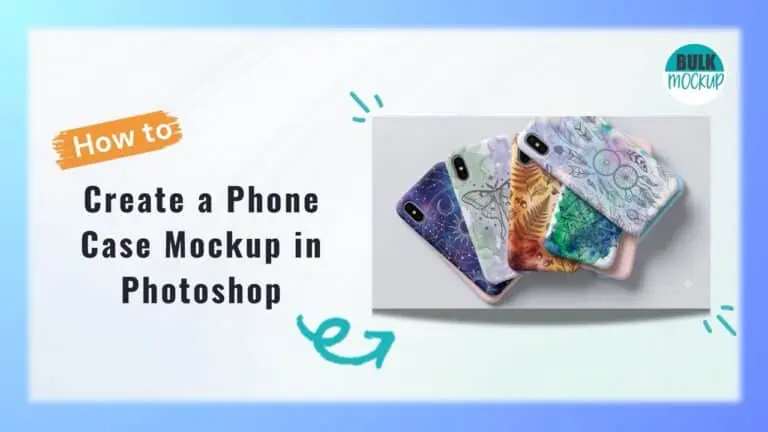


A phone case mockup lets you see how a logo, pattern, illustration or custom design could look on a finished case before you publish, print or present it. A strong preview can make the product feel tangible, while a weak one may leave the artwork looking flat or poorly fitted.
Creating a realistic result involves more than dropping an image onto a phone photograph. Your design needs to follow the case angle, stay clear of the camera area, bend around curved edges and preserve the original highlights, shadows and texture.
In this guide, you will learn how to build a reusable mockup from a photograph and how to edit an existing phone case mockup PSD.
Let us begin with the method that gives you the most control.
The best method depends on the files you already have, your Photoshop skills and how much control you need over the final image.
| Method | Best For | Photoshop Skill | Editability | Relative Time |
| Build from a photograph | Unique branded scenes and custom case styles | Intermediate | High | Longer |
| Edit an existing PSD | Fast ecommerce and portfolio images | Beginner | High | Short |
| Use a mockup generator | Occasional or one off visuals | Beginner | Limited | Fastest |
| Build a 3D render | Precise custom angles and materials | Advanced | Very high | Longest |
Choose the photograph-based workflow when you need an original scene or cannot find a PSD that matches the exact phone case.
Use a layered phone case mockup PSD when speed and repeatability matter. Online generators are convenient, but they usually provide less control over camera angle, edge printing, material texture and scene originality.
This phone case mockup tutorial turns an existing case photograph into a reusable file. Once the structure is ready, you can replace the artwork inside the Smart Object without rebuilding the perspective each time.
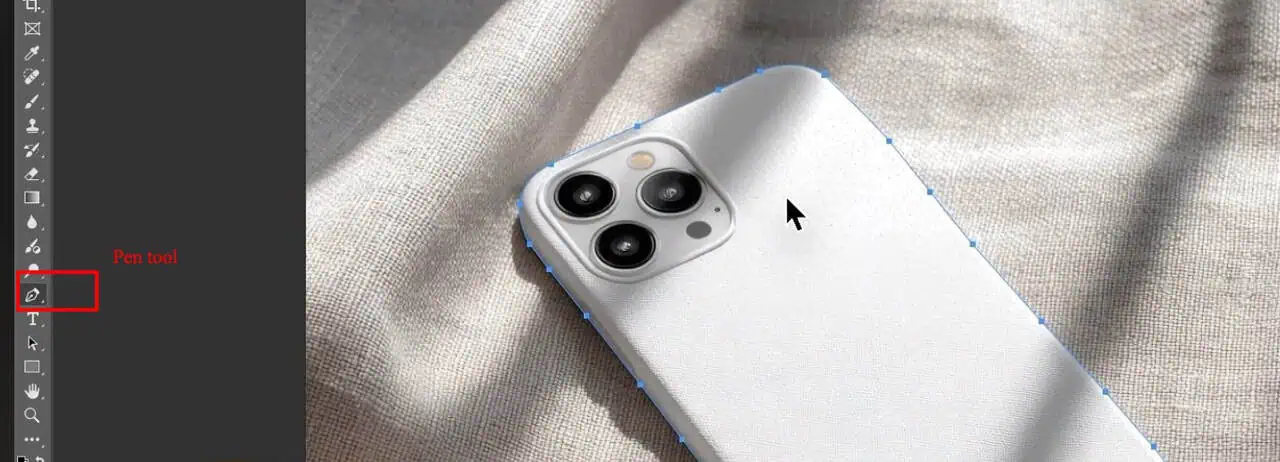
Select the Pen Tool and trace carefully around the complete outer edge of the phone case. Close the path once you return to the starting point.
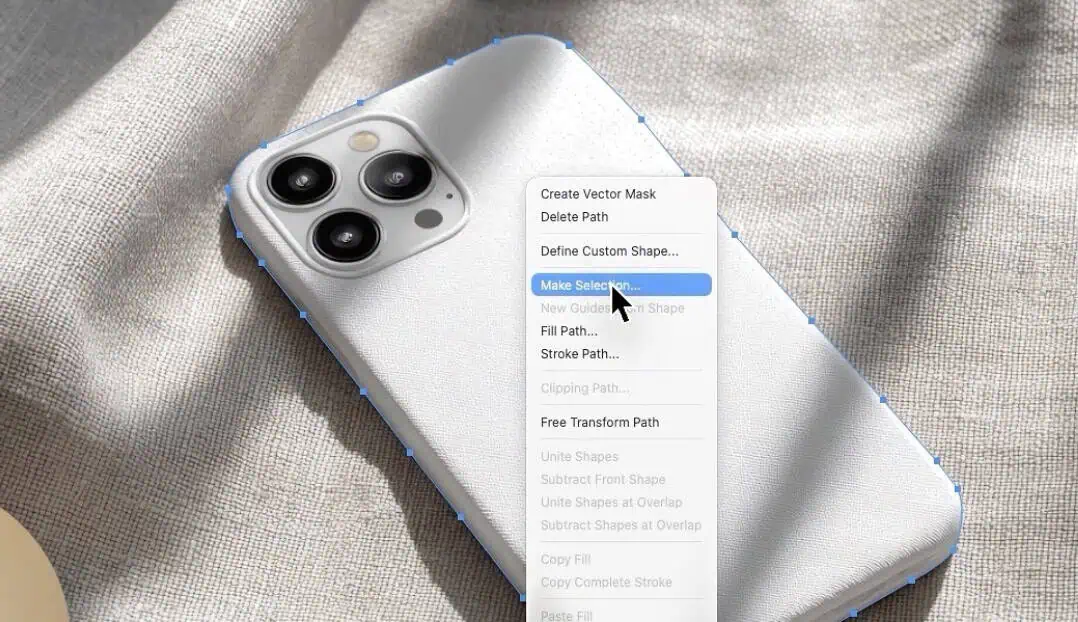
Right-click inside the path and choose Make Selection. Keep the selection settings unchanged unless the image requires a softer edge, then click OK.
Press Cmd + J on Mac or Ctrl + J on Windows. The selected phone case will be copied onto a new layer above the original photograph.
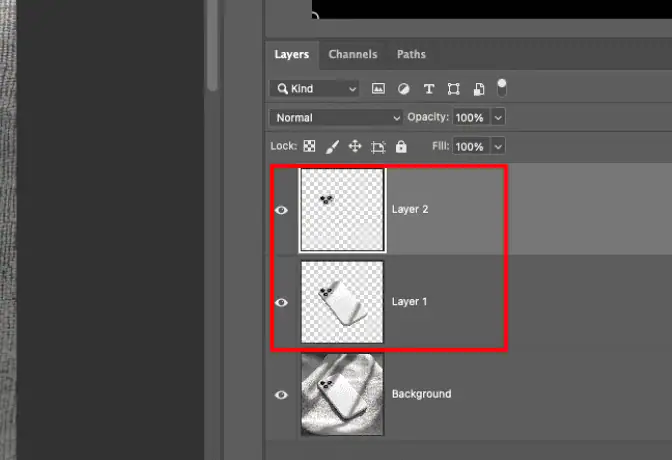
Choose the Pen Tool again and trace around the camera opening. Follow the complete boundary so the lenses, flash and surrounding camera area can remain visible above the artwork.
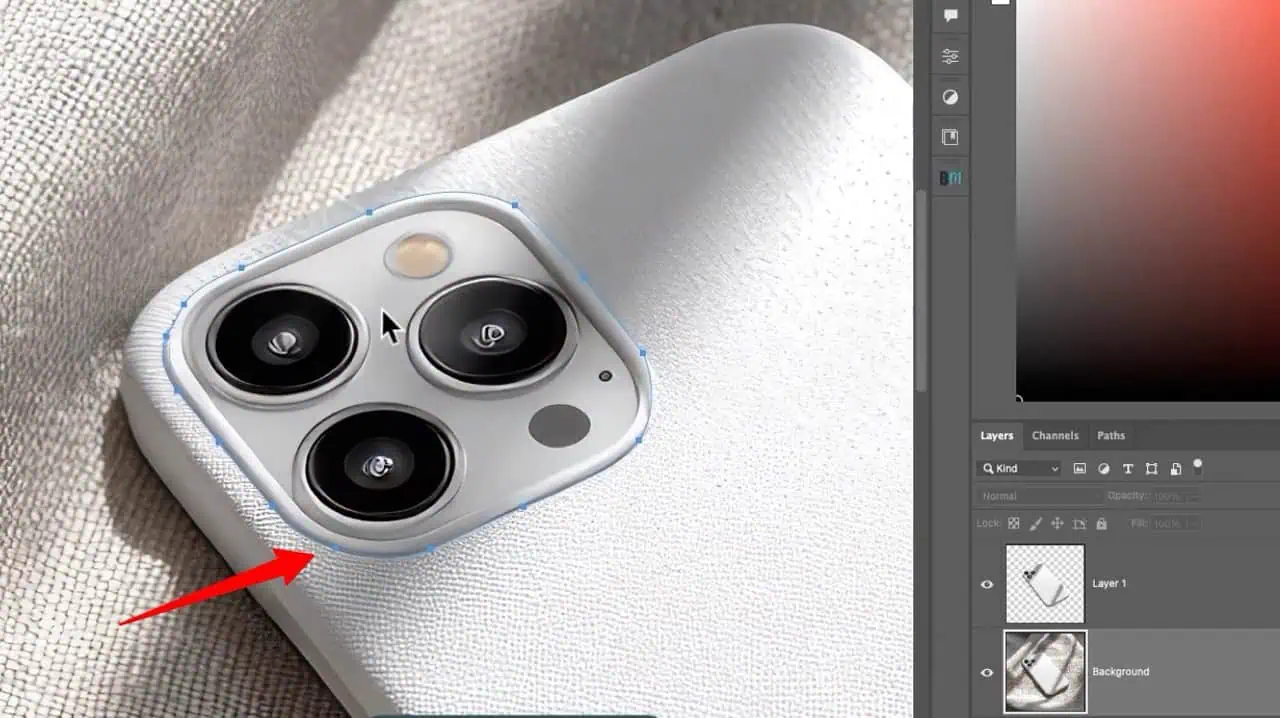
Convert the path into a selection, then select the isolated phone case layer.
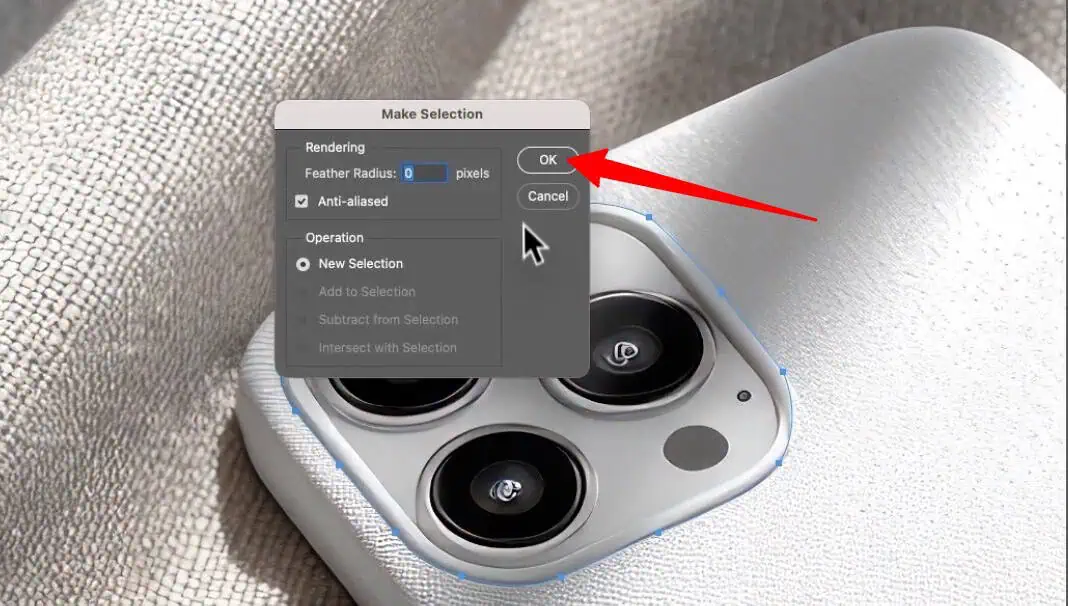
Press Cmd + J or Ctrl + J to copy the camera section onto another layer. Keep this new layer above the case and artwork layers in the layer panel.
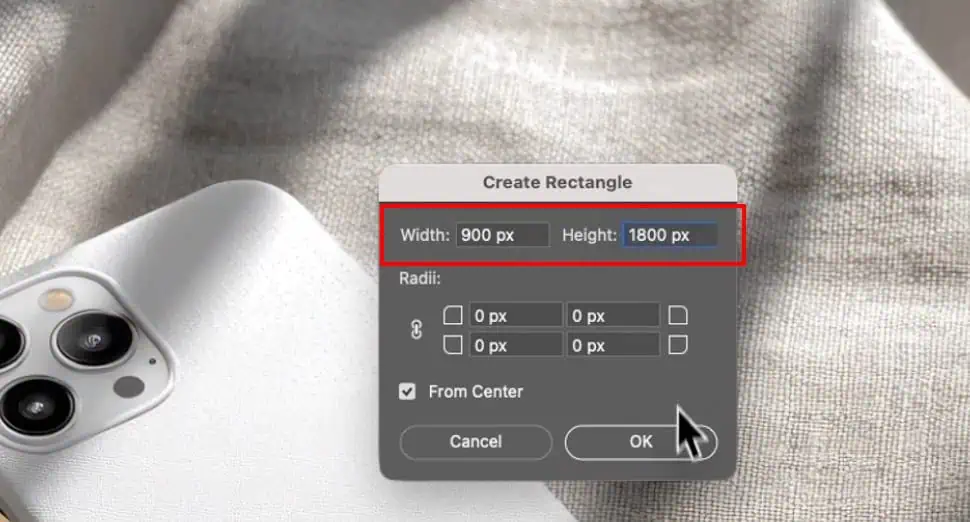
Select the Rectangle Tool and create a rectangle measuring approximately 900 by 1800 pixels. These dimensions match the design area used in this workflow, although your production artwork should still follow the requirements supplied by the case manufacturer.
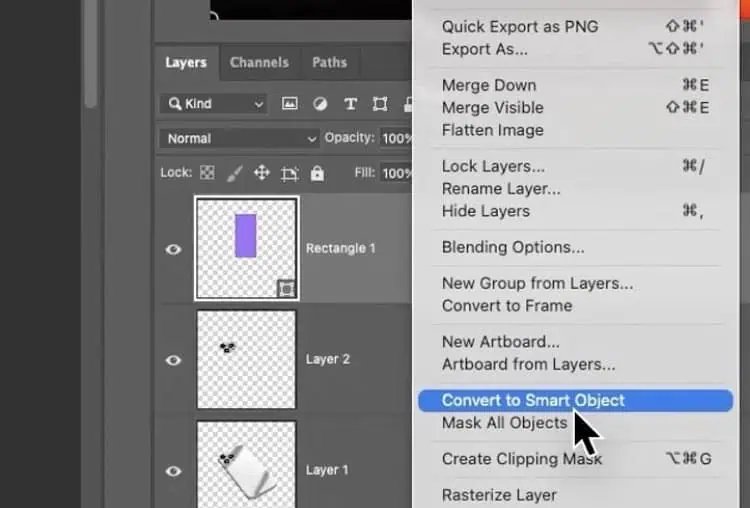
Right-click the rectangle layer and choose Convert to Smart Object.
Press Cmd + T on Mac or Ctrl + T on Windows to activate Free Transform. Right-click inside the transform box and select Distort.
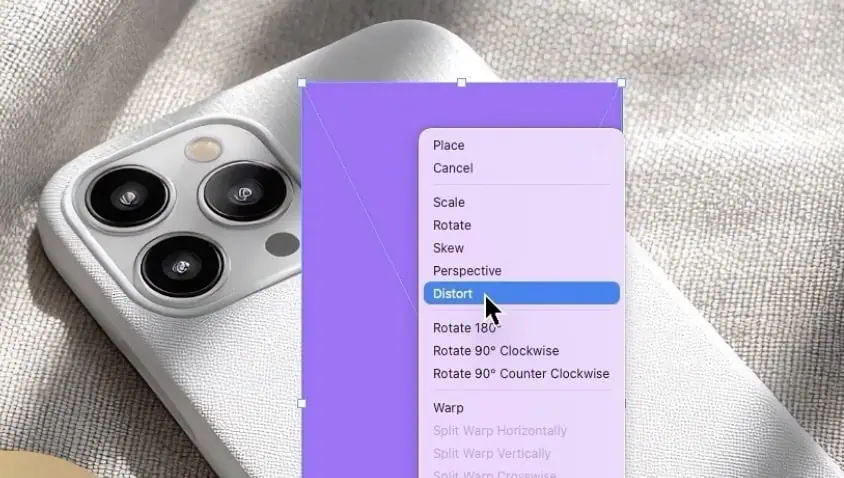
Move each corner of the rectangle until it follows the photographed angle of the phone case. Lower the rectangle opacity temporarily when the underlying edges are difficult to see. Restore the opacity after the alignment is complete.
Drag the Smart Object below the isolated phone case and camera layers. The case and camera should remain visible above the design.
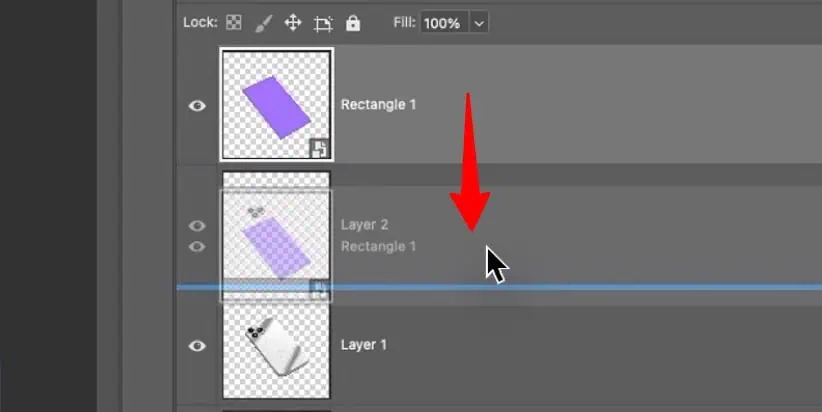
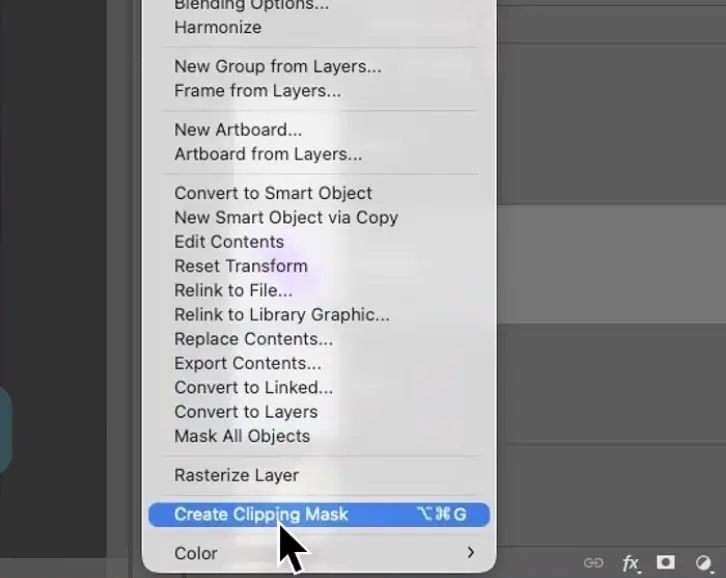
Right-click the Smart Object and choose Create Clipping Mask. This limits the visible artwork to the shape of the phone case layer beneath it.
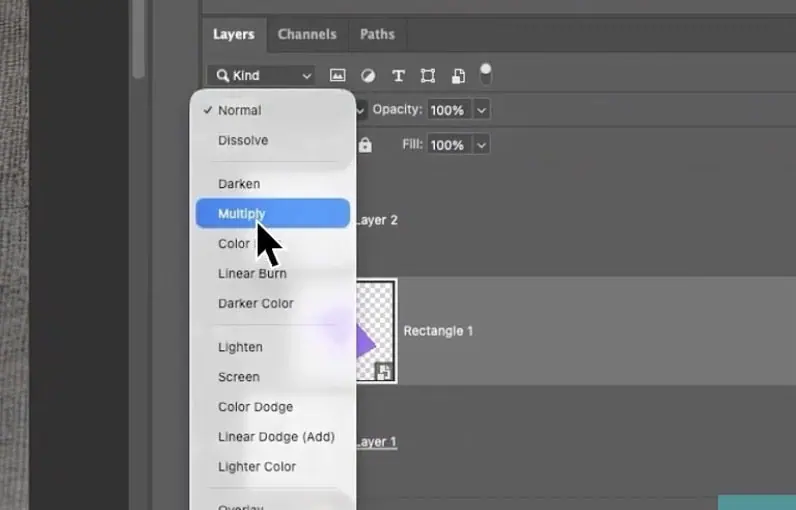
Change the Smart Object blend mode to Multiply. The original shading and tonal detail will remain visible through the artwork, helping the design follow the form of the case instead of appearing as a flat overlay.
You can right-click the layer and choose Edit Contents.
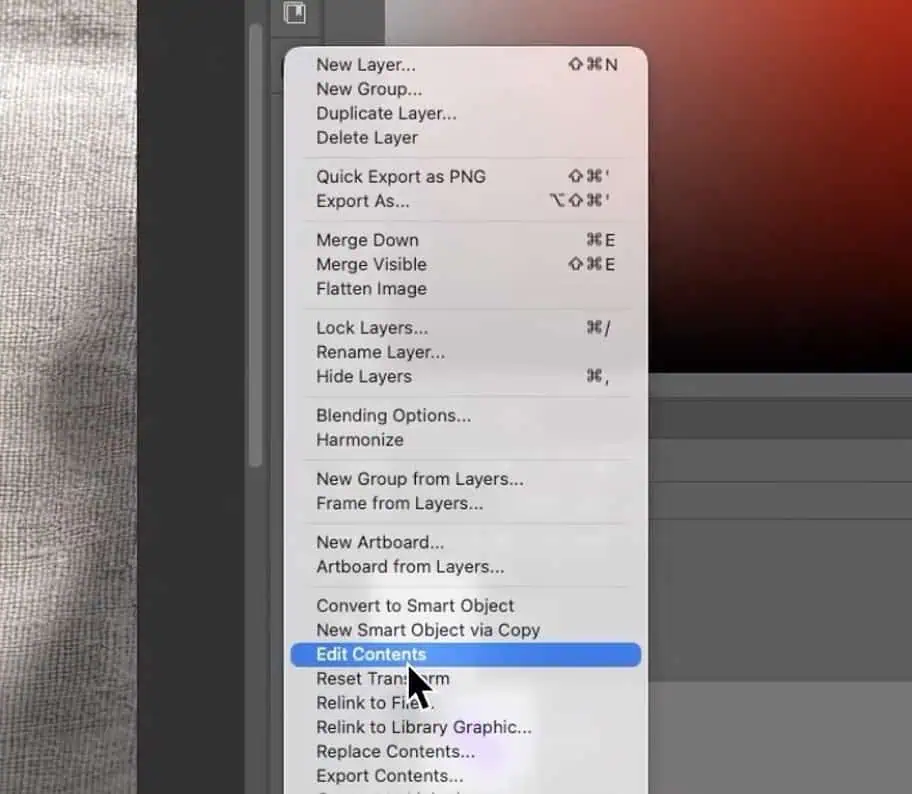
A separate Smart Object document will open. Drag your artwork into this tab, position it inside the canvas and save the document.
Close the Smart Object tab and return to the main file. The artwork will appear on the phone case using the perspective, clipping and blend settings already applied.
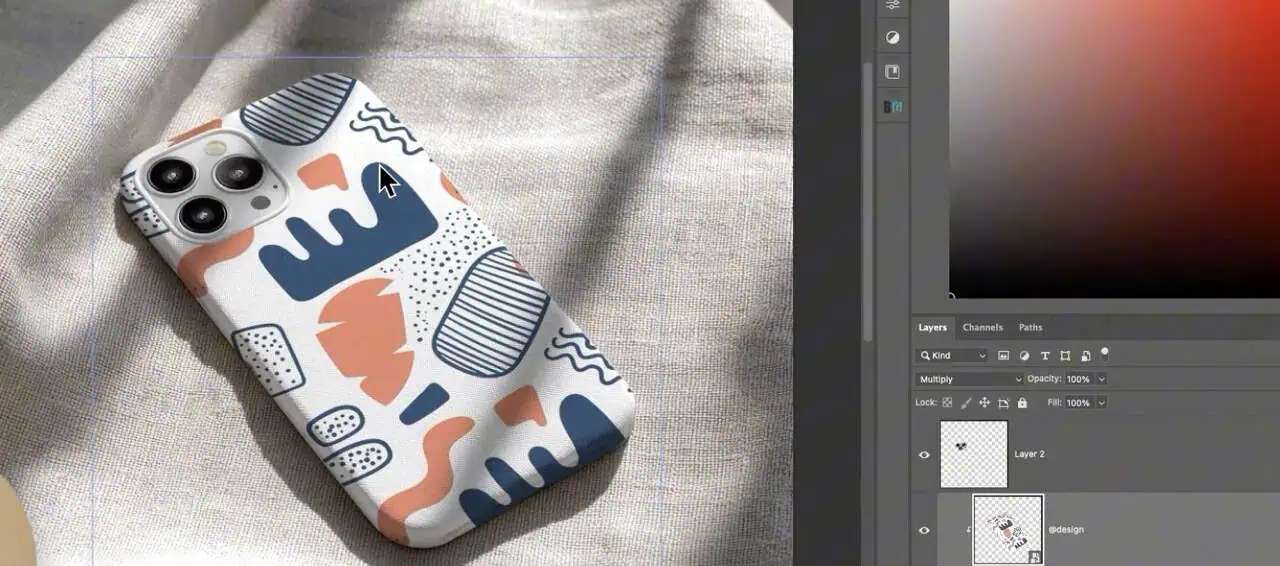
You can repeat this step whenever you want to replace the design. This is the simplest way to understand how to use Smart Objects for mockups and how to add a design to a phone case mockup without repeating the full setup.
“We have also created a step-by-step video to make the process easier to follow. You can watch the complete phone case mockup Photoshop workflow and see each tool, layer and setting as it is applied.
When you already have a layered phone case mockup PSD, you can replace its placeholder artwork without creating a new file from a photograph.
| Problem | Likely Cause | Recommended Fix |
| Artwork appears outside the case | The Smart Object is not clipped correctly | Confirm that the Smart Object uses a clipping mask and remains below the isolated case layer |
| Design covers the camera | The camera layer is below the artwork or was isolated incorrectly | Move the camera cutout layer above the Smart Object and refine its selection |
| Artwork looks flat | The blend mode does not preserve the original case shading | Set the Smart Object to Multiply and confirm that the case layer remains visible above it |
| Perspective looks incorrect | The rectangle corners do not match the photographed case angle | Open Free Transform, choose Distort and realign each corner with the case edges |
| Design becomes blurry | The source artwork has insufficient resolution | Replace it with a higher resolution file and avoid enlarging it beyond its usable size |
| Smart Object does not update | The edited document was not saved or the wrong layer was opened | Edit the correct Smart Object, save its contents and return to the main PSD |
| Artwork does not fill the case | The design does not cover the Smart Object canvas | Enlarge or reposition the artwork inside the Smart Object document |
| Colours look different after export | The file uses an unsuitable colour profile or the platform processes it | Convert the web copy to sRGB and review the exported image before publishing |
Smart Objects preserve the original artwork during editing, but they cannot restore detail that is missing from a low-resolution source file.
Whether you create a custom phone case mockup from a photograph or edit an existing iPhone case mockup PSD, the finished template should be easy to reuse. Test the Smart Object with several designs and confirm that the perspective, clipping mask and camera cutout remain accurate.
When your Etsy, Shopify or print-on-demand catalogue contains hundreds of designs, replacing artwork manually quickly becomes inefficient. You can pair the finished PSD with Bulk Mockup to generate a large batch of mockups within minutes. The plugin places multiple artwork files into compatible Photoshop templates, resizes and aligns them, handles more than one Smart Object and organises the finished exports without opening every PSD individually.
For sellers researching how to automate phone case mockups, Bulk Mockup turns a tested Photoshop template into a scalable production workflow. Explore Bulk Mockup when manual design replacement starts slowing down your catalogue growth.
Yes. You can transform and clip the artwork as a regular layer, but replacing it later may require the same perspective adjustments again. A Smart Object keeps the source artwork editable and makes the PSD easier to reuse.
Follow the dimensions, bleed and safe zones supplied by the manufacturer or print-on-demand provider. Requirements vary by phone model, case construction and print area, so one resolution will not suit every product.
Place the isolated camera cutout on a separate layer above the Smart Object. The artwork can continue underneath this layer while the camera opening, lenses and flash remain visible.
Photoshop Actions, Variables and scripts can reduce repeated work. Bulk Mockup can automate Smart Object replacement, artwork alignment, file naming and export across compatible phone case PSD templates.