

Manual Photoshop methods to create a tapered tumbler template design, like warp, skew, puppet, and brushes, are time-consuming, error-prone, and hard to scale. For print-on-demand sellers, doing this for hundreds of wraps drains productivity fast.
I have created a free Photoshop action as a tapered tumbler template generator to help you do it in a few steps and save time.
First, I will explain how to use the Photoshop action and then explain how to automate the batch generation of tapered tumbler designs in steps.
For this, you will need an image file with a smart object layer.
Also Read: How to Make a Smart Object in Photoshop
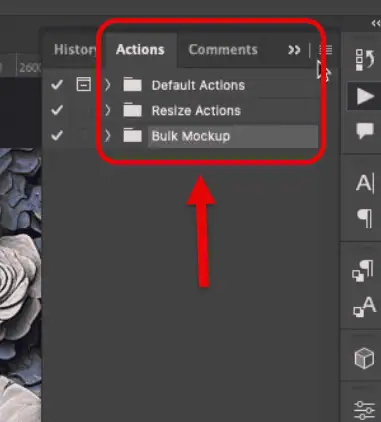
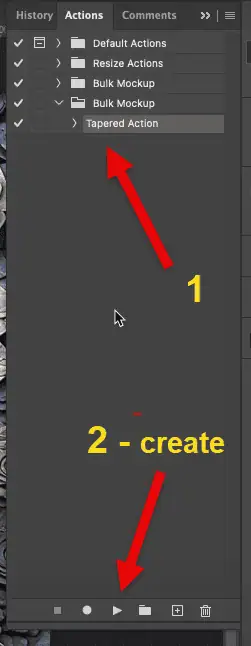
Visit this Bulk Mockup Photoshop Action link and download it for free. Open Photoshop and go to Window. Click on Actions.

The Photoshop action bar will open on the right side of your Photoshop window.
Go to Button mode on the Photoshop Action taskbar.
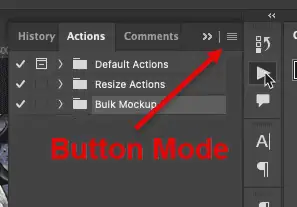
Click on it and select Load Actions.
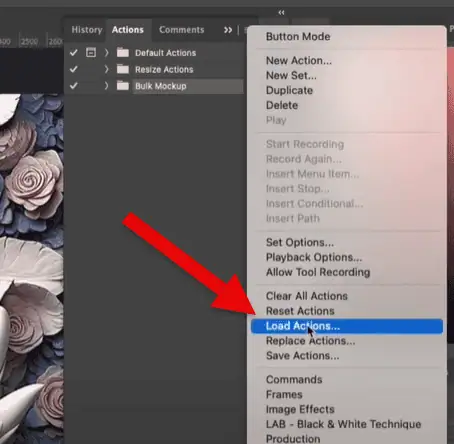
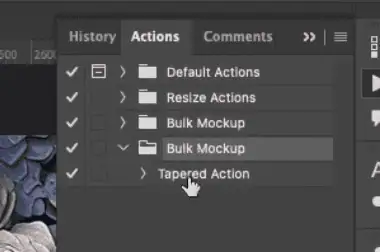
It will take you to your Downloads section, where you have the Photoshop action file ready. Once you open the action file, it will appear as this:
Open a rectangular PNG tumbler wrap in Photoshop.
In the right column, you will find that its layers are locked.
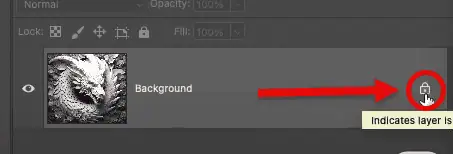
Unlock the background layer if locked (click the padlock icon). All the layers in this PNG file will be unlocked.
Click on the Tapered Action in the Photoshop Action Bar and click on Play.
Photoshop converts the straight design into a tapered one.
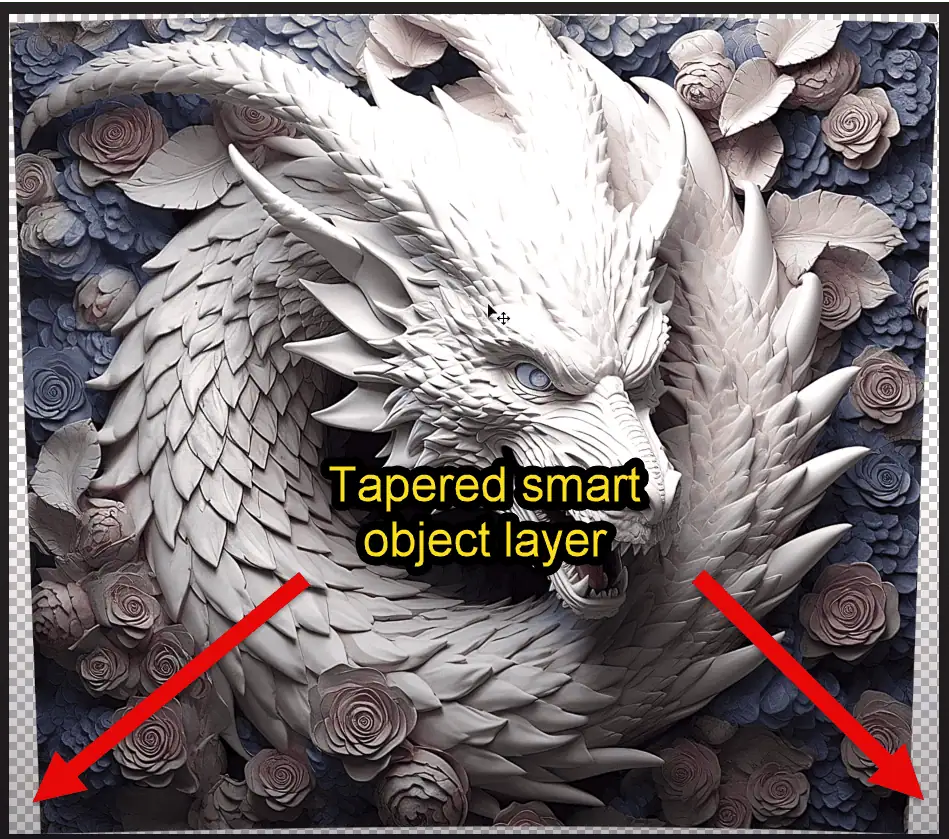
Save this tapered tumbler template as a .psd file for automation use in a separate folder named ‘Tapered Template’.
That’s it.
A few easy steps with our Photoshop action to learn how to make a tapered tumbler template. You can use this template to taper multiple designs in a single step by using Bulk Mockup, our Photoshop automation plugin.
Also Read: How to Create a Mockup in Photoshop
Install Bulk Mockup and follow these steps.
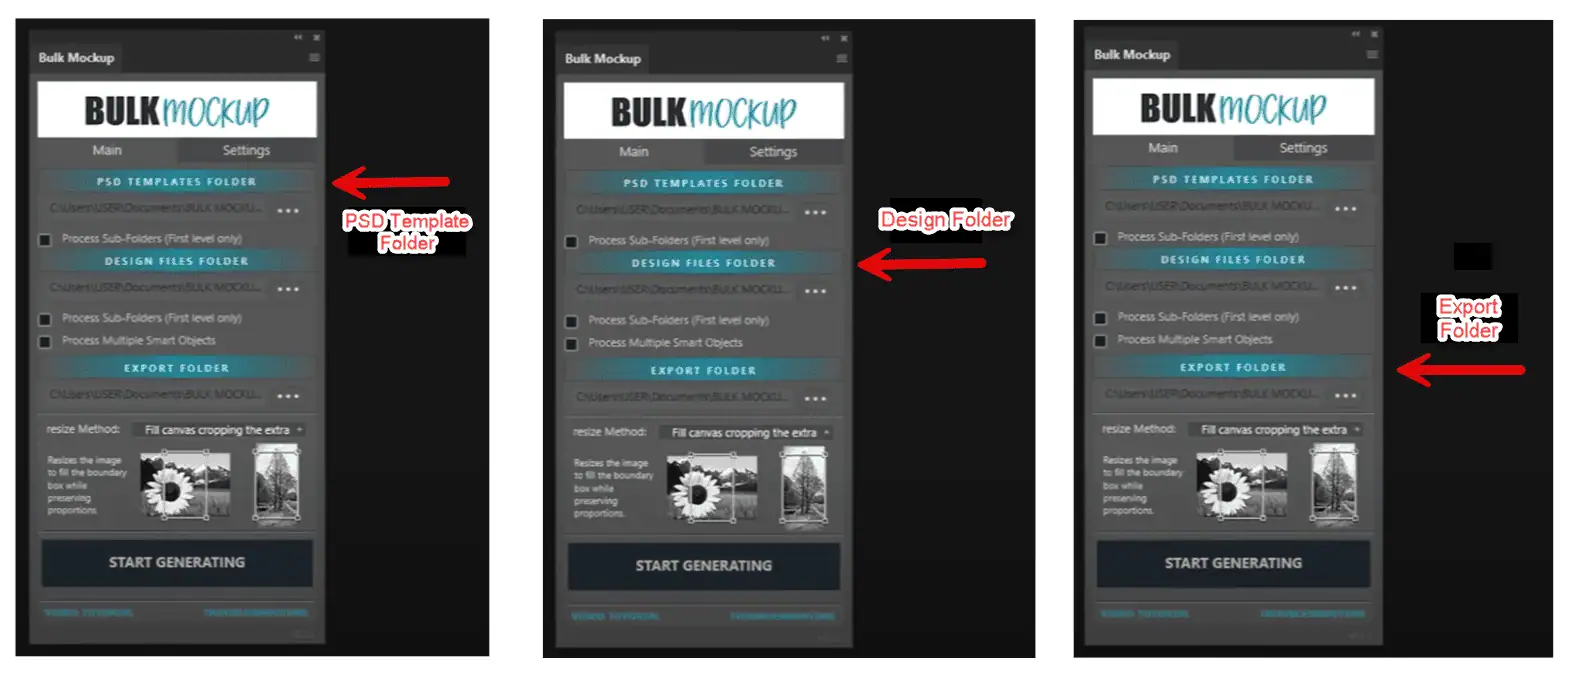
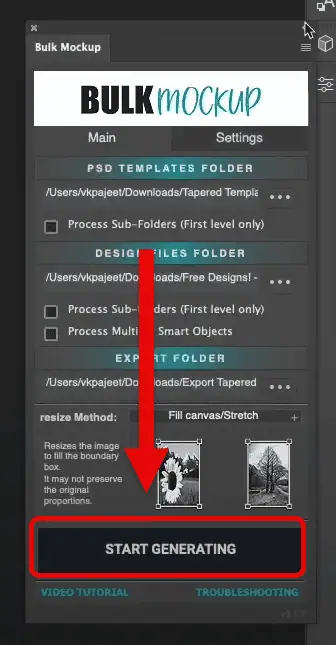
Open the Bulk Mockup plugin from Plugins > Bulk Mockup.

PSD Template Folder: Choose the saved tapered tumbler file folder.
Design File Folder: Select the folder with all straight PNG design files.
Export Folder: Create or select a folder for tapered mockup output.
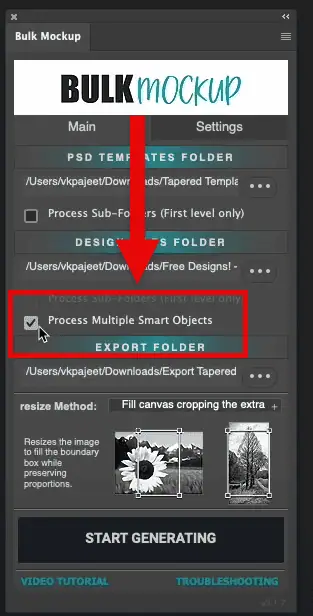
Uncheck “Process Multiple Smart Objects.”
Set the resize method to “Fill Canvas with Stretch.”
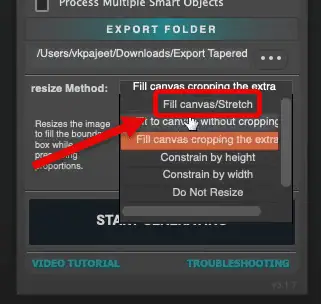
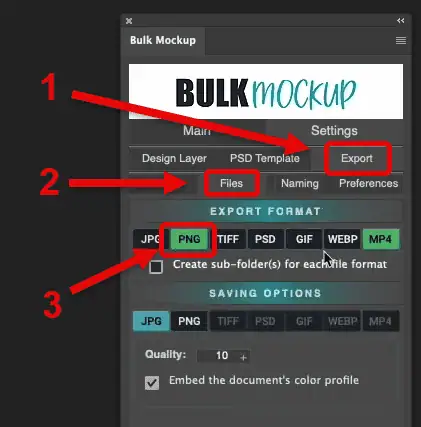
Choose PNG as the export format.
Set naming conventions if required.
Click “Start Generating.”
The system will apply the taper action to each design and export it to the designated folder.
That’s all. Instantly, you can generate a tapered tumbler template free of cost. Save hours by using this Photoshop action and Bulk Mockup while generating hundreds of printable tumbler templates.
Tapering a tumbler wrap design manually might work for one or two files, but what if you have 200?
Automation is the key when you’re creating sublimation-ready wraps for Etsy, designing custom corporate gifts, or running a full-fledged PoD brand.
Bulk Mockup streamlines this tedious process.
Once you have prepared a tapered wrap smart object, you can use this PSD template to batch-produce multiple tumbler mockups.
With just a few clicks, you can batch-process thousands of files without touching a warp tool again.
You can taper an image in Photoshop using warp, distort, or puppet warp tools. You can save time by using our tapering Photoshop action and Bulk Mockup for faster batch processing and accuracy.
Print your tapered wrap on sublimation paper, wrap it tightly around the tumbler, secure it with heat tape, and use a tumbler press or convection oven for even heat transfer.
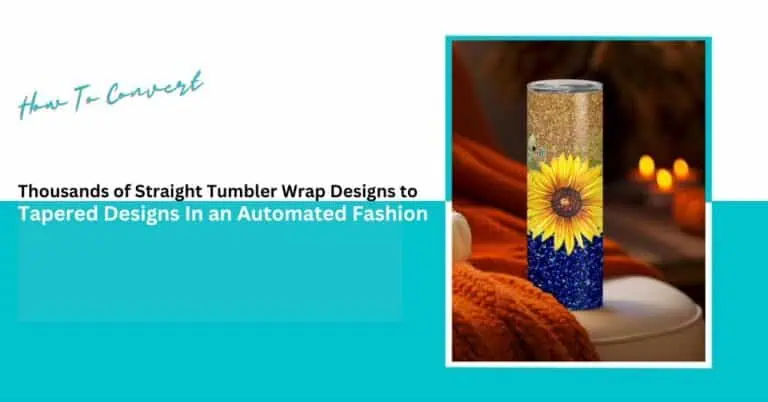
Straight designs generated by a tumbler template generator don’t account for the tumbler’s tapered shape. They cause distortion during wrapping or sublimation. This is why you need to taper a design for a clean fit.
Yes, with tools like Photoshop and Bulk Mockup, you can batch-convert thousands of straight wraps into tapered designs automatically.
No, the process is beginner-friendly. Just load our ready-made Photoshop action, set up Bulk Mockup, and follow a few simple steps.
It’s optimized for standard sizes like 20oz skinny tumblers; for other sizes, you may need a custom tapering action that matches the specific curve.