
How to Change Aspect Ratios in Photoshop Without Distortion
This tutorial shows you how to resize images from one aspect ratio to another (like 2:3 to 3:4 or 11x14) in Adobe Photoshop. You'll learn five manual methods that prevent distortion, plus how to automate the process for hundreds of images using the Bulk Mockup Photoshop Plugin.

Before You Start
You'll need:
Adobe Photoshop CC2019 or later
Bulk Mockup Photoshop Plugin installed (for bulk automation only) - download and install instructions
Your images at 300 DPI for print-quality artwork
New to aspect ratios and image sizing? Watch the related video linked in the description for a deeper dive into ratios, sizes, and DPI.
Method 1: Stretching (Distorts Image)
This method stretches your image to fit the new aspect ratio. It will distort your image, so use it only when distortion is acceptable.
Step 1: Create a New Document
Go to File > New and set your target dimensions. For example, 18 x 24 inches at 300 DPI for a 3:4 aspect ratio.
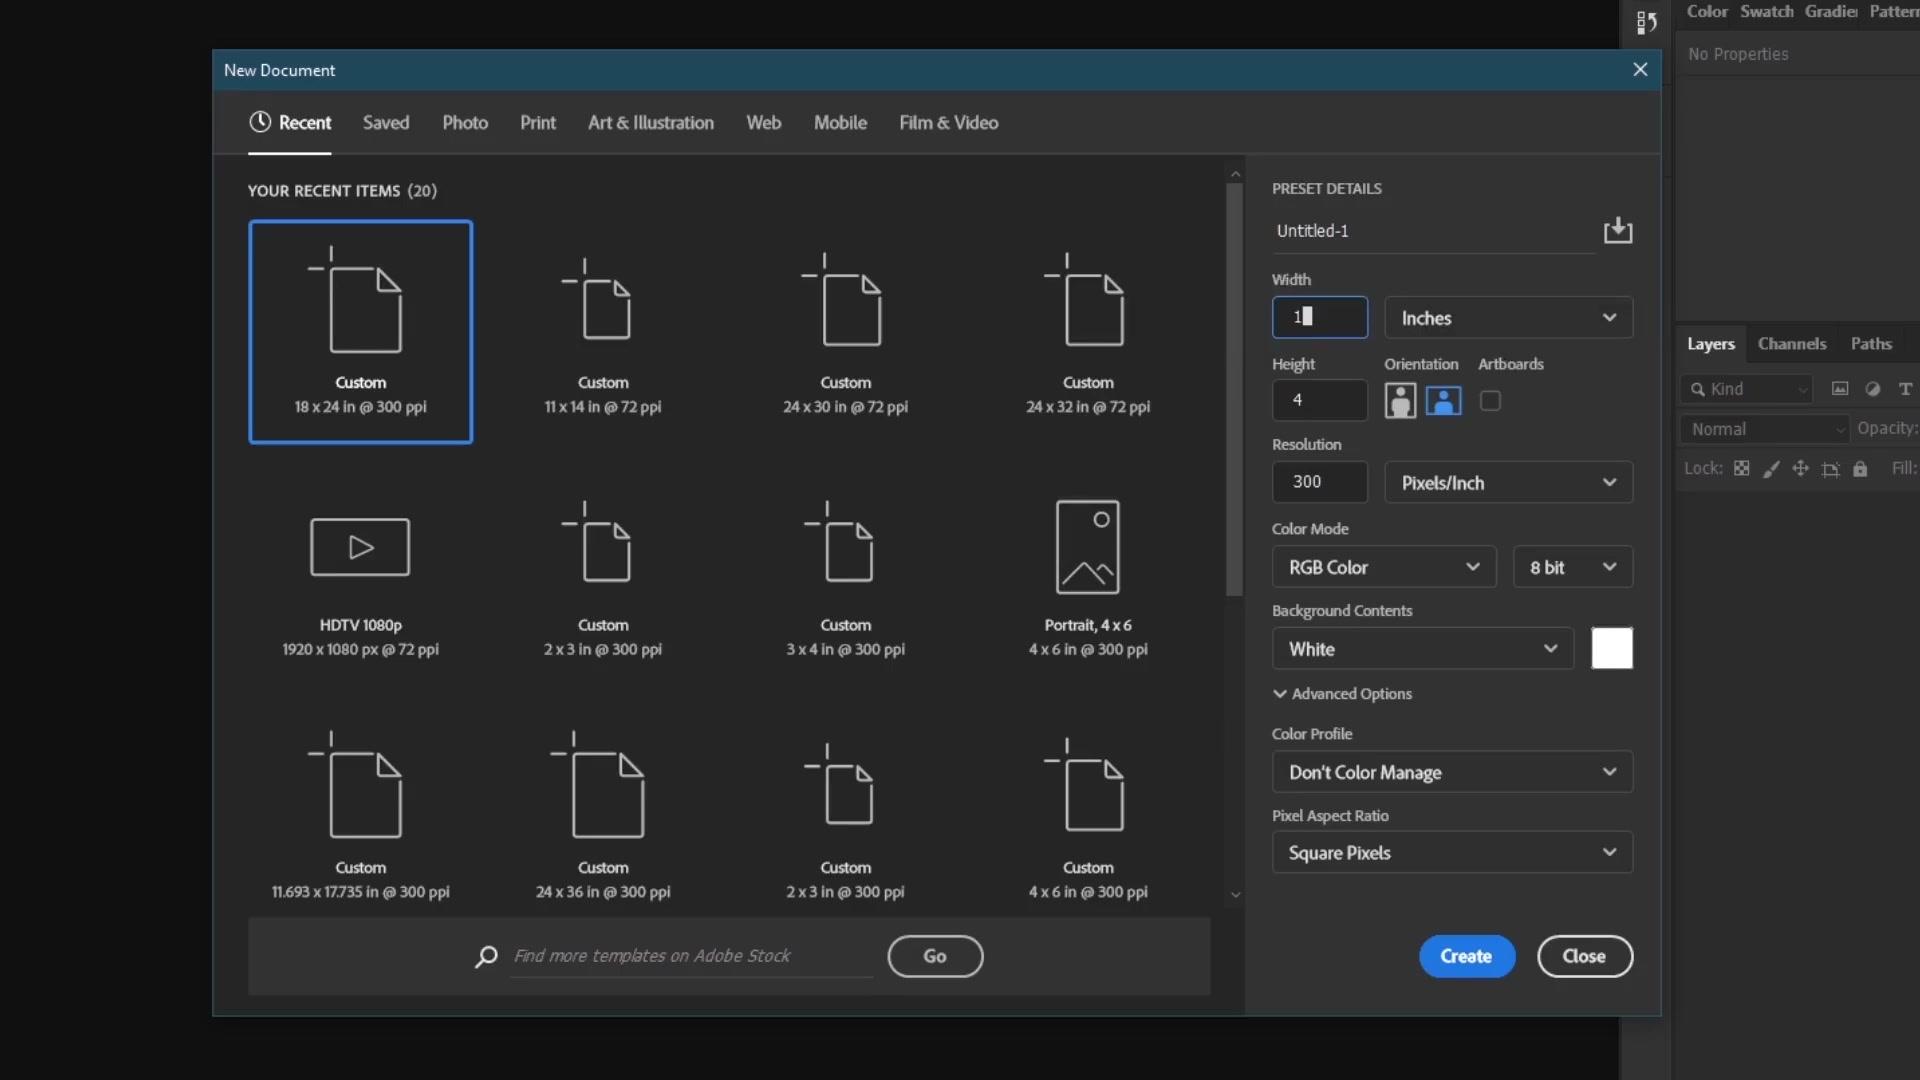
Step 2: Place Your Image
Drag and drop your image onto the canvas. It will appear smaller than the canvas if the aspect ratios don't match.
Step 3: Stretch to Fit
Press Ctrl+T (or Cmd+T on Mac) to activate Free Transform. Drag the corner handles while holding Shift to stretch the image to the canvas edges. Press Enter to apply.
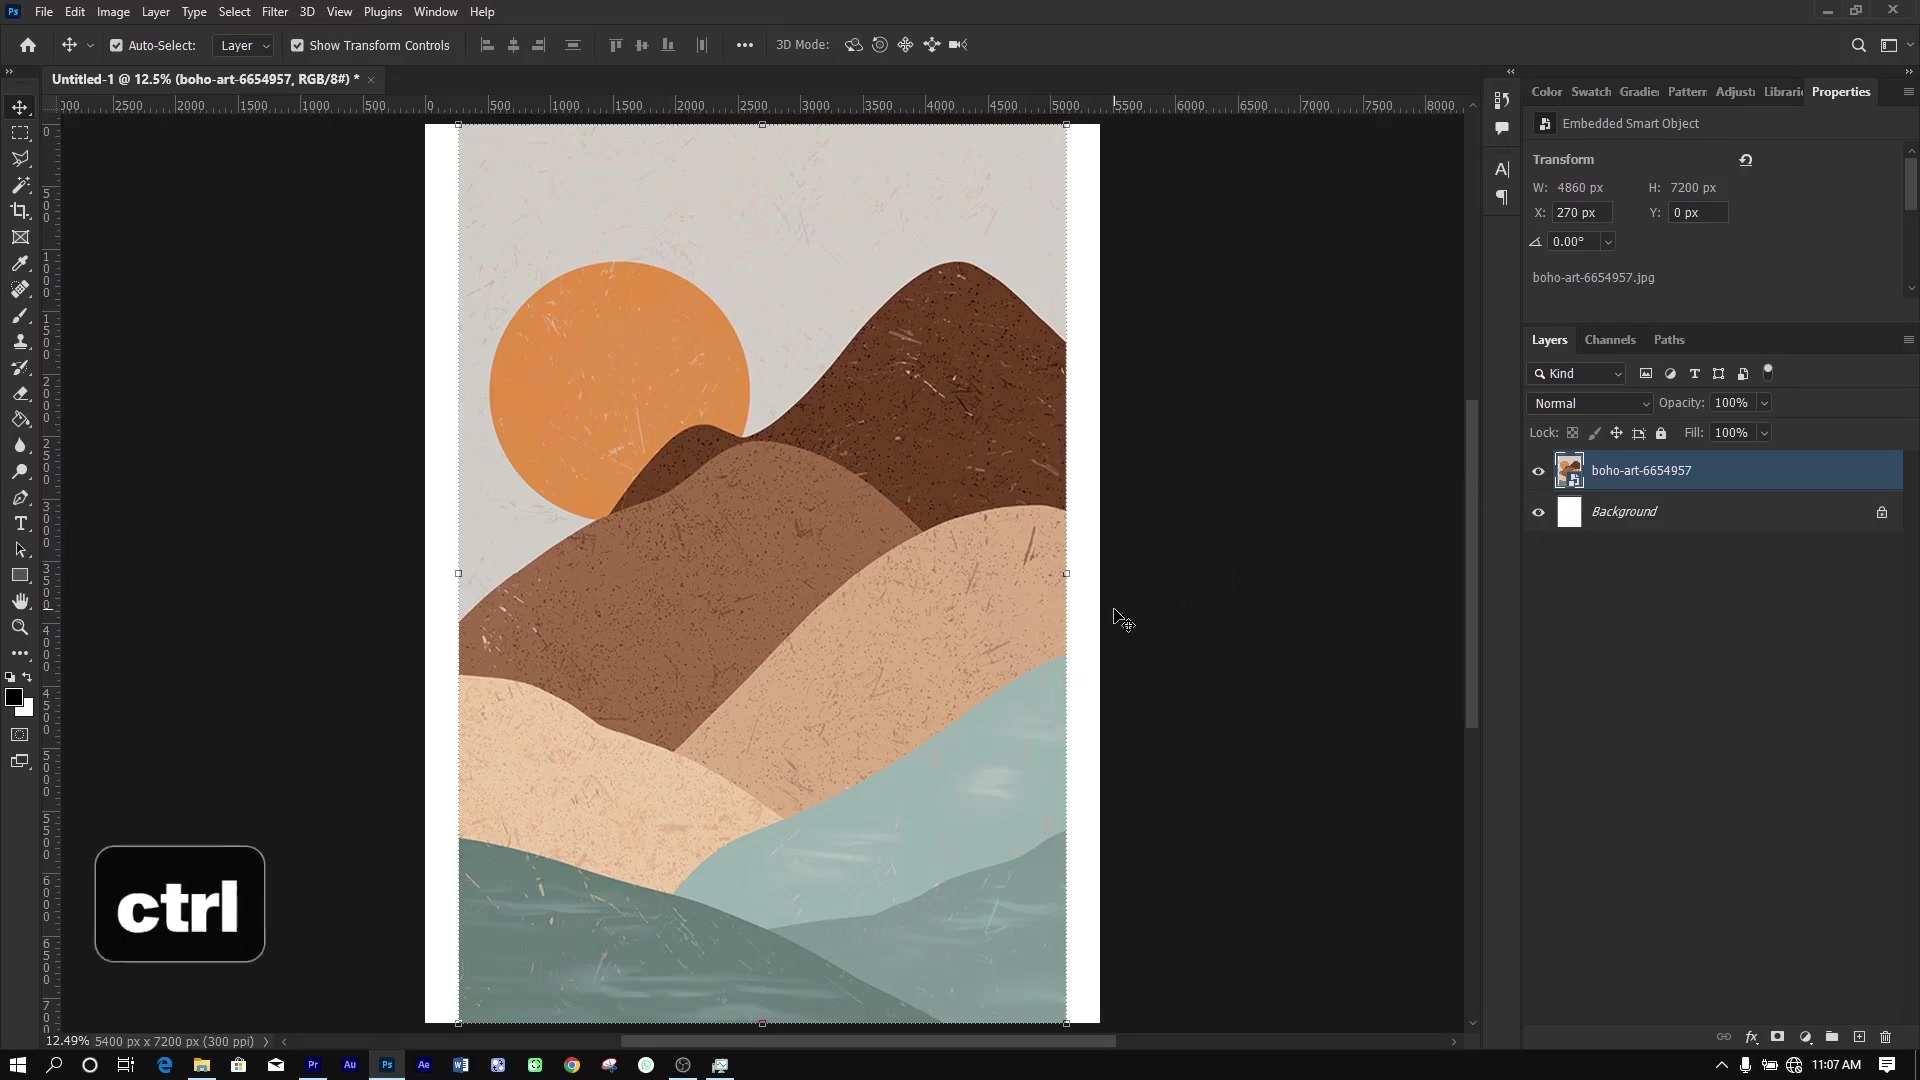
This method will distort your image. Elements may appear stretched or squished. Use Methods 2-5 if you want to avoid distortion.
Method 2: Extend Background (Generative Fill or Content-Aware)
This method uses AI to fill empty canvas space by extending your image's background. Best for images with simple or uniform backgrounds.
Step 1: Enable Contextual Task Bar
Go to Window menu and enable Contextual Task Bar if it's not already visible.
Step 2: Select Empty Space
Use the Rectangular Marquee Tool to select the empty canvas area. Make sure to overlap the image slightly for better blending.
Step 3: Apply Generative Fill
Click Generative Fill in the Contextual Task Bar. Leave the prompt empty and let Photoshop generate variations automatically.
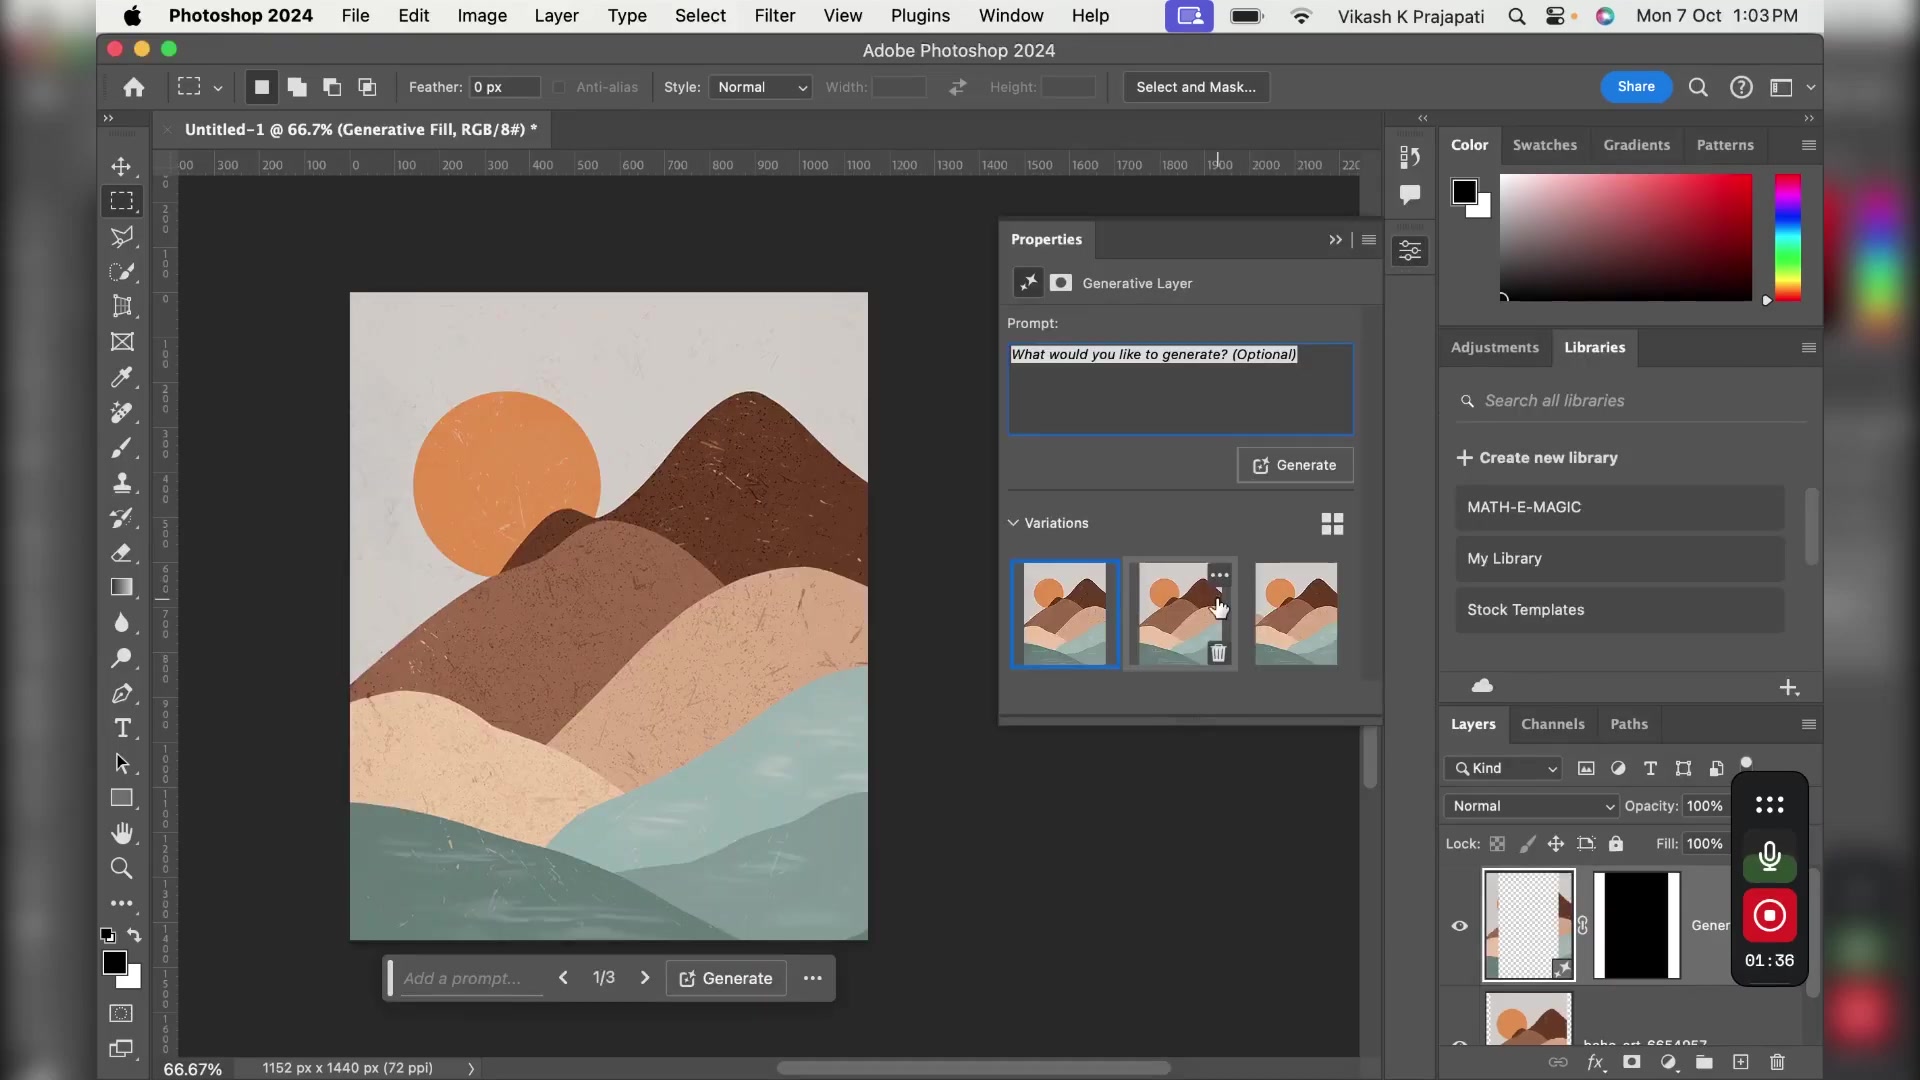
Step 4: Choose the Best Variation
Review the variations in the Properties panel and select the one that looks most natural.
If you're using an older version of Photoshop without Generative Fill, use Content-Aware Fill instead. Right-click your layer, select Rasterize, then go to Edit > Fill > Content-Aware with Color Adaptation enabled.
Method 3: Solid Color Fill
This method fills empty space with a solid color that complements your artwork. Perfect for modern, minimalist designs.
Step 1: Select Background Layer
Click on the background layer in the Layers panel.
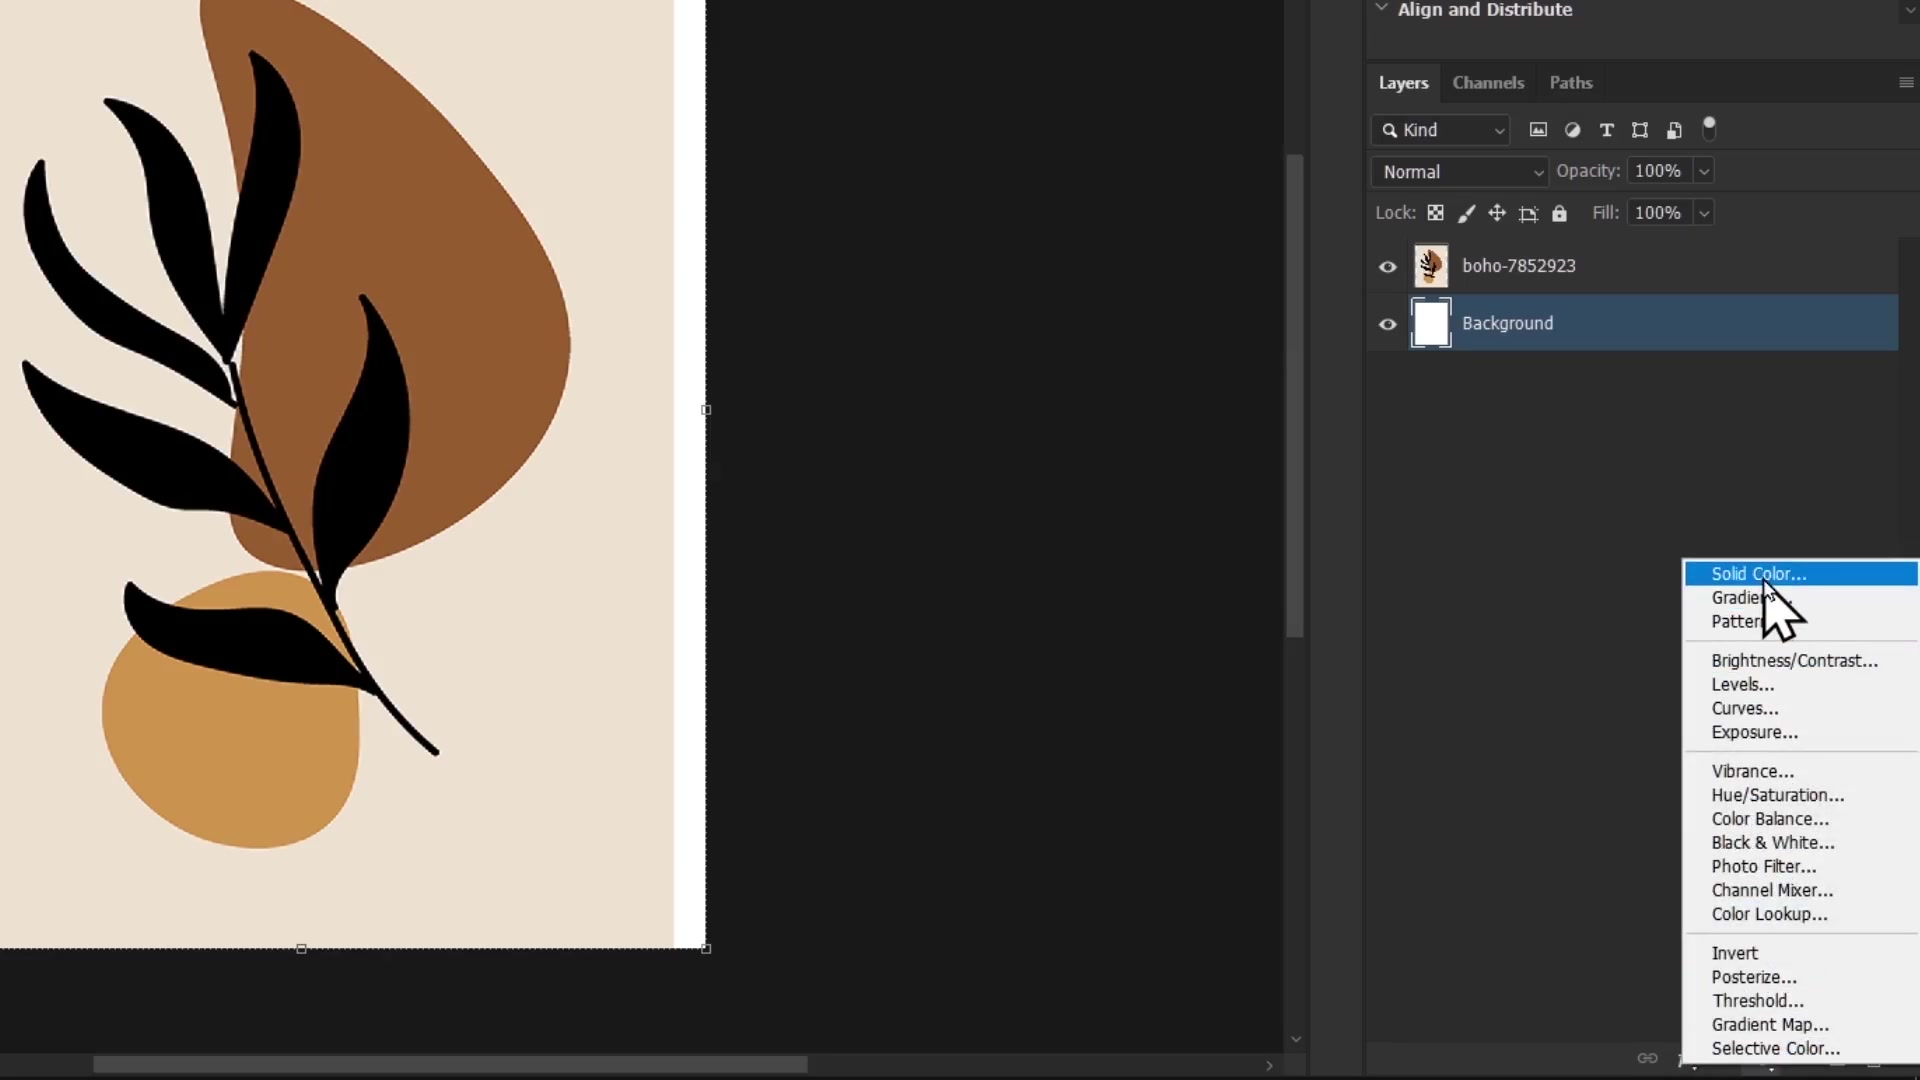
Step 2: Add Solid Color
Right-click the background layer and choose Solid Color... from the Adjustments menu. Alternatively, use the Paint Bucket Tool.
Step 3: Choose Your Color
Use the Color Picker to select a complementary color, or use the Eyedropper Tool to sample a color from your artwork.
Choose colors from your artwork's palette to create a cohesive, professional look.
Method 4: Adjust Without Distortion (Crop/Reposition)
This method maintains your image's proportions by cropping or repositioning it within the canvas. No distortion occurs.
Step 1: Activate Free Transform
Press Ctrl+T (or Cmd+T on Mac).
Step 2: Scale Proportionally
Drag the corner handles while holding Shift to maintain proportions. The image may extend beyond the canvas edges.
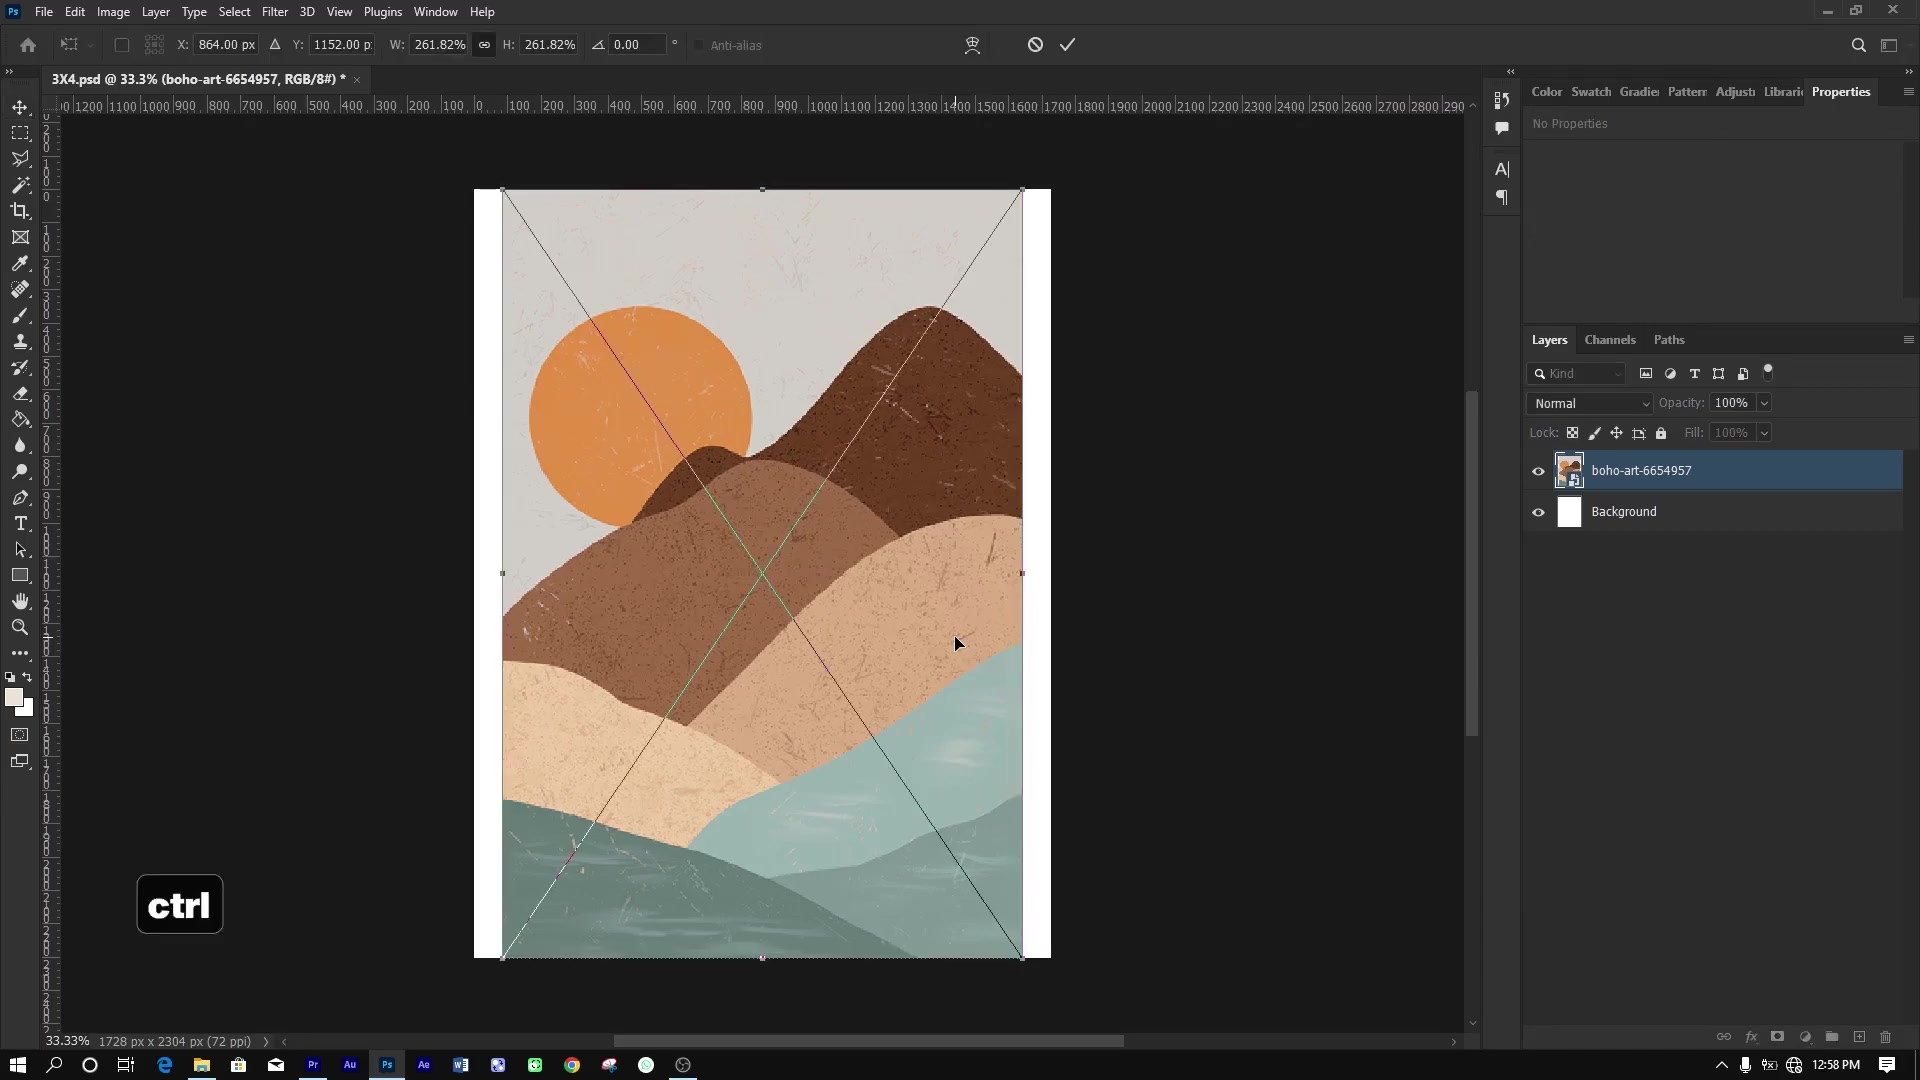
Step 3: Reposition to Highlight Key Elements
Move the image to focus on the most important parts. The canvas will crop out anything beyond its edges. Press Enter to apply.
This method preserves image quality and prevents distortion, making it ideal for detailed artwork.
Method 5: Mirroring
This method creates symmetrical fills by duplicating and flipping your image. Great for abstract or symmetrical designs.
Step 1: Duplicate the Layer
Press Ctrl+J (or Cmd+J on Mac) to duplicate your image layer.
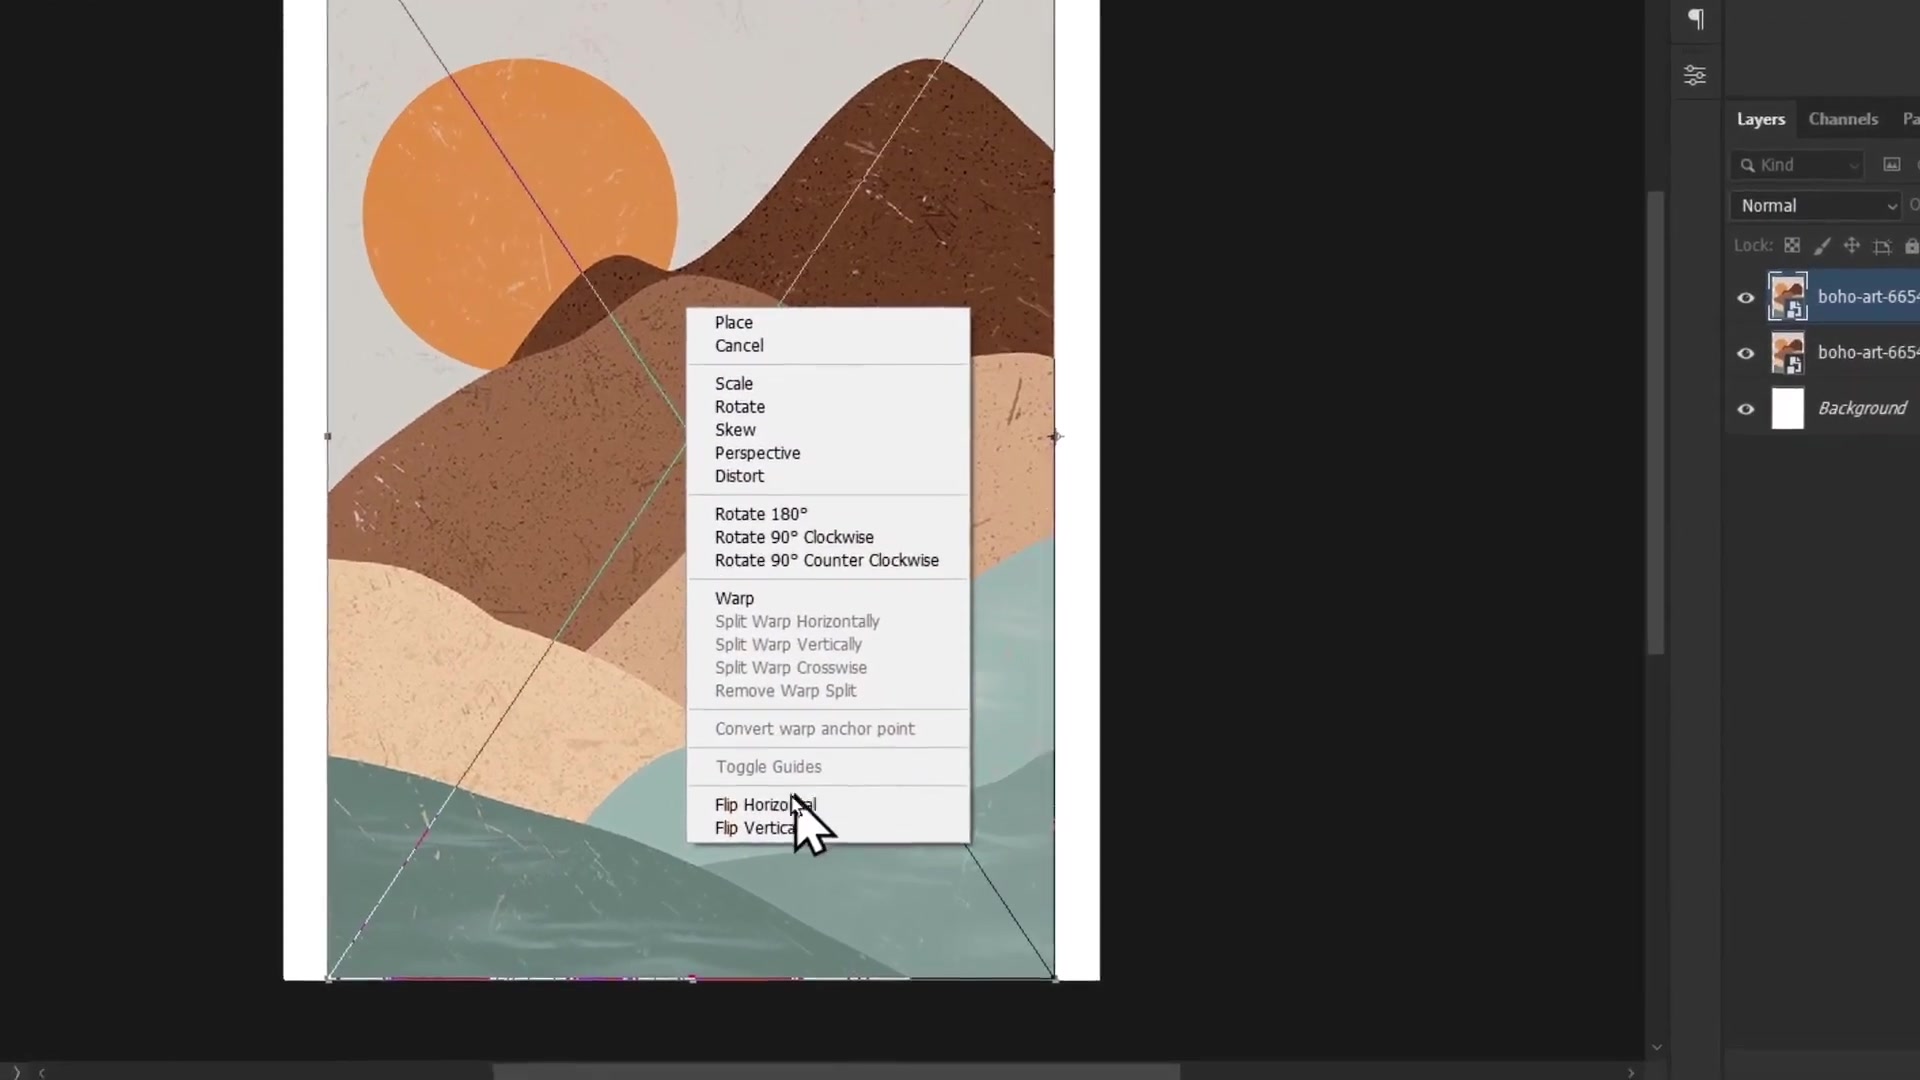
Step 2: Activate Free Transform
Press Ctrl+T and set the reference point for the flip (top, bottom, left, or right edge).
Step 3: Flip the Layer
Right-click and choose Flip Horizontal or Flip Vertical depending on which side needs filling.
Step 4: Repeat for Other Sides
If multiple sides need filling, duplicate and flip additional layers until the canvas is filled.
Bulk Automation with Bulk Mockup Photoshop Plugin
Manually resizing hundreds of images takes hours or days. The Bulk Mockup Photoshop Plugin automates this process, applying any of the above methods to multiple images across different aspect ratios simultaneously.
Step 1: Download PSD Templates
Download aspect ratio templates (2:3, 3:4, 4:5, 11x14, A1, etc.) from the video description or Bulk Mockup template resources.
Step 2: Organize Your Folders
Create three folders:
Templates - Store your PSD templates here
Arts - Place all your source images here
Exports - This is where processed images will save
Step 3: Open Bulk Mockup Photoshop Plugin
In Photoshop, go to Plugins > Bulk Mockup Photoshop Plugin to open the plugin panel.
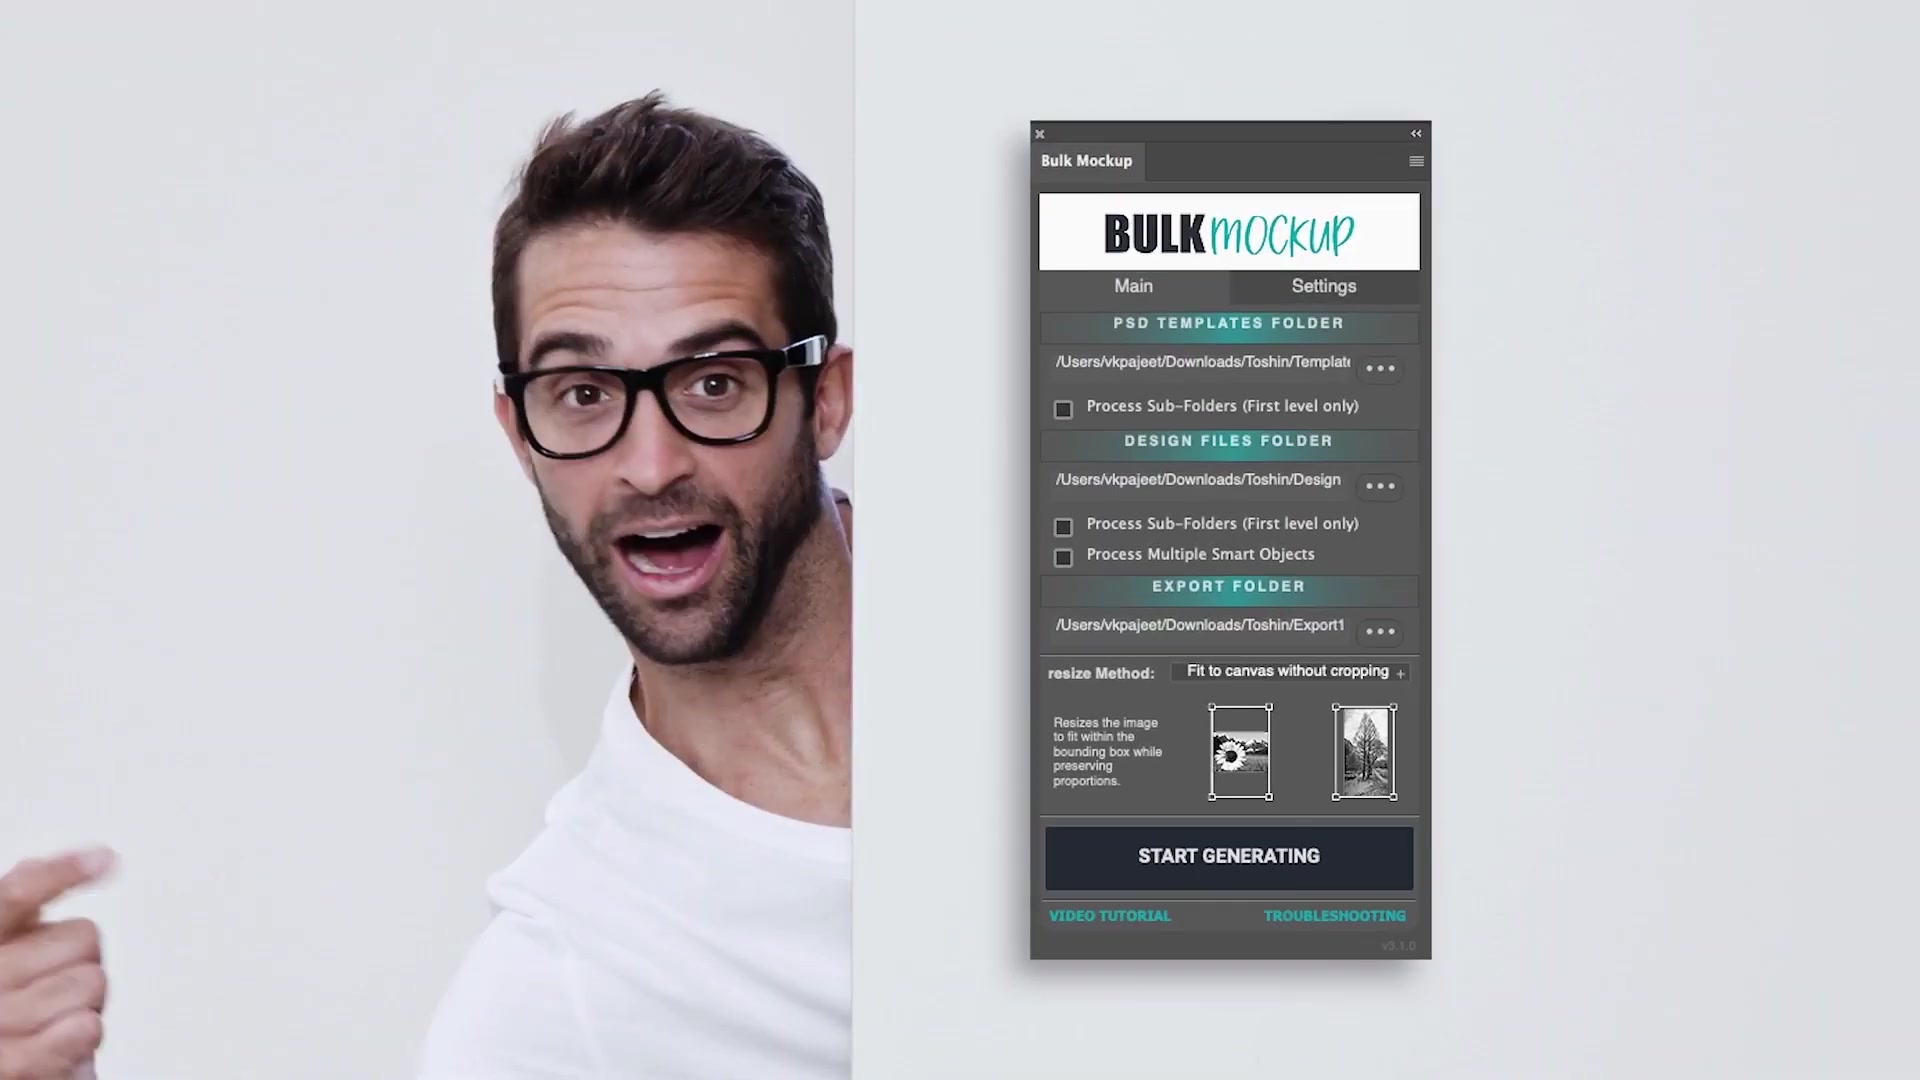
Step 4: Configure Plugin Settings
Set the following paths:
PSD Templates - Point to your Templates folder
Design Files - Point to your Arts folder
Export Folders - Point to your Exports folder
Under Export options, select Fit to Canvas Cropping the Extra. This applies Method 4 (non-distorting adjustment) automatically.
Step 5: Start Generating
Click Start Generating. The Bulk Mockup Photoshop Plugin will process all images through all templates and save them to subfolders organized by aspect ratio.
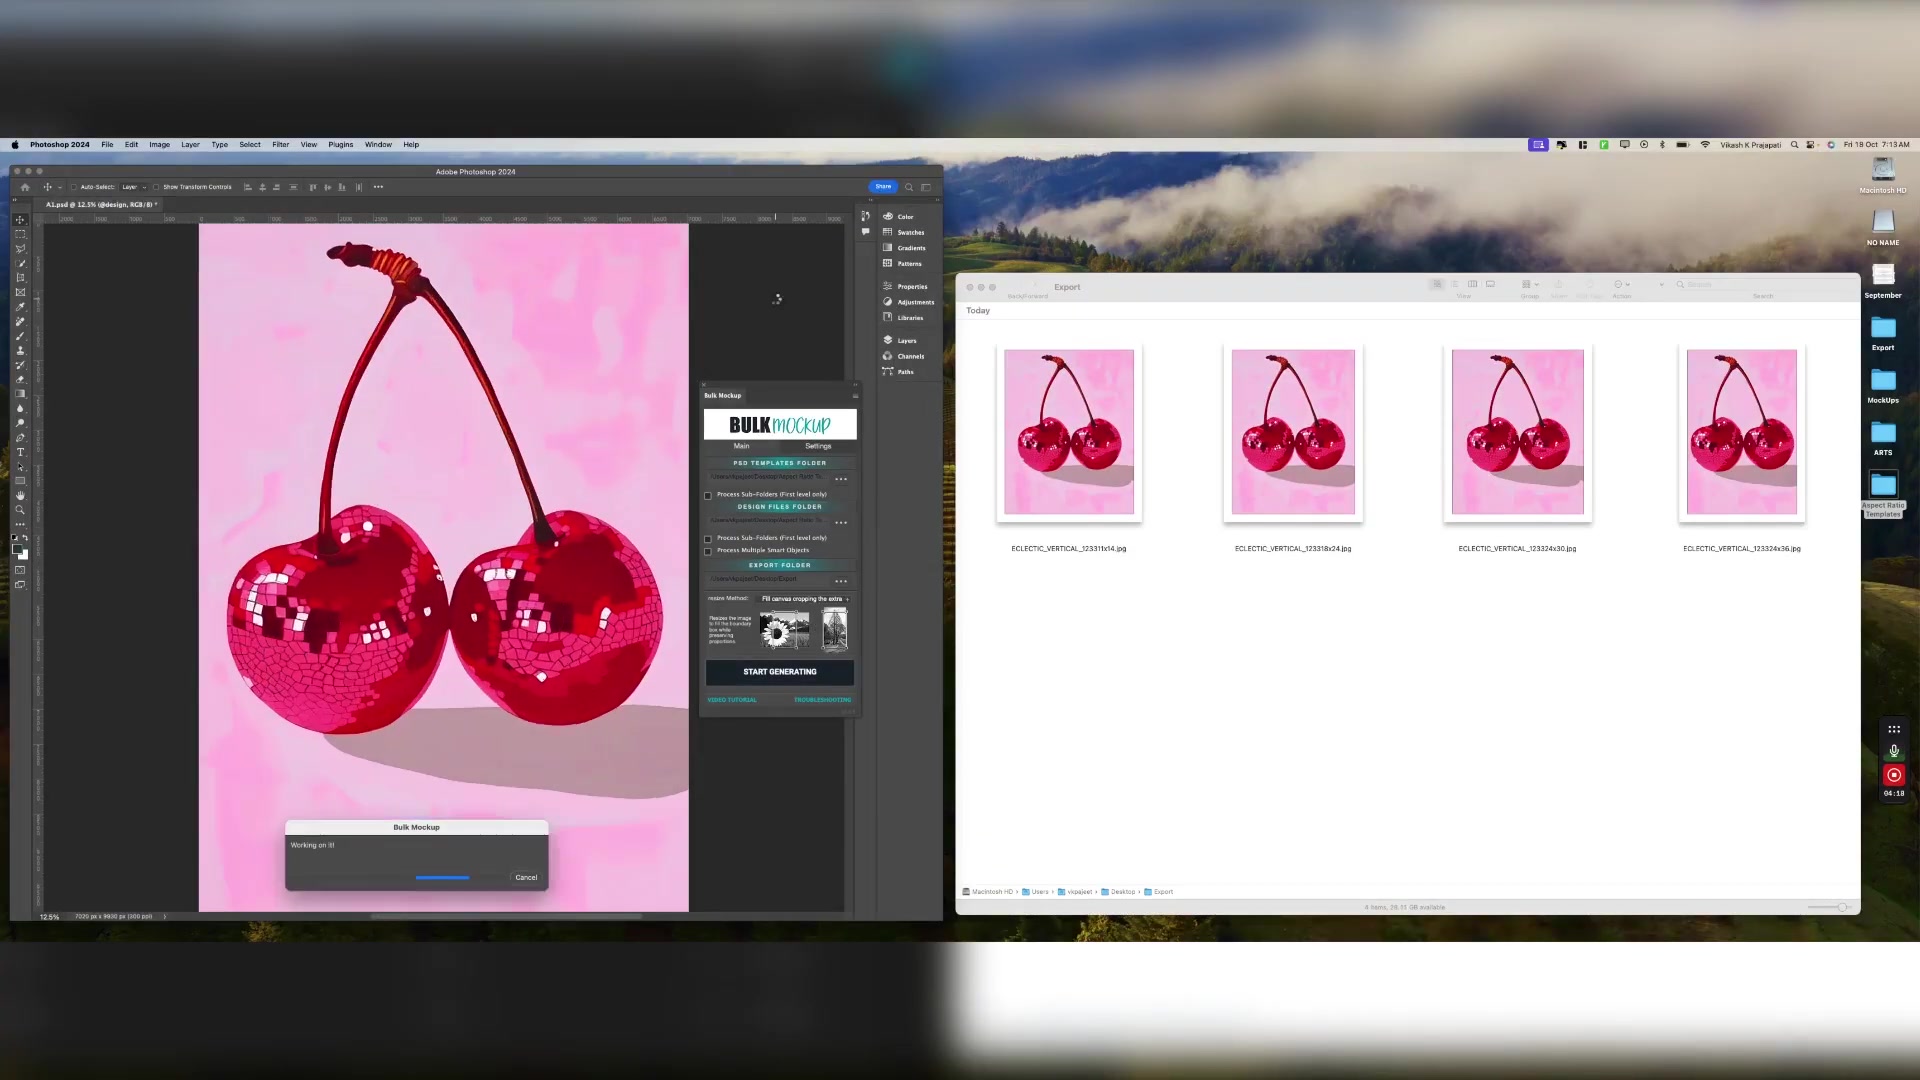
The Bulk Mockup Photoshop Plugin processes hundreds of images in minutes, saving you hours of manual work while maintaining consistent quality across all aspect ratios.
Choosing the Right Method
Method 1 (Stretching) - When distortion is acceptable or intentional
Method 2 (Generative/Content-Aware Fill) - For images with simple backgrounds that can be extended naturally
Method 3 (Solid Color) - For minimalist designs or when you want a clean, modern look
Method 4 (Non-Distorting) - When preserving image quality and proportions is critical
Method 5 (Mirroring) - For abstract or symmetrical artwork where mirrored elements look intentional
Bulk Automation - When processing dozens or hundreds of images across multiple aspect ratios
Related Resources
How to Resize Printable Wall Art for Etsy – Step-by-Step Tutorial
Batch Watermark – How to Add Watermarks to Multiple Photos Automatically
Need More Help?
If you have questions about changing aspect ratios or encounter any issues, contact the Bulk Mockup support team at [email protected].
Watch Similar Videos:
Additional related video tutorials will be listed here as they become available.
Use Cases:
Resizing Etsy printable wall art for different frame sizes
Creating product mockups in multiple aspect ratios for marketplaces
Adapting artwork for social media platforms with different dimension requirements
Preparing print-on-demand designs for various product formats