
How to Split Panoramic Images into Triptych Wall Art
Turn your panoramic photos into professional three-panel triptych wall art ready for printing. This tutorial shows you two methods: a manual approach for single images and an automated batch process for multiple panoramas.
What You'll Need
Adobe Photoshop (any recent version)
Panoramic images with a 2:1 aspect ratio (72x36 inches works well)
Bulk Mockup plugin (for automated method only) – download here
Use 150 DPI for large canvases (72x36 inches) to avoid performance issues while maintaining print quality.
Method 1: Manual Splitting (Single Image)
Use this method when you need to split one panoramic image into three equal panels.
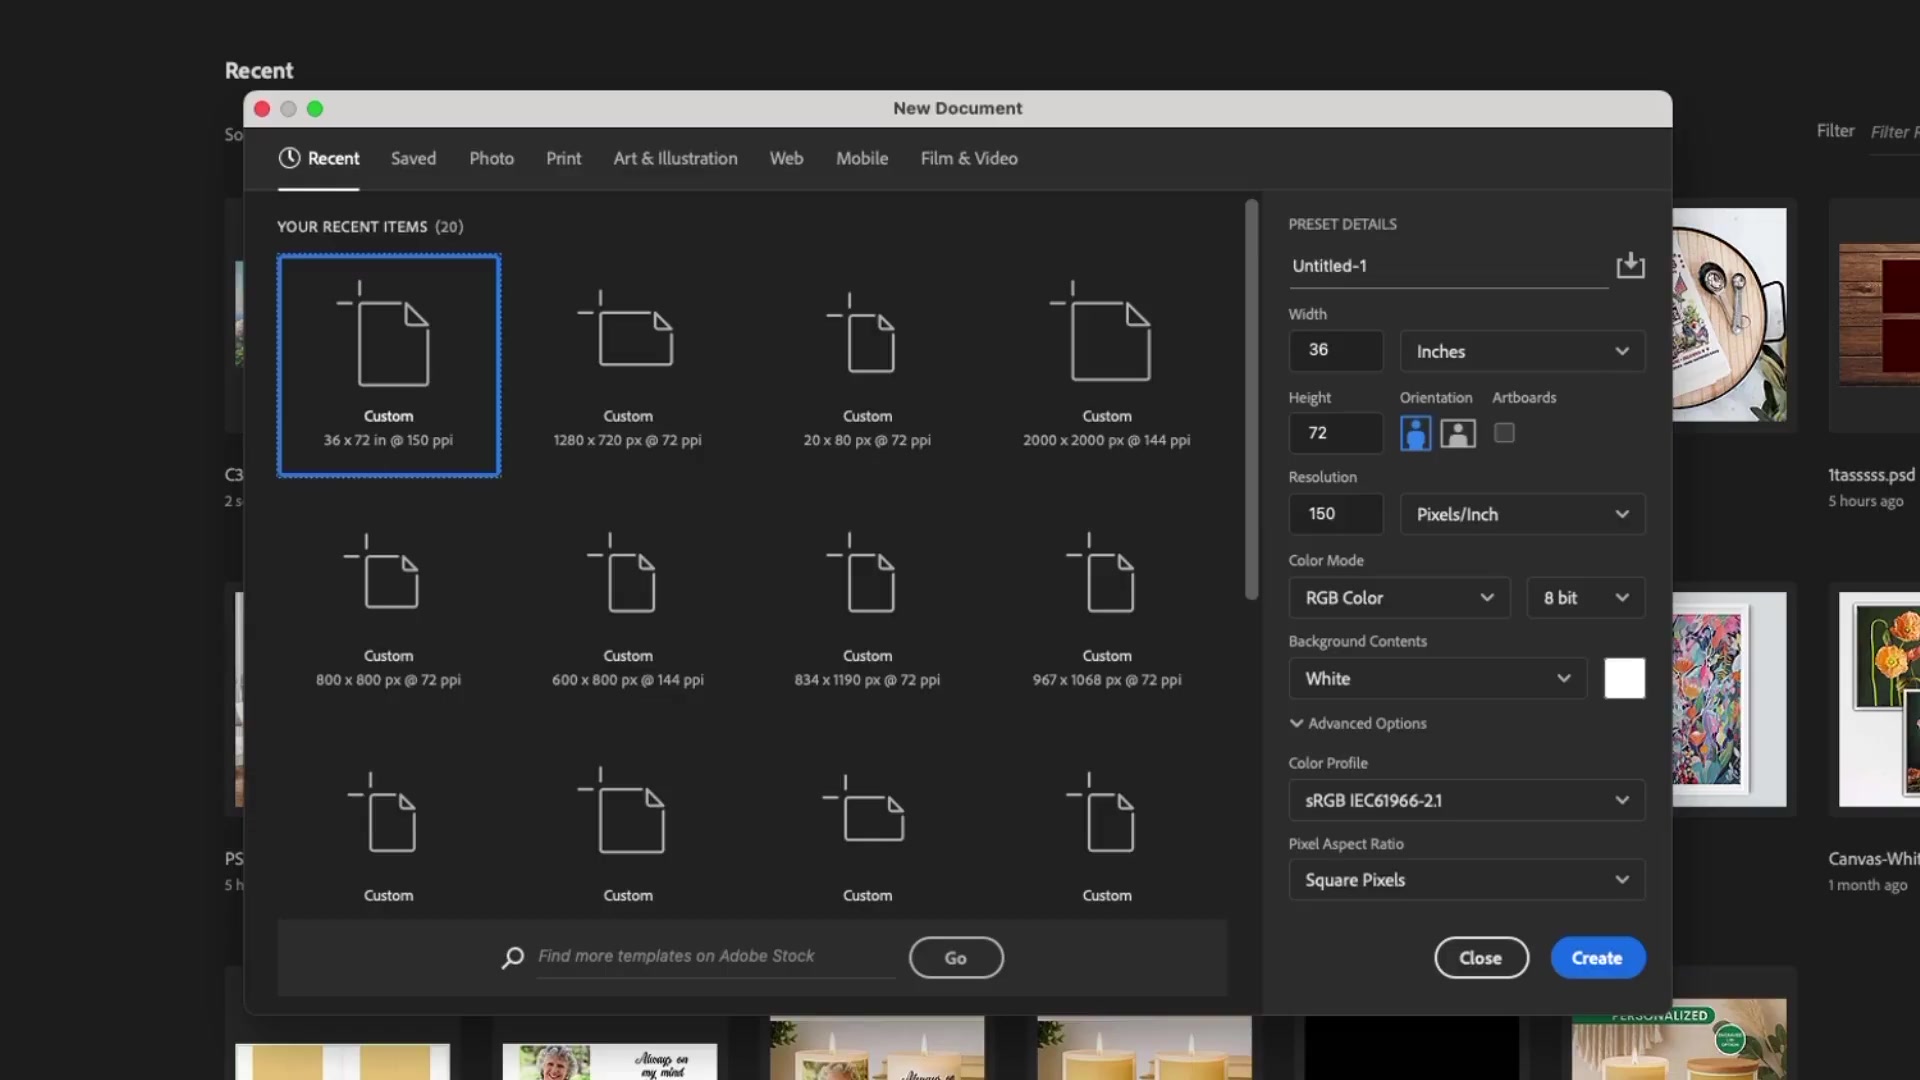
Step 1: Create Your Canvas
Open Photoshop and create a new document:
Go to File > New
Set Width to 72 inches
Set Height to 36 inches
Set Resolution to 150 pixels/inch
Choose Landscape orientation
Click Create
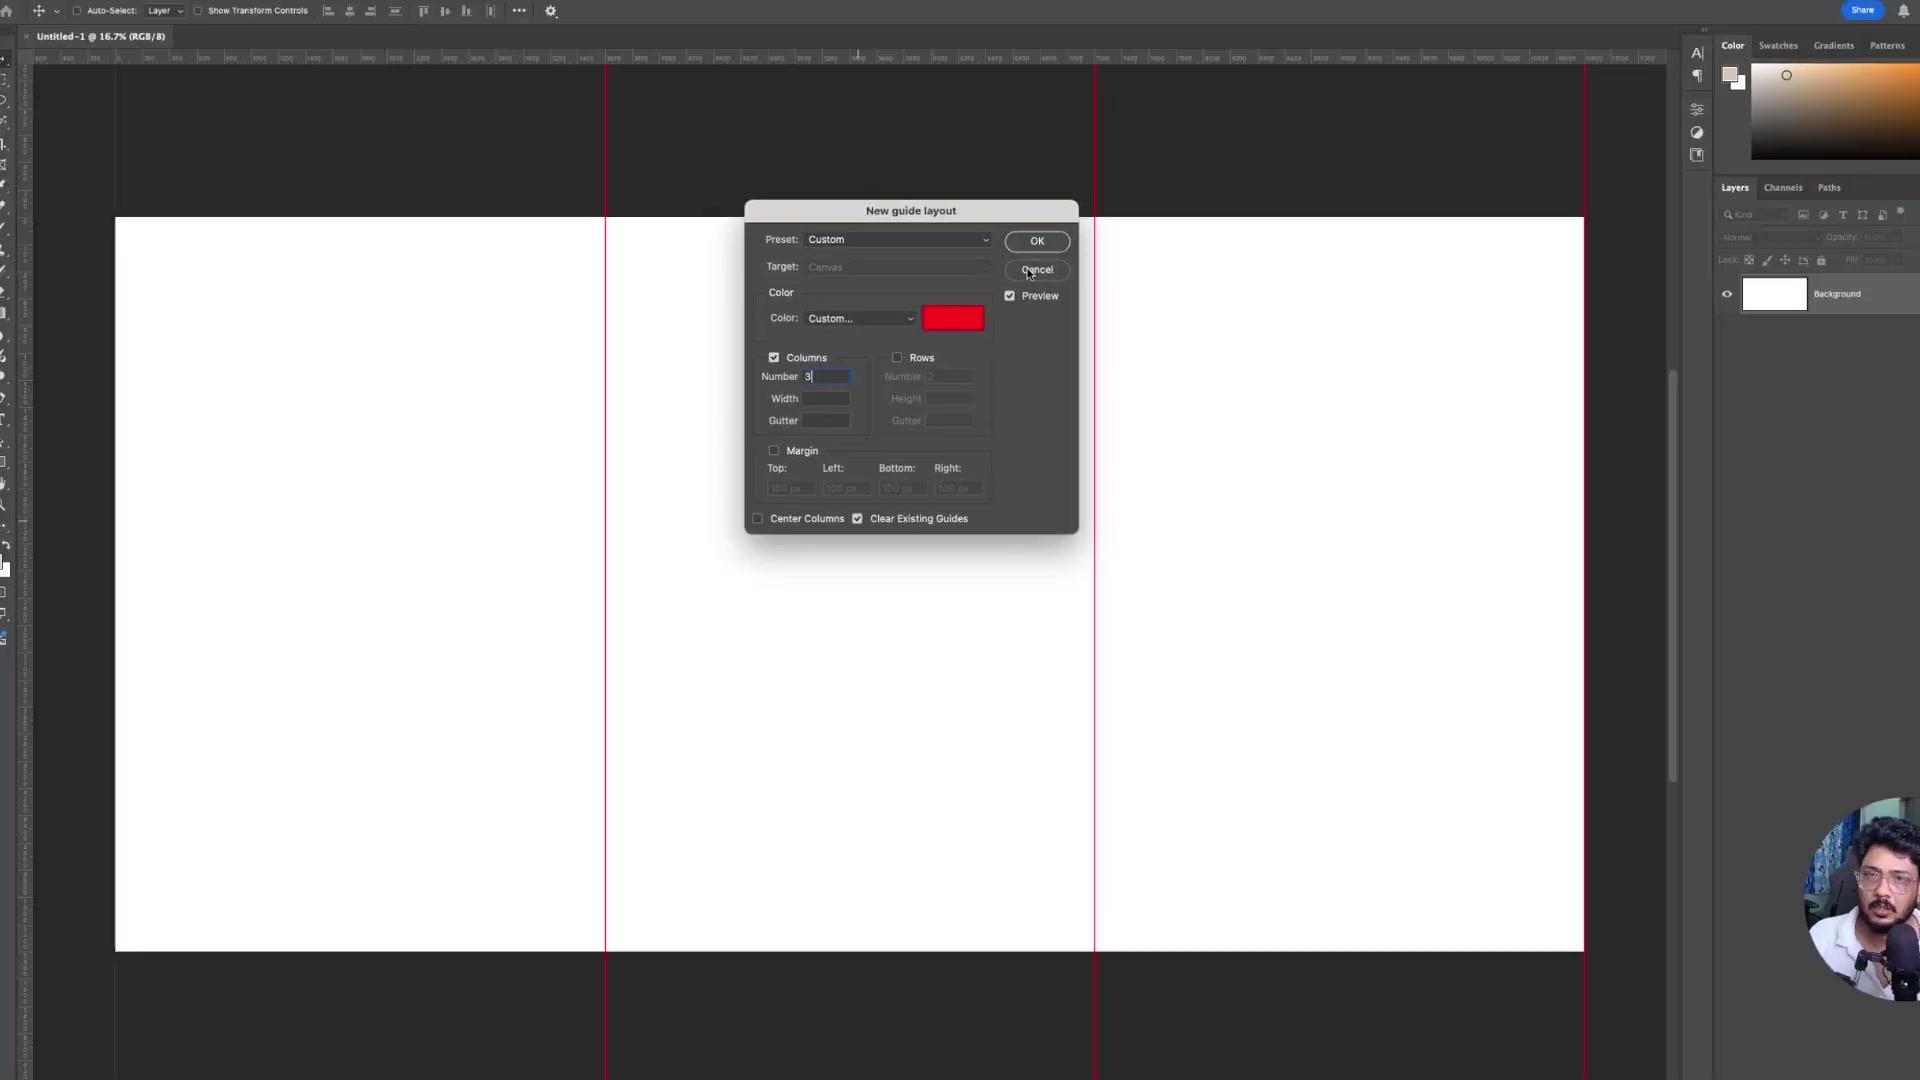
Step 2: Add Guides to Divide the Canvas
Create vertical guides to mark where you'll split the image:
Go to View > Guides > New Guide Layout
Set Columns to 3
Uncheck Rows and Margins
Make sure Preview is checked to see the guides
Click OK
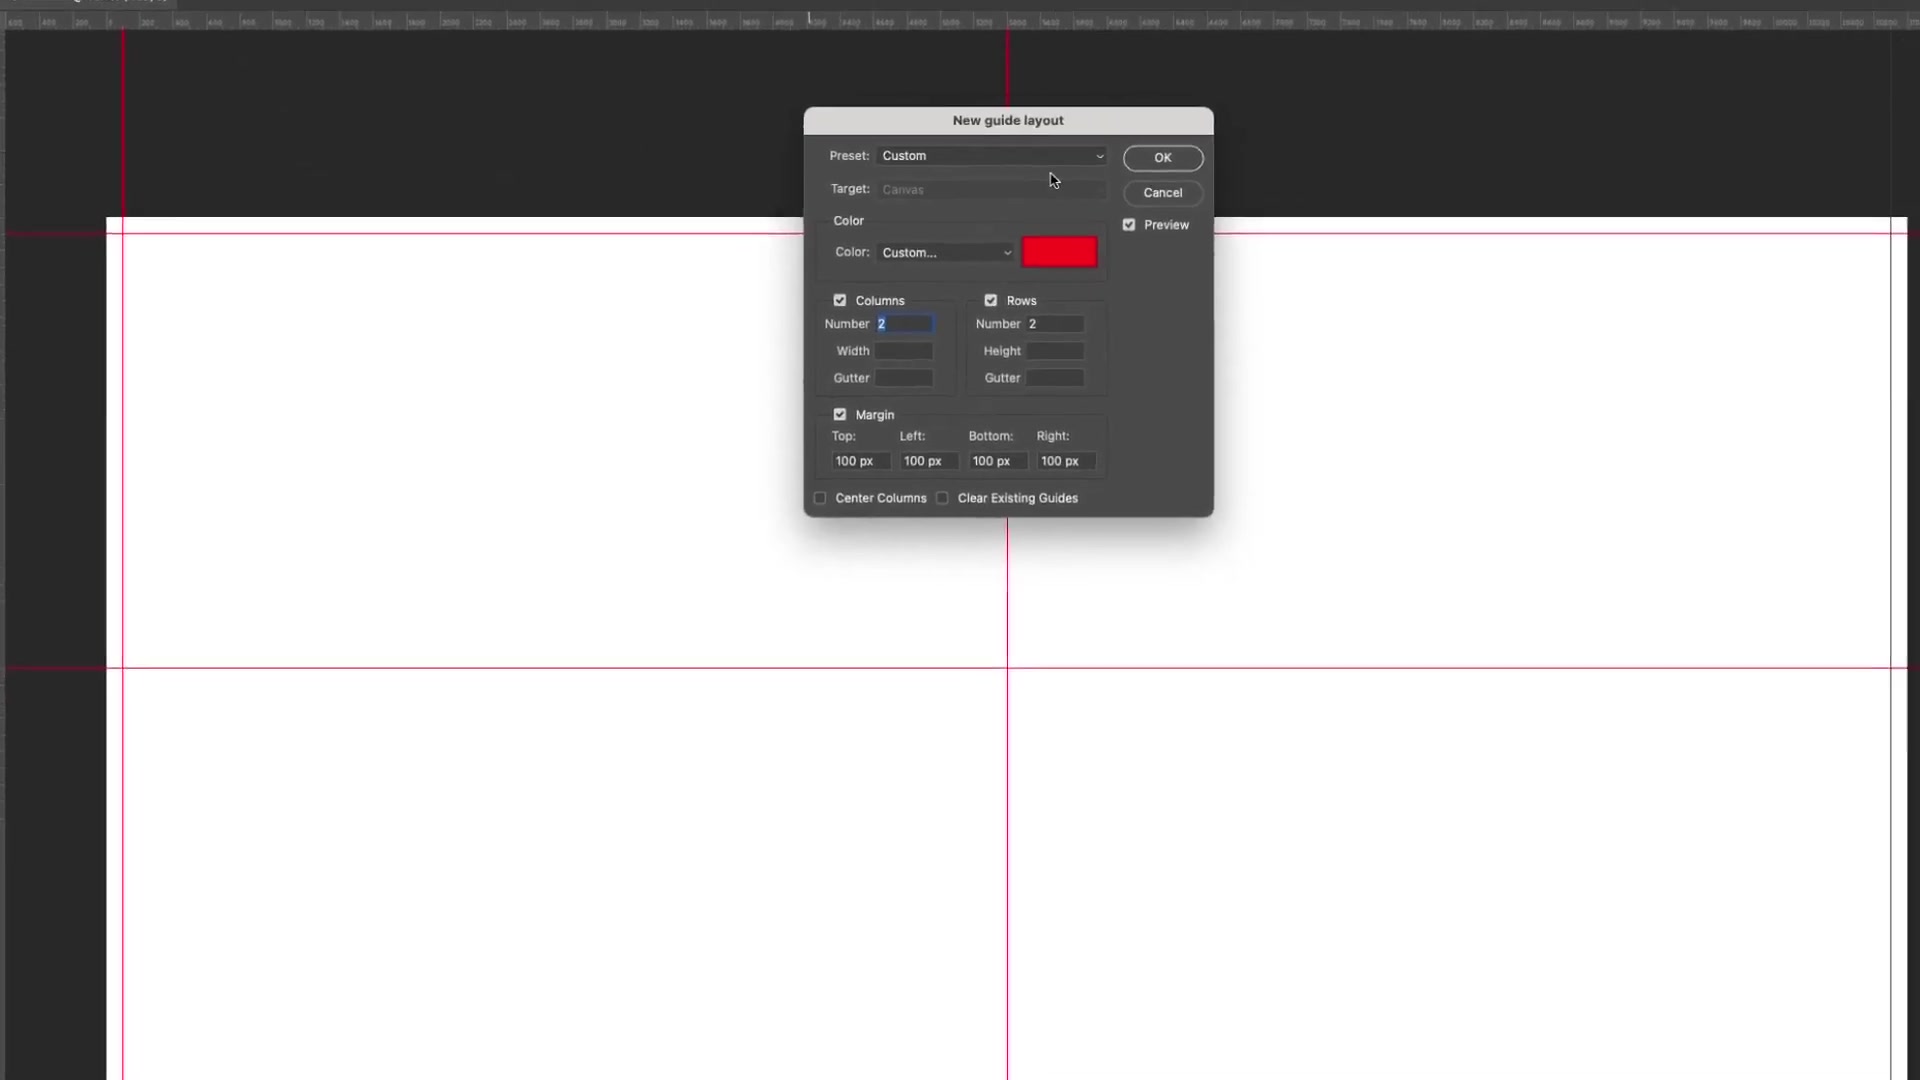
You should now see two red vertical guides dividing your canvas into three equal sections.
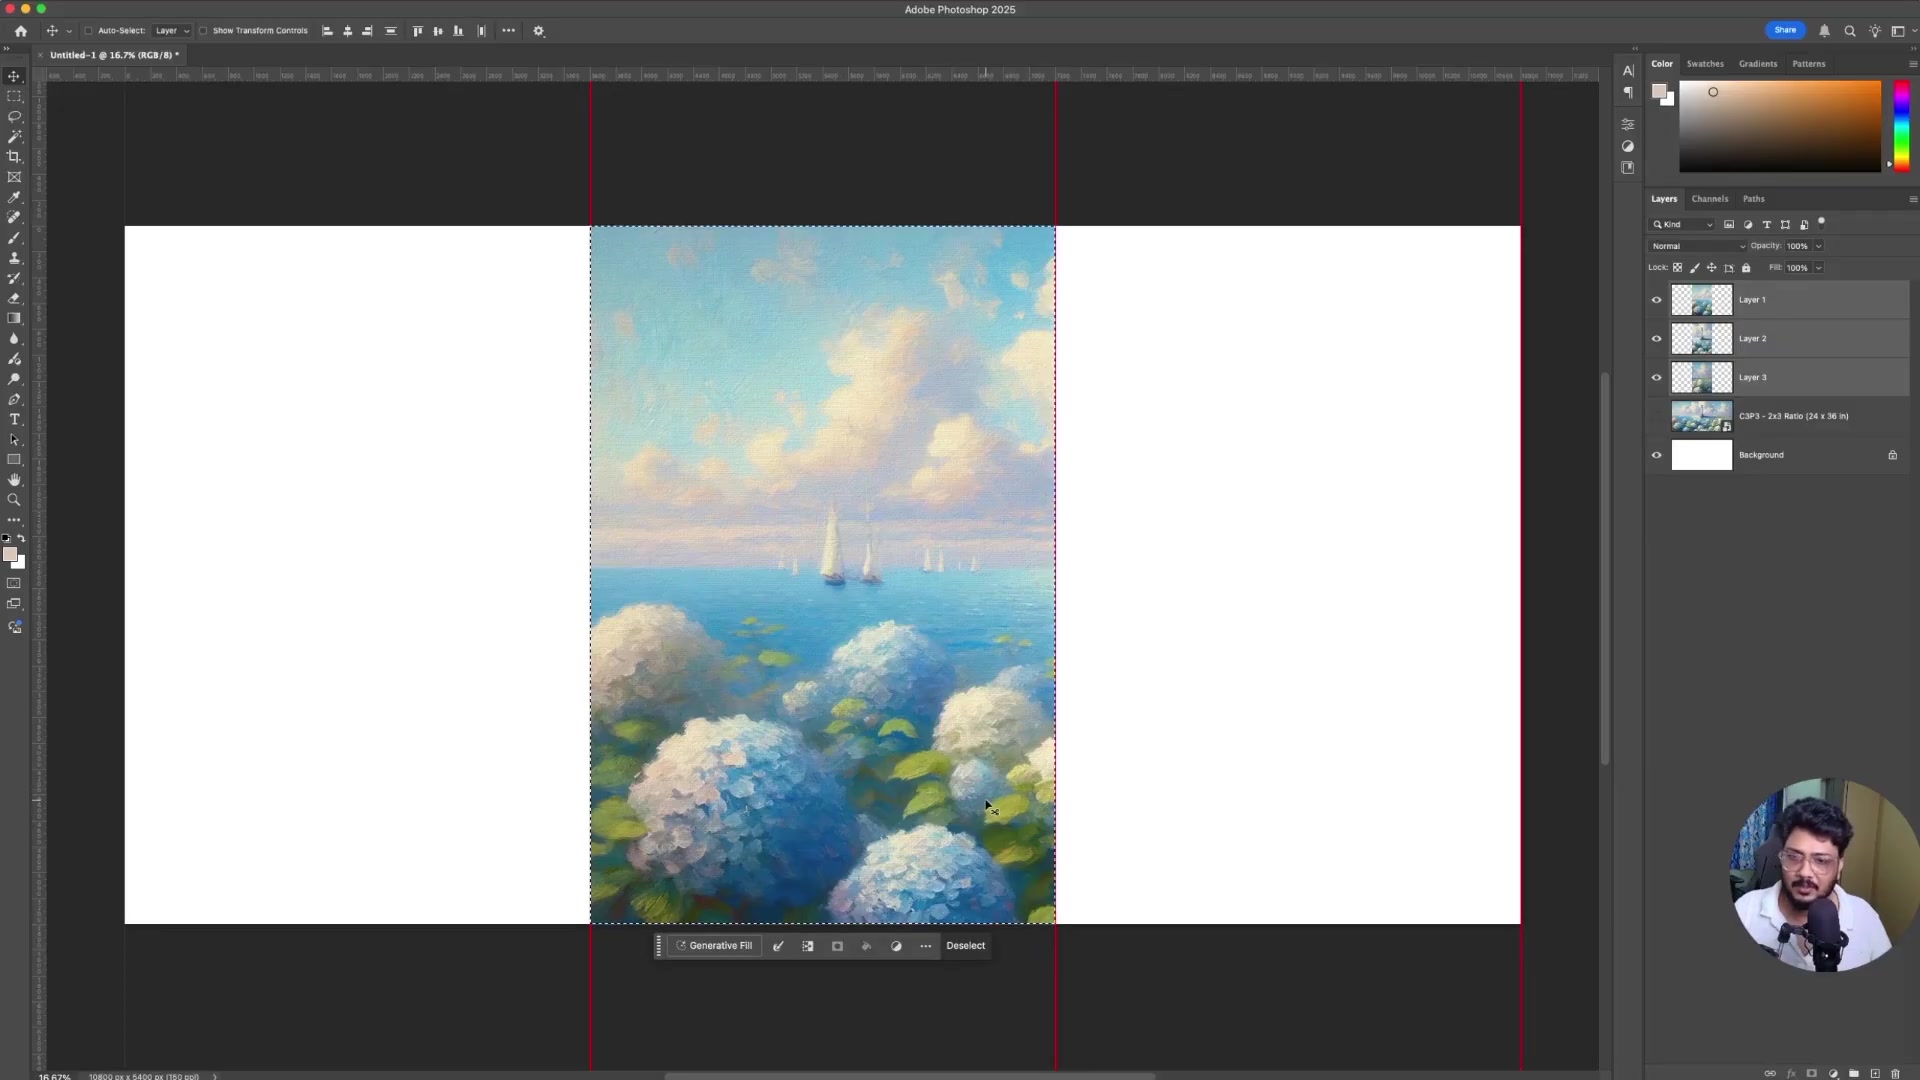
Step 3: Place Your Panoramic Image
Go to File > Place Embedded
Select your panoramic image
Position and resize it to fit the canvas
Press Enter to confirm placement
Your panoramic image should ideally match the 72x36 inch dimensions to avoid distortion.
Step 4: Select and Split Each Panel
Now you'll create three separate layers, one for each panel:
Enable snapping by going to View > Snap to Guides
Select the Rectangular Marquee Tool from the toolbar
Click and drag to select the left third of the image (it will snap to the guides)
Press Ctrl+J (Windows) or Cmd+J (Mac) to duplicate this section to a new layer
Repeat for the center and right sections
If the selection doesn't snap to the guides, make sure View > Snap to Guides is enabled.
Step 5: Align and Trim the Layers
Clean up each layer before exporting:
Select all three panel layers in the Layers panel (hold Shift while clicking)
Press Ctrl+A (Windows) or Cmd+A (Mac) to select all
With the Move Tool selected, click the Align horizontal centers and Align vertical centers buttons in the top toolbar
For each layer individually:
Hide the other layers (click the eye icon)
Ctrl+Click (Windows) or Cmd+Click (Mac) on the layer thumbnail to select it
Go to Image > Trim and choose Transparent Pixels
Click OK
Step 6: Save Each Panel as JPG
Make sure only one panel layer is visible
Go to File > Save a Copy
Choose JPEG format
Name it appropriately (e.g., "Panorama_Left.jpg")
Set quality to 12 (Maximum)
Click Save
Repeat for the center and right panels
You now have three separate JPG files ready to print as triptych wall art!
Method 2: Automated Batch Processing (Multiple Images)
If you have multiple panoramic images to convert, use the Bulk Mockup plugin to automate the entire process.
Step 1: Create Template Files
You'll need three template PSD files – one for each panel position (Left, Center, Right).
Create the Base Template
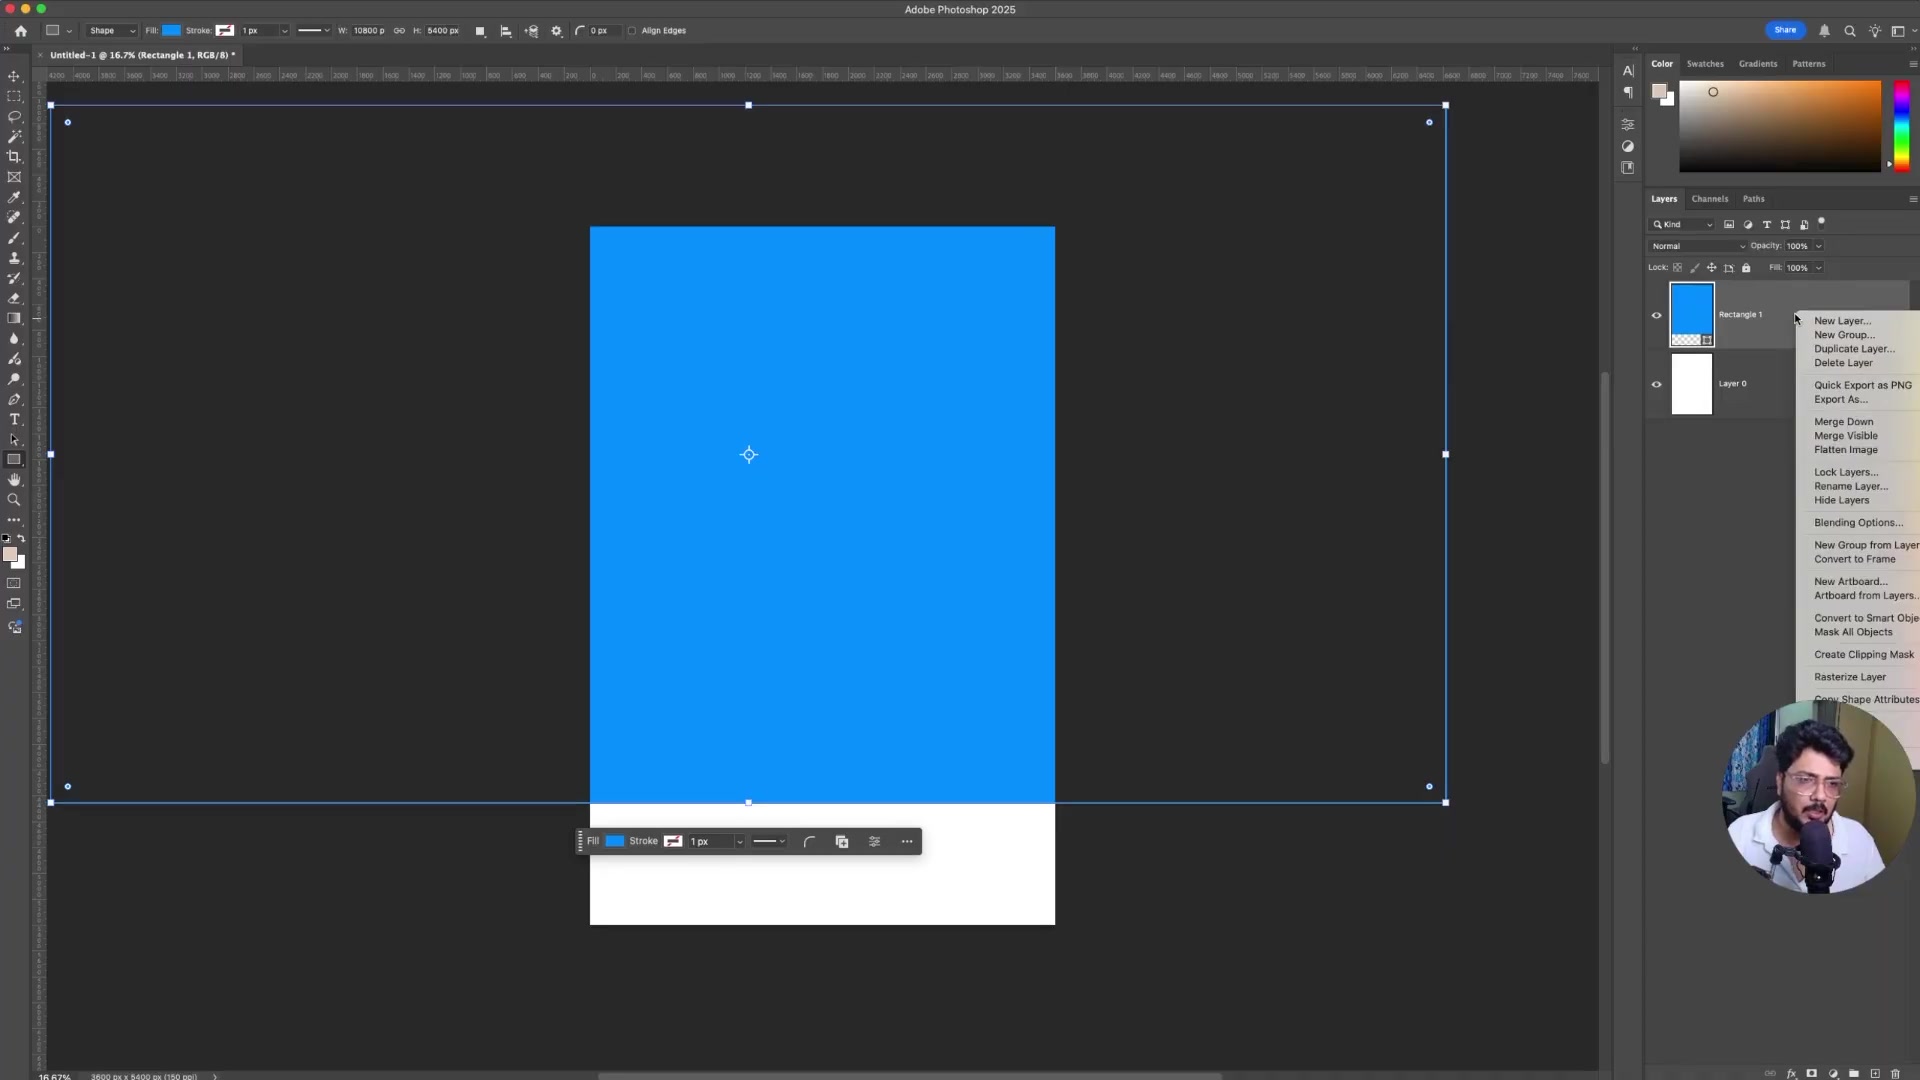
Create a new document: 24 x 36 inches, 150 DPI, Portrait orientation
Select the Rectangle Tool from the toolbar
Draw a rectangle with these exact dimensions:
Width: 10800 pixels (72 inches × 150 DPI)
Height: 5400 pixels (36 inches × 150 DPI)
Right-click the rectangle layer and select Convert to Smart Object
Use the Move Tool to center the rectangle both horizontally and vertically
Position for Each Panel
Left Panel Template: Shift the rectangle to align with the left edge of the canvas. Save as "Template_Left.psd"
Center Panel Template: Keep the rectangle centered. Save as "Template_Center.psd"
Right Panel Template: Shift the rectangle to align with the right edge of the canvas. Save as "Template_Right.psd"
Place all three templates in a single folder (e.g., "Triptych Templates").
Step 2: Configure Bulk Mockup Plugin
Open the Bulk Mockup plugin in Photoshop (Plugins > Bulk Mockup):
PSD Templates Folder: Select the folder containing your three template files
Design Files Folder: Select the folder with your panoramic images
Export Folder: Choose where to save the split panels
Step 3: Adjust Plugin Settings
Configure these settings for best results:
Resize Method: Select "Fill Canvas/Stretch"
Export Format: Choose JPG
Quality: Set to 12 (Maximum)
Folders: Enable "Create sub-folders per design file" to organise outputs
The "Fill Canvas/Stretch" option ensures your panoramic images completely fill each template without leaving gaps.
Step 4: Generate Your Triptychs
Double-check all settings
Click "Start Generating"
Wait for the plugin to process all images
The plugin will create a subfolder for each panoramic image, containing three JPG files (Left, Center, Right).
Step 5: Review Your Exports
Navigate to your export folder. You'll see organised subfolders with all your triptych panels ready for printing:
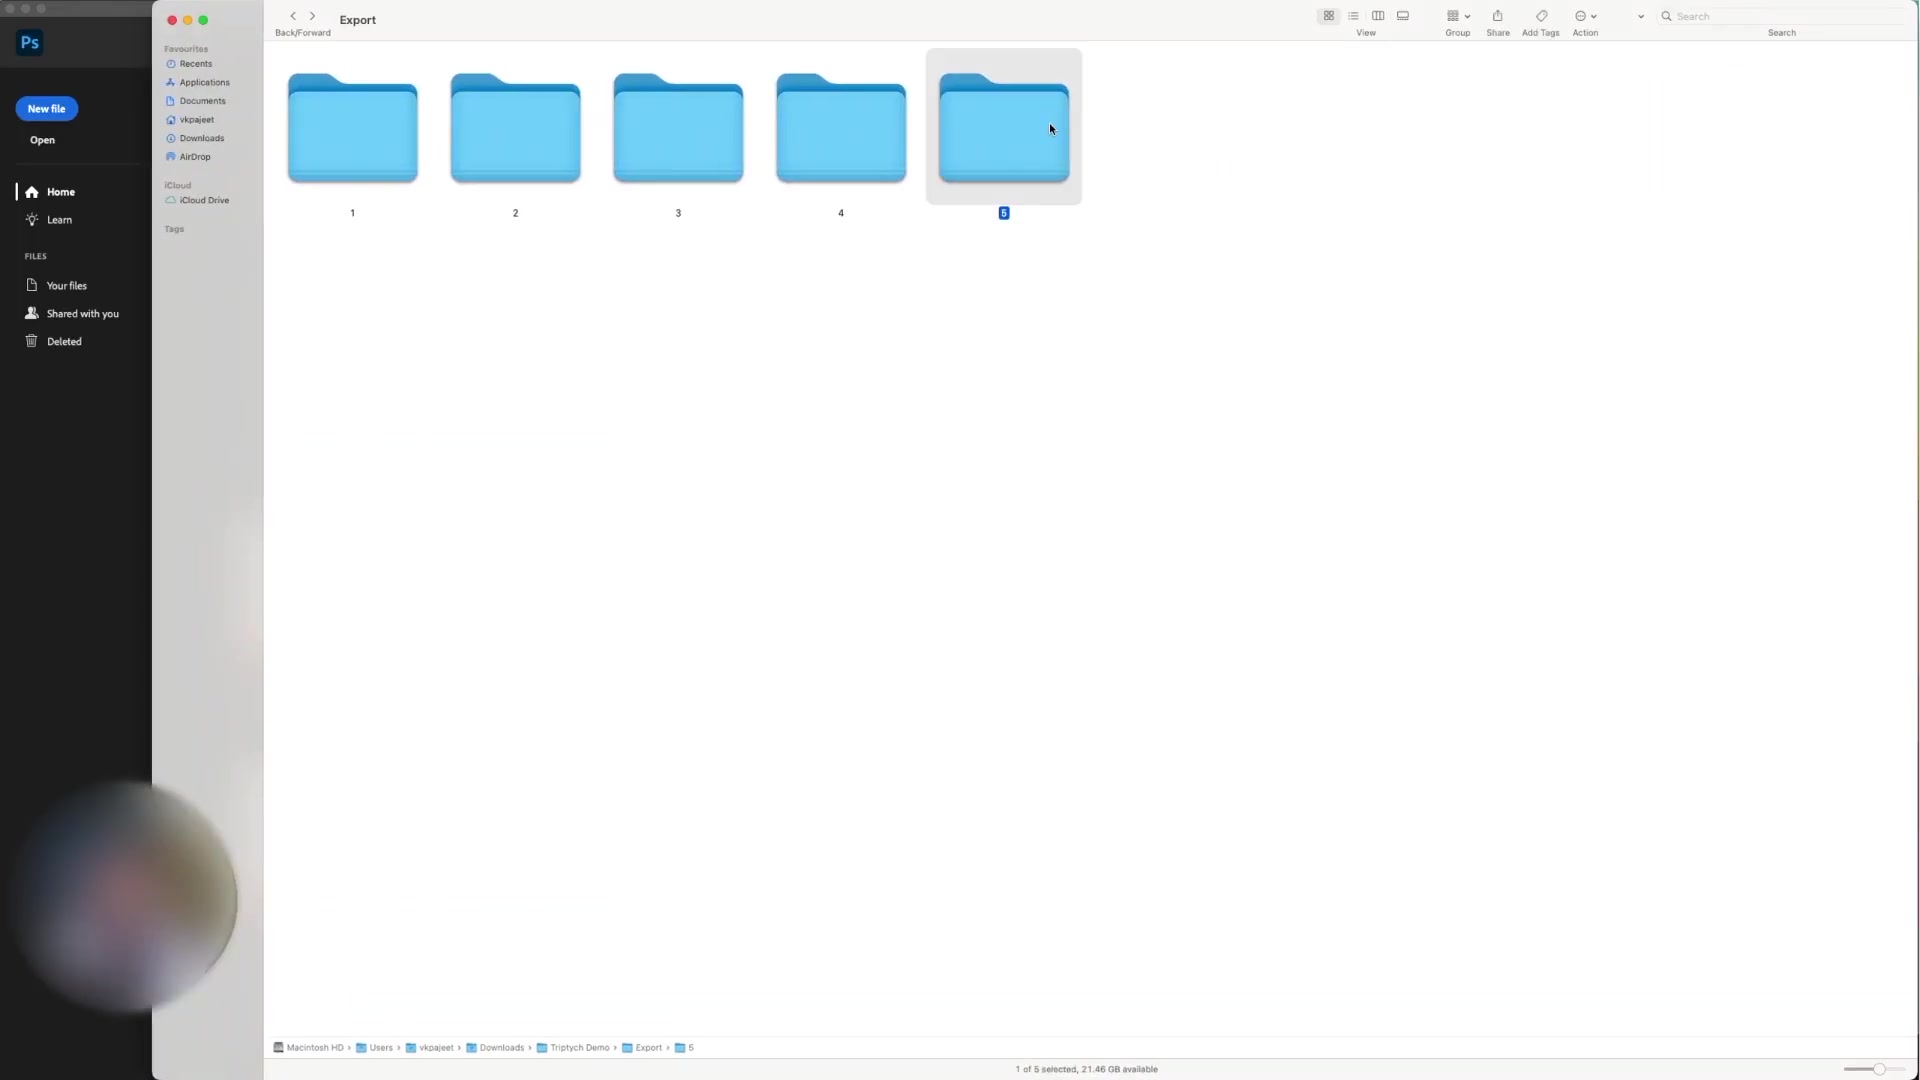
You've successfully batch-processed multiple panoramas into print-ready triptych sets!
Next Steps
Now that you have your split panels, you can:
Send the JPG files to a canvas printing service
Order 24x36 inch prints for each panel
Arrange them side-by-side with even spacing for professional wall art
For more advanced workflows with the Bulk Mockup plugin, check out:
Need More Help?
If you have questions about video mockup processing or encounter any issues, contact the Bulk Mockup support team at [email protected].