
Creating First Mockup With Photoshop Plugin Bulk Mockup – Intermediate’s Guide
This quick-start guide walks you through using the Bulk Mockup Photoshop Plugin for the first time to generate hundreds of mockups automatically.
Before You Begin
You'll need Adobe Photoshop CC 2022 or later with the Bulk Mockup Photoshop Plugin installed. Prepare three folders: one with your PSD mockup templates, one with your design files (PNG/JPG), and one empty folder for exports.
Step 1: Open the Bulk Mockup Photoshop Plugin
In Photoshop, go to Plugins > Bulk Mockup from the top menu to open the plugin panel.

Step 2: Prepare Your Smart Object Layer
Open one of your PSD mockup templates. In the Layers panel, rename the smart object layer where your design should appear to @design. This tells the plugin which layer to target.
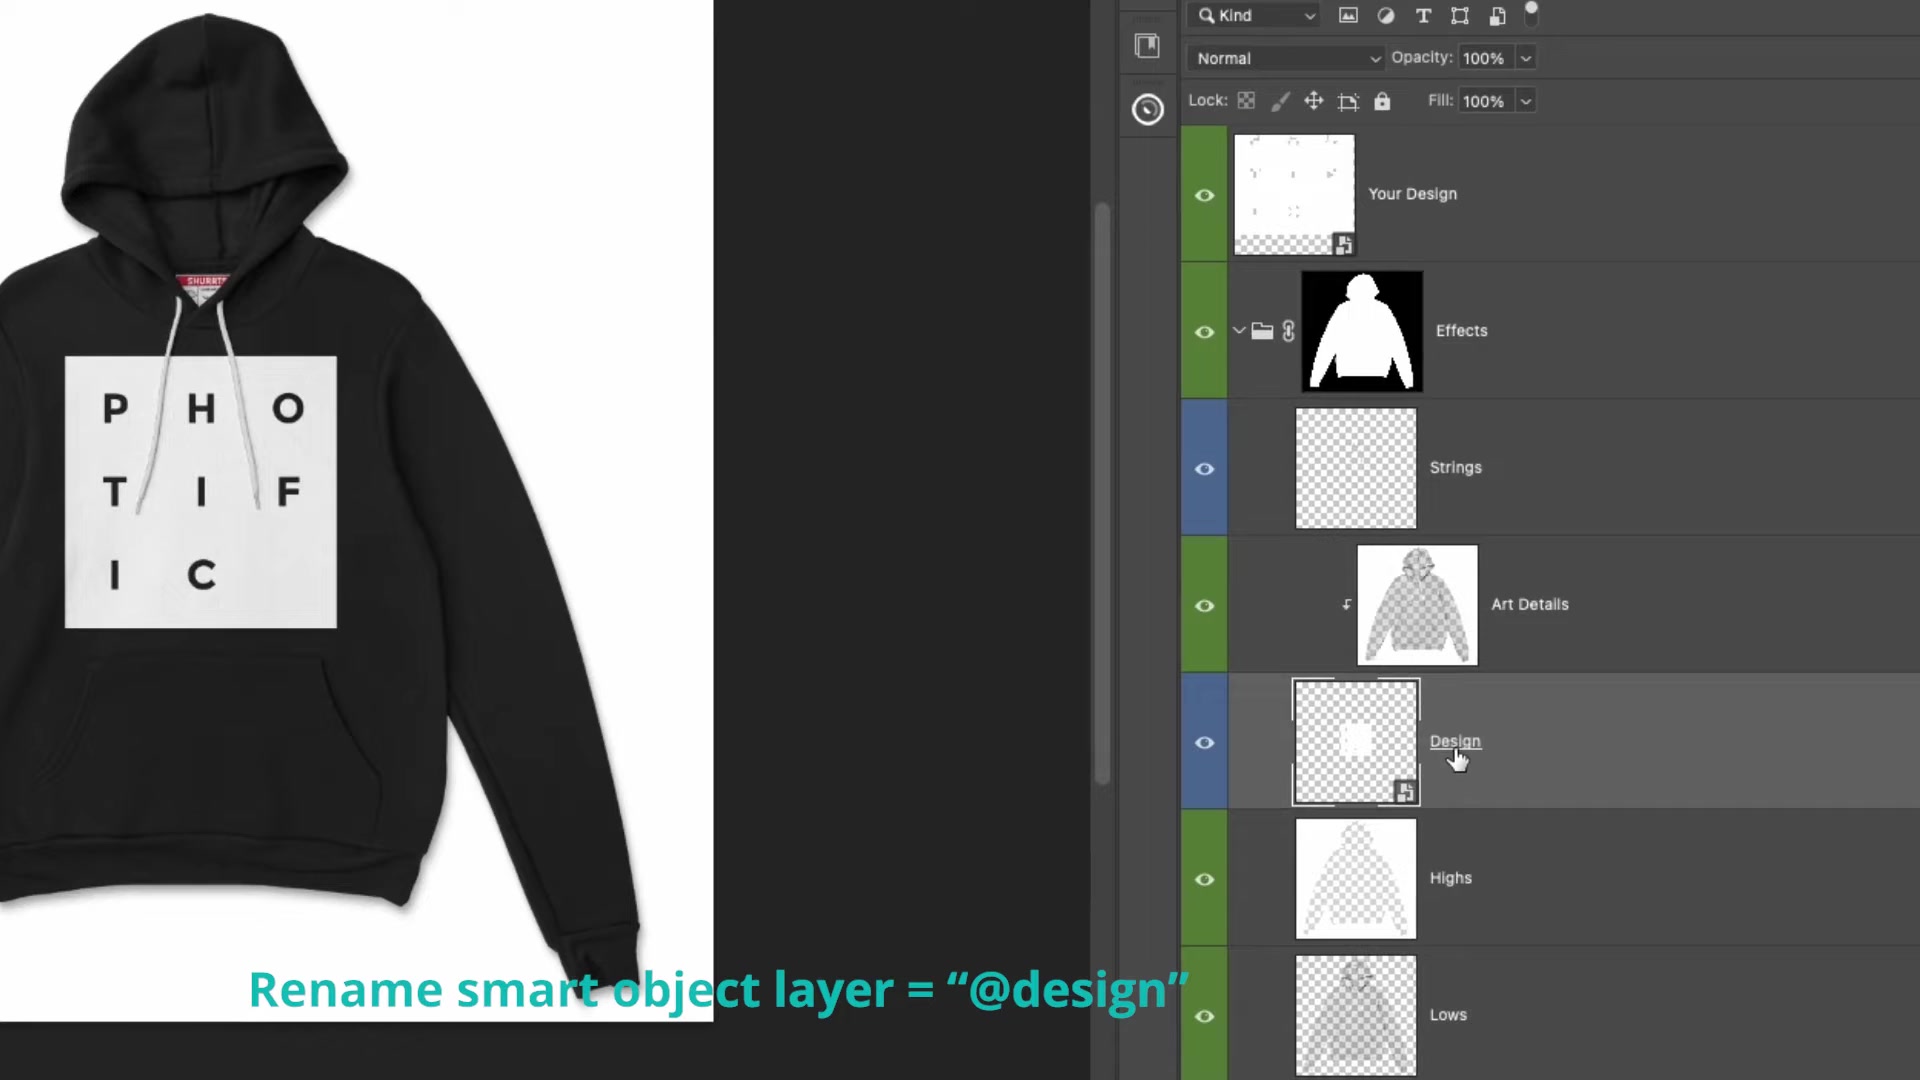
You only need to rename the smart object layer once per template. The plugin will remember this for all future generations with that template.
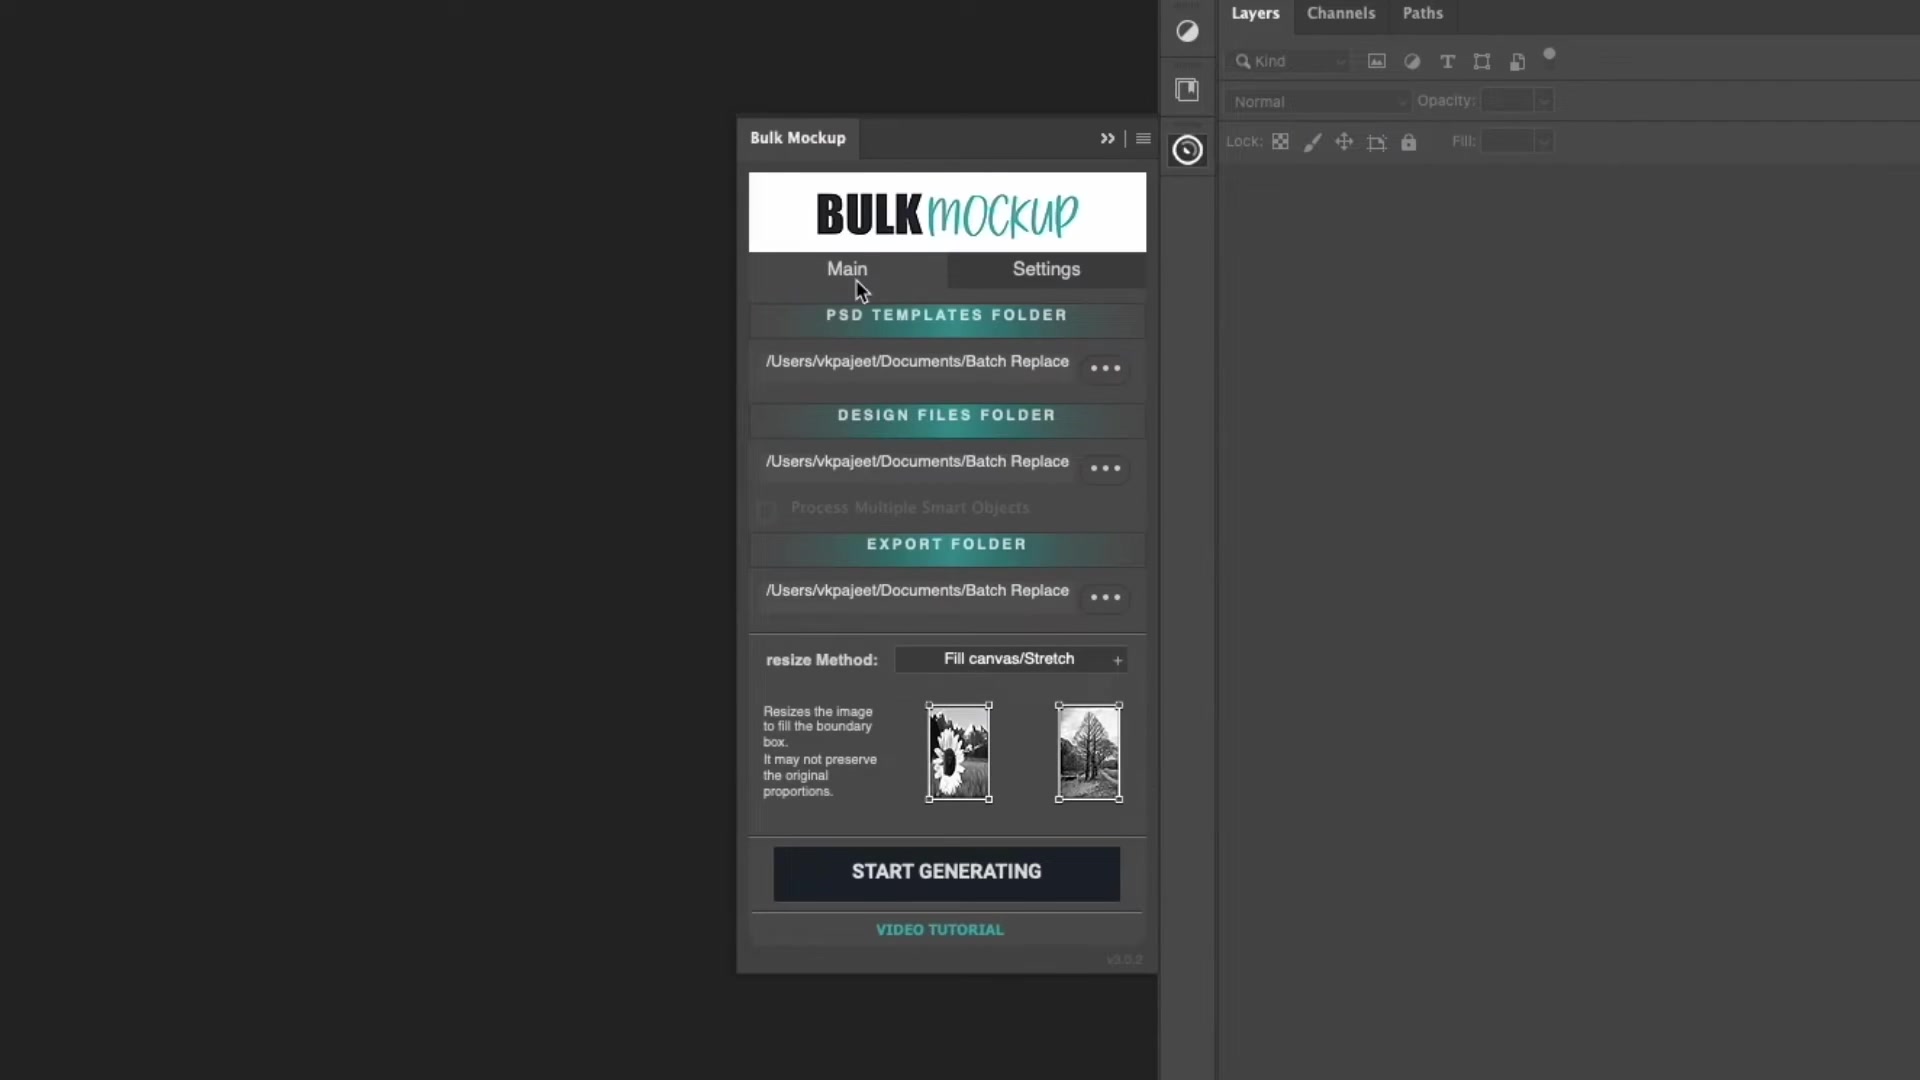
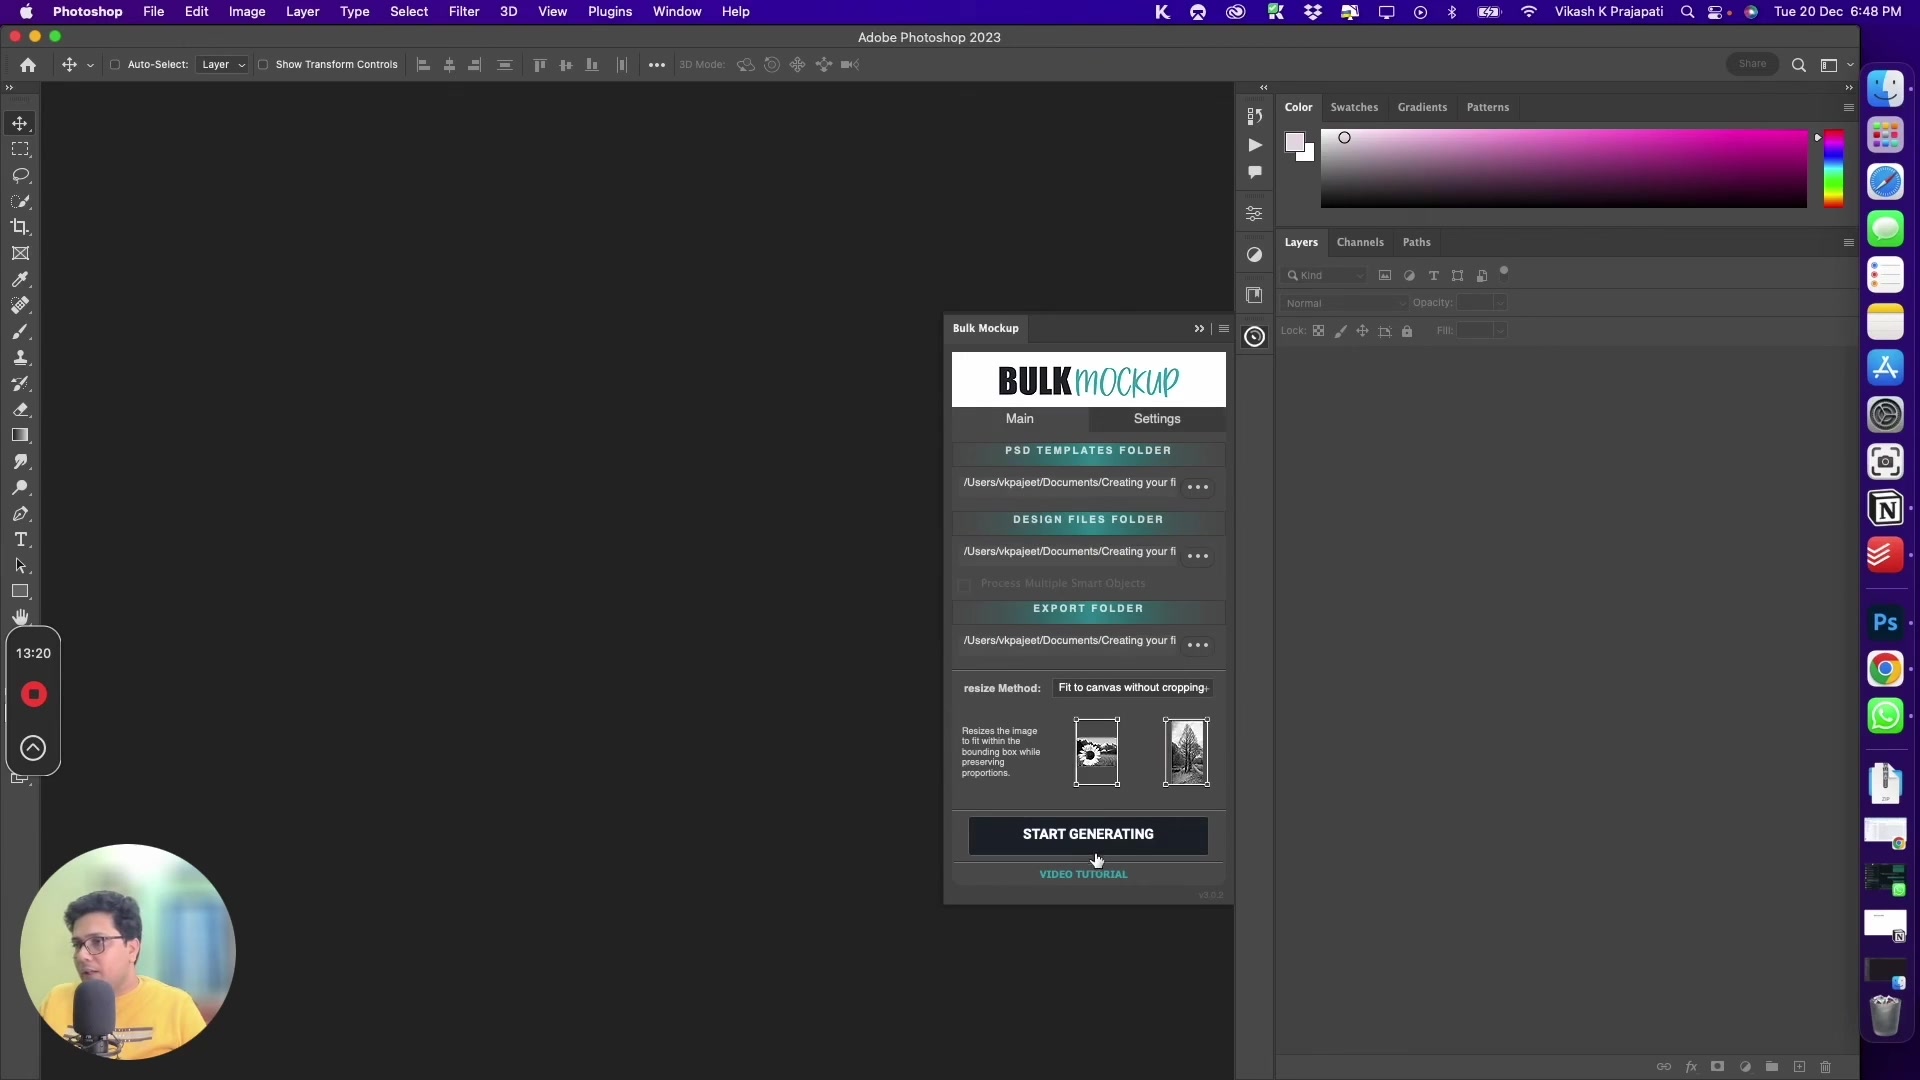
Step 3: Configure Main Settings
In the Main tab, set up your folders and resize method:
PSD Templates Folder: Select the folder containing your mockup templates
Design Files Folder: Select the folder with your designs to insert
Export Folder: Choose where to save the generated mockups
Resize Method: Select "Fit to canvas without cropping" (recommended for most POD products)
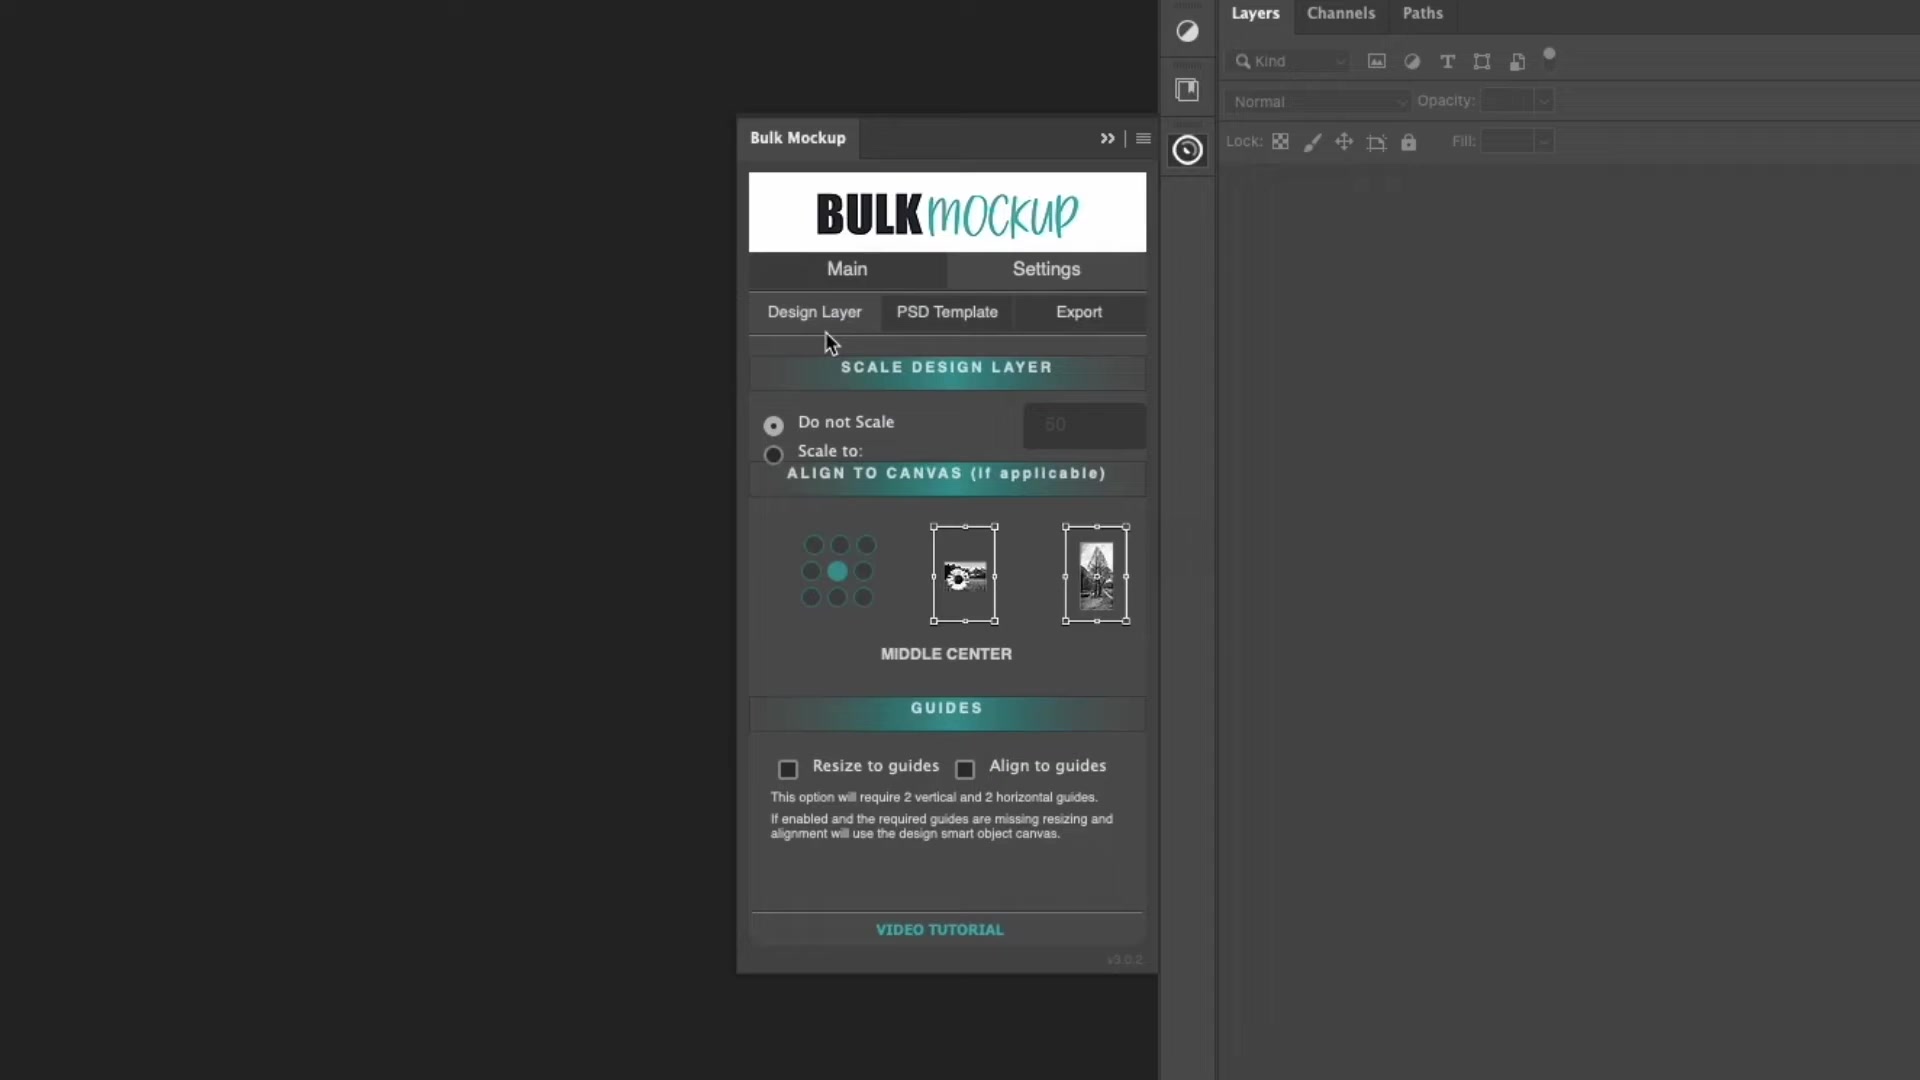
Step 4: Configure Design Layer Settings
In the Design Layer tab, adjust how your designs are placed:
Scale: Set percentage to resize designs inside the smart object
Align: Choose alignment (center is default)
Guides: Enable if your templates use Photoshop guides for positioning
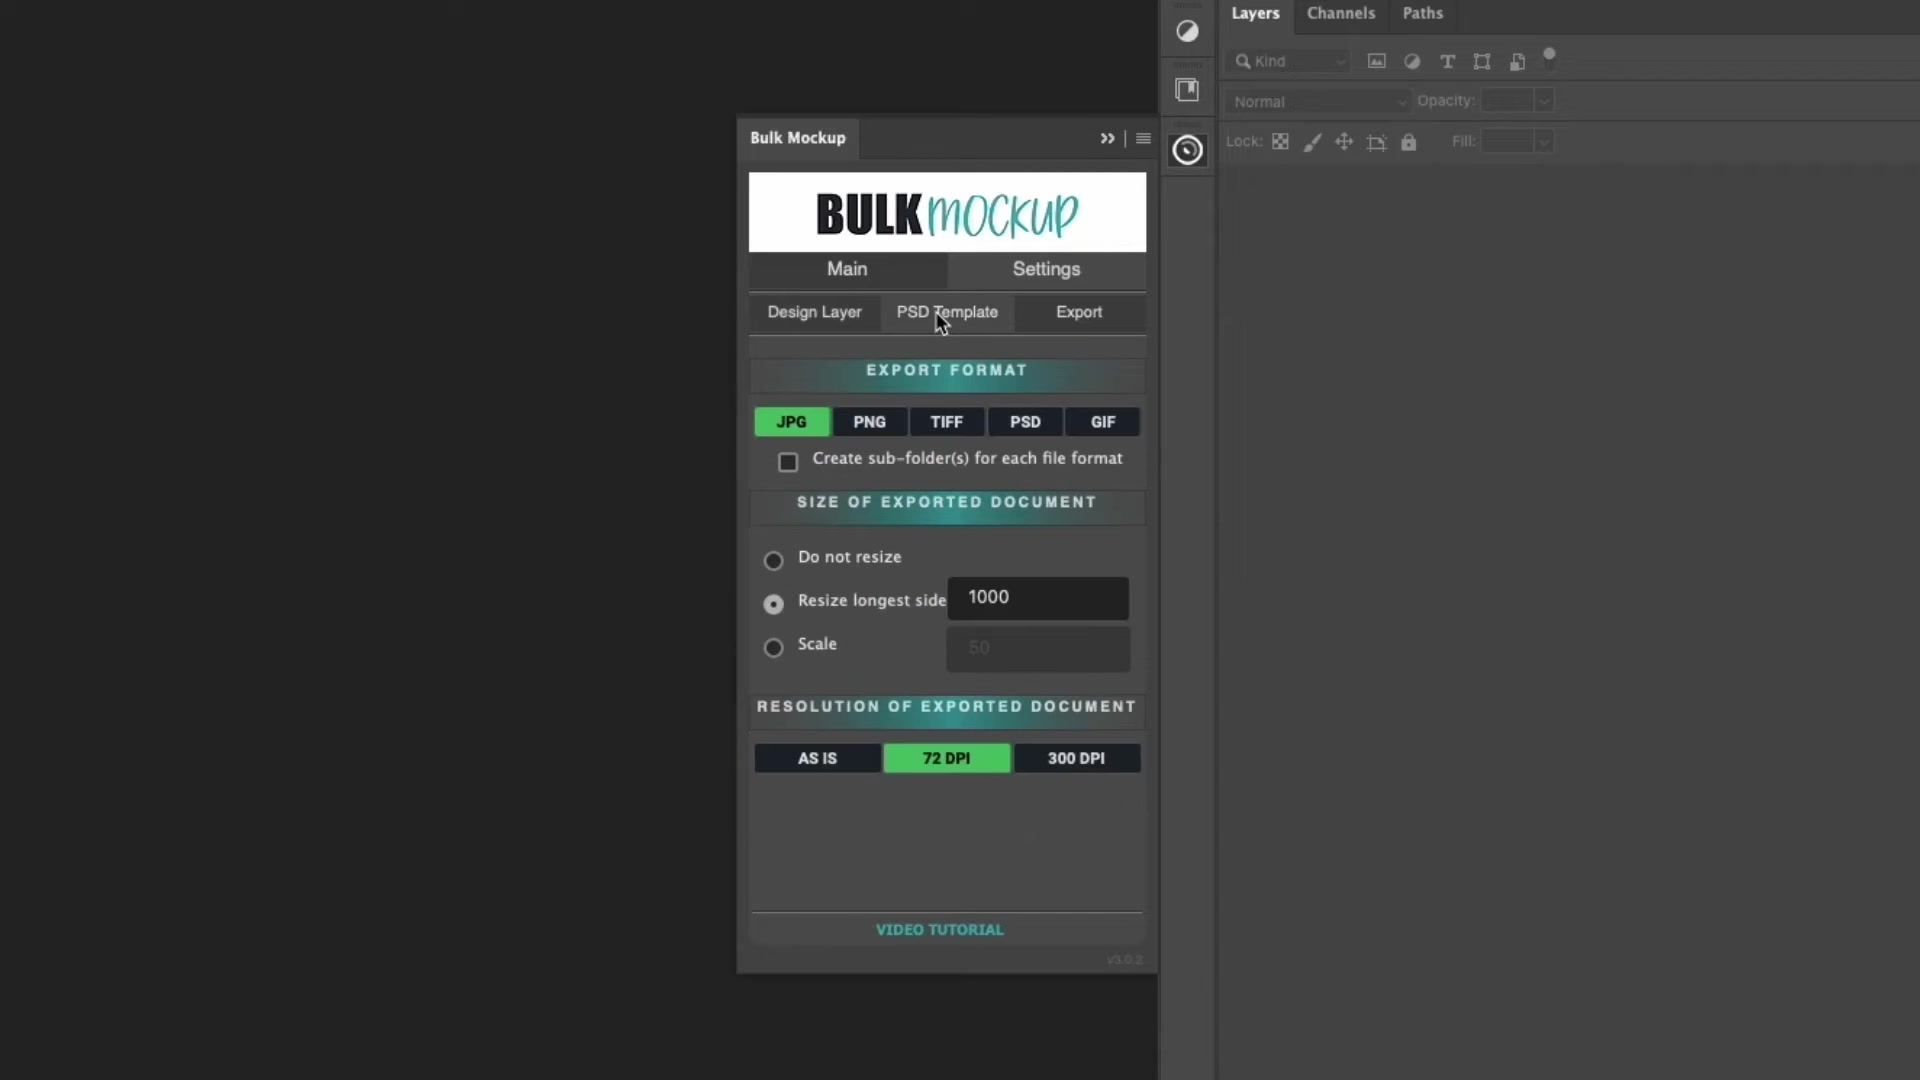
Step 5: Set Export Format
In the PSD Template tab, choose your export settings:
Format: Select JPG or PNG (JPG recommended for POD platforms)
Size: Set dimensions or leave at original template size
Resolution: 72 DPI for web, 300 DPI for print
Step 6: Organize Export Structure
In the Export tab, customize how files are organized:
Subfolders: Choose "By Design" or "By PSD Template" to organize output
File Naming: Use patterns like {design}_{template} to name your mockups

For detailed export folder options, see How to Organize Exports with Export Folder Settings.
Step 7: Start Generating Mockups
Click the START GENERATING button at the bottom of the plugin panel. The plugin will process all combinations of your designs and templates, saving organized JPG files to your export folder.
Depending on the number of designs and templates, the plugin can generate hundreds or thousands of mockups in minutes. A typical batch of 50 designs × 20 templates (1,000 mockups) completes in under 2 minutes.
Working with Multiple Smart Objects
If your templates have multiple smart object layers, you can target specific ones or process them all. Learn more in How to Process Multiple Smart Object Layers.
Need More Help?
If you have questions or encounter any issues, contact the Bulk Mockup support team at [email protected].