
How to Bulk Add Patterns in Wallpaper Mockups
Learn how to edit wallpaper mockup templates in Photoshop and apply custom patterns to kids' room designs. This tutorial covers both manual pattern editing and automated batch processing using the Bulk Mockup plugin to create hundreds of mockups quickly.
What You'll Learn
By following this guide, you'll be able to:
Define and apply patterns to wallpaper mockup templates in Photoshop
Edit smart object layers to customize kids' room wall designs
Automate pattern application across multiple mockups using Bulk Mockup
Generate 100+ wallpaper mockups in minutes for print-on-demand or portfolio use
Before You Begin
Make sure you have the following ready:
Adobe Photoshop (cc2022 or later recommended)
Bulk Mockup plugin installed (v3.0.2 or newer) - Download here
PSD mockup templates with smart objects (e.g., kids' room templates from Envato)
PNG pattern files that are seamless (e.g., cute animal patterns)
Organized folders for your templates, patterns, and exports
If you're new to automating smart objects, check out How to Process Multiple Smart Object Layers for background on @design and @nested naming conventions.
Method 1: Manual Pattern Application (Single Mockup)
Use this method when editing one mockup at a time or testing patterns before bulk processing.
Step 1: Open Your Mockup Template
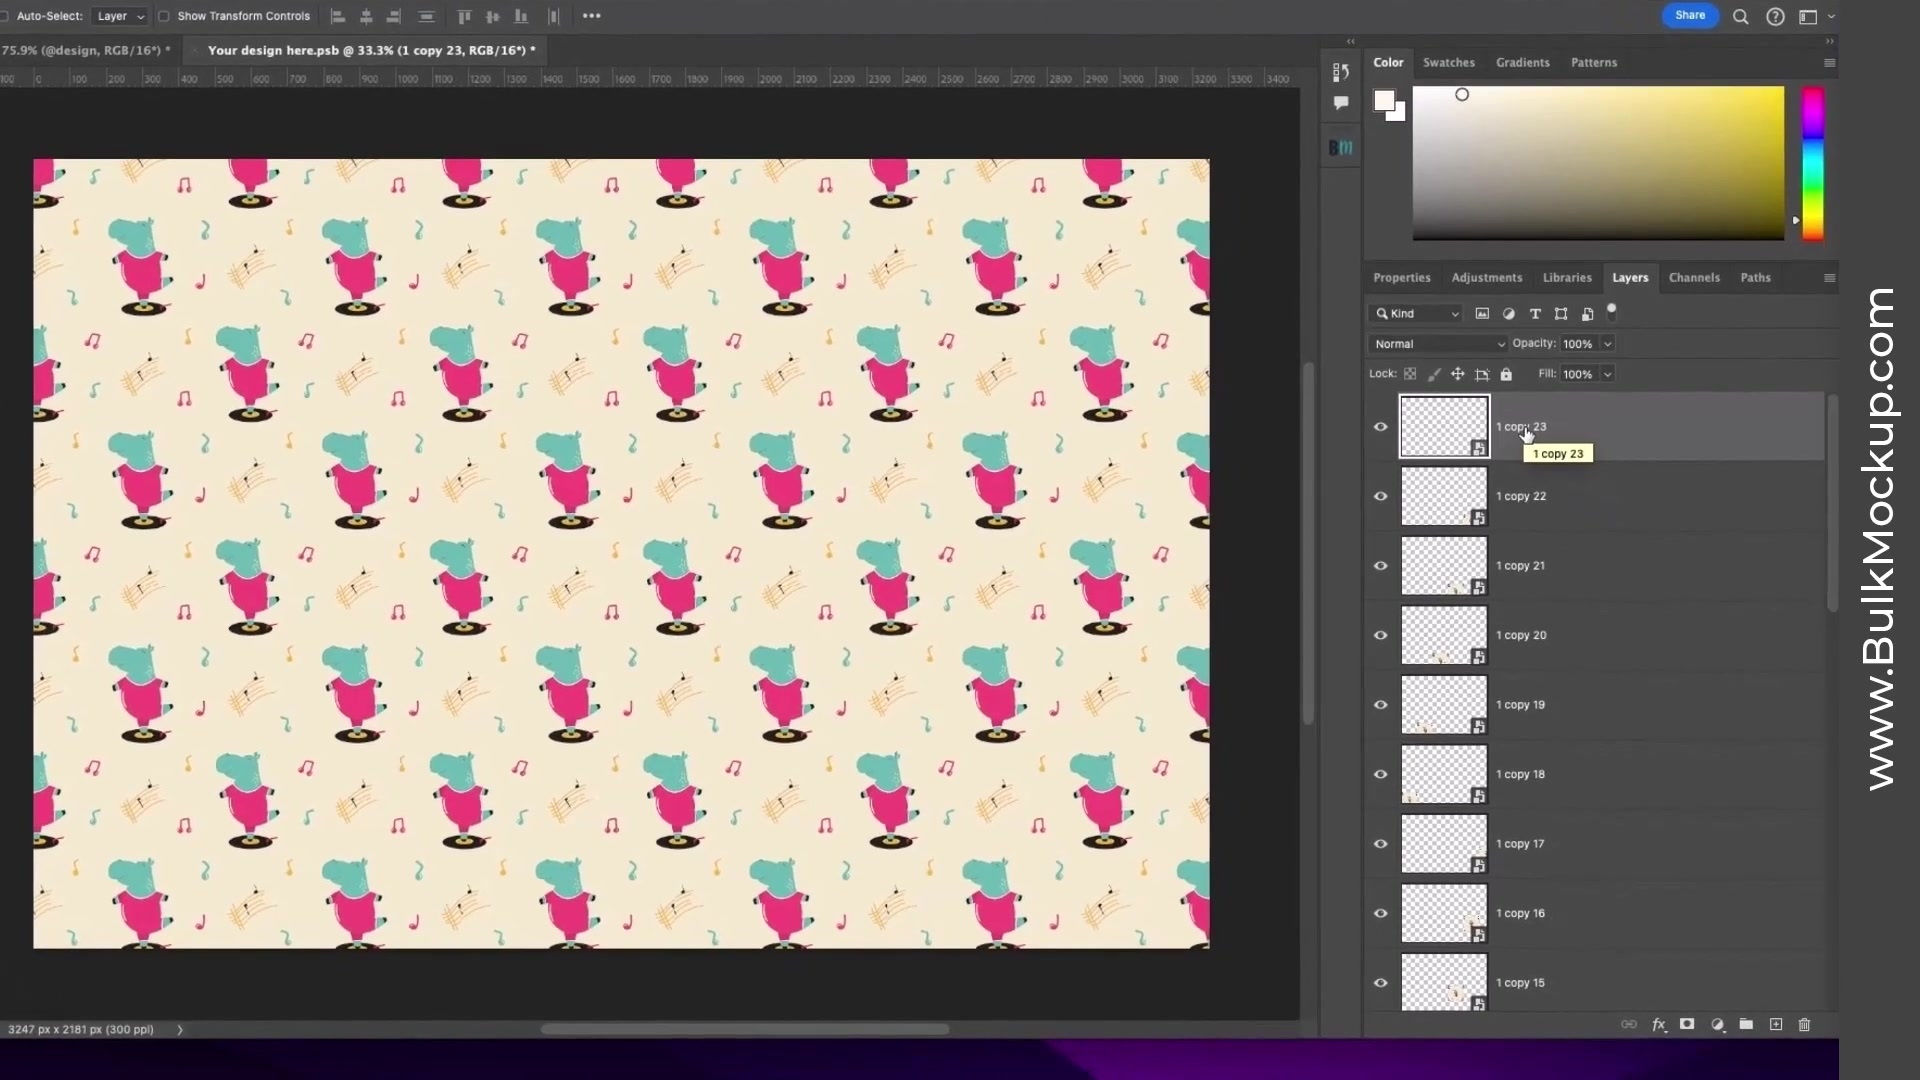
Open your kids' room PSD template in Photoshop. In the Layers panel, locate the group named "Wall_Your design here" or similar and expand it. You'll see smart object layers where your pattern will appear.
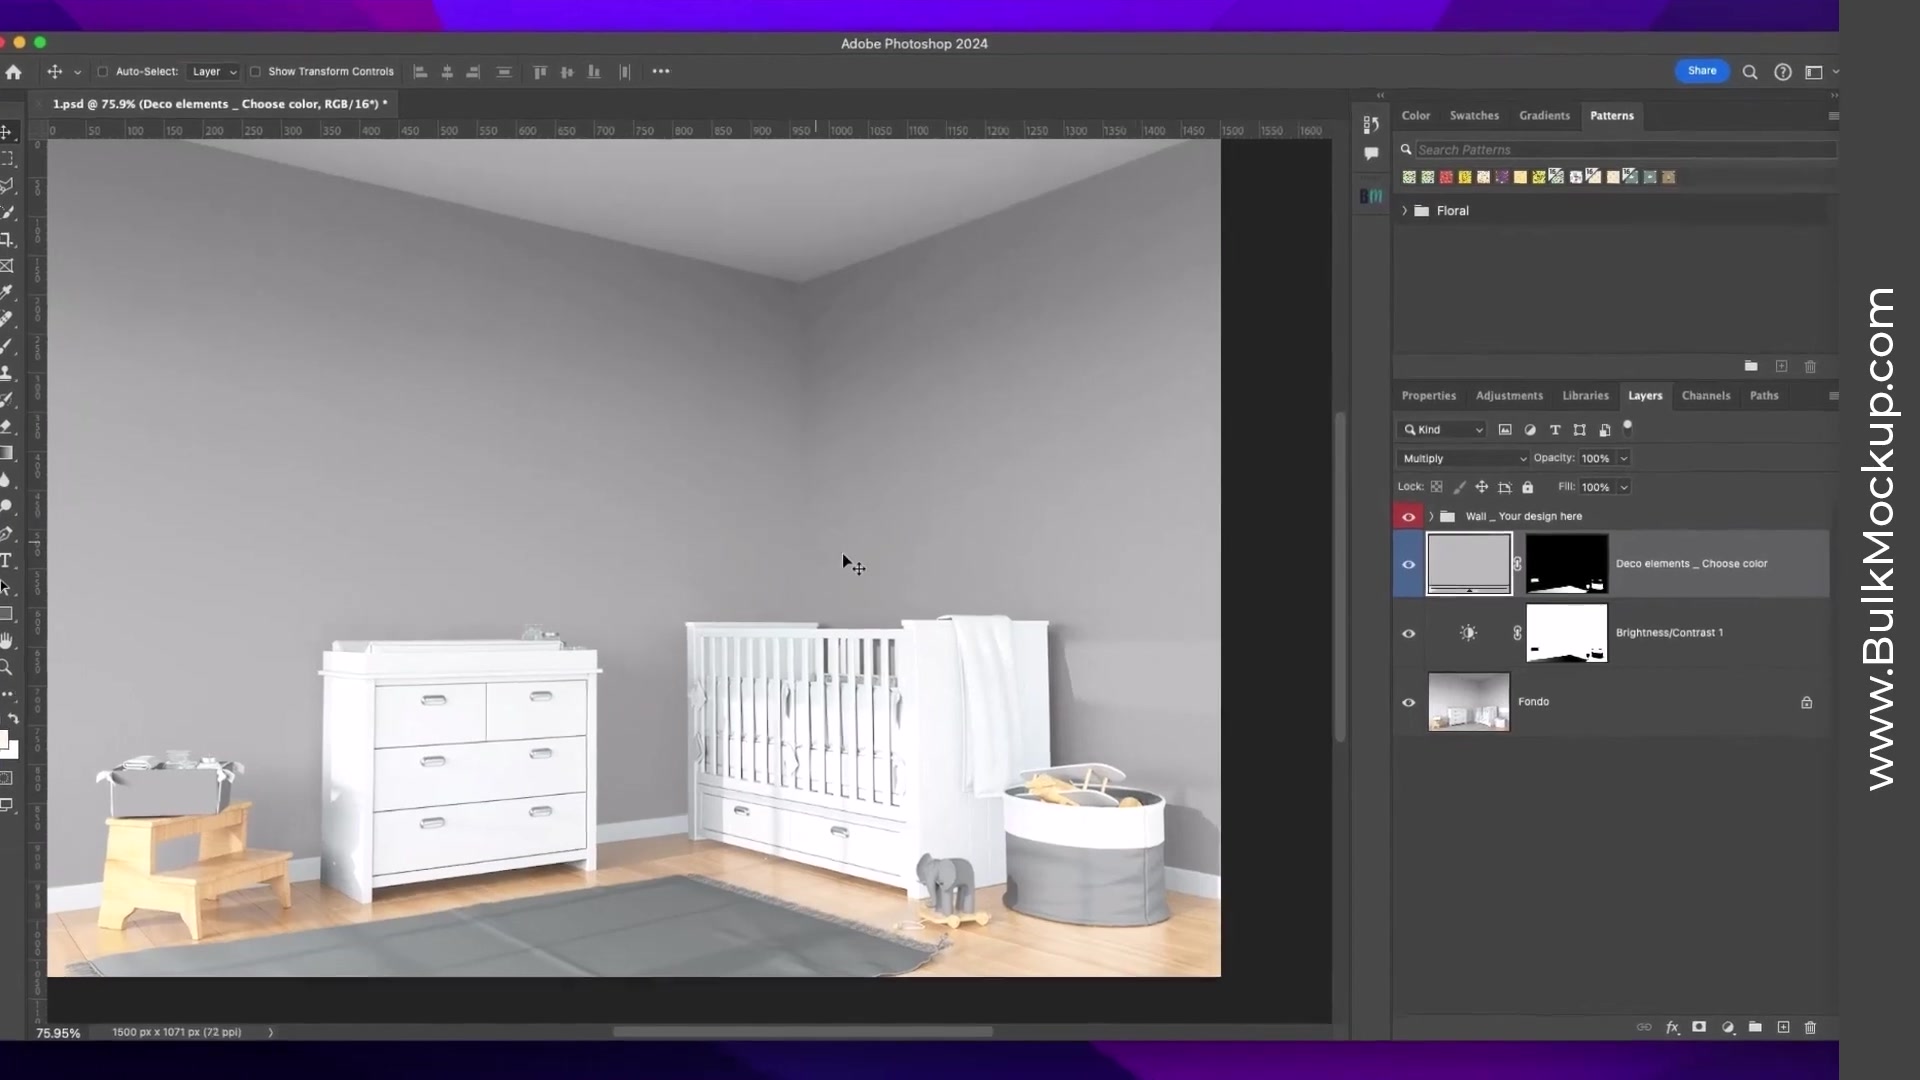
The smart object layers are often interlinked. Editing one will automatically update both walls in the room, so you only need to edit one.
Step 2: Define Your Pattern
Double-click one of the smart object thumbnails to open it in a new window. You'll see a blank gray canvas.
Now open your pattern PNG file (like a cute hippo or animal design). With the pattern file active, go to Edit > Define Pattern in the menu. Give your pattern a descriptive name (e.g., "pig" or "hippo") and click OK.
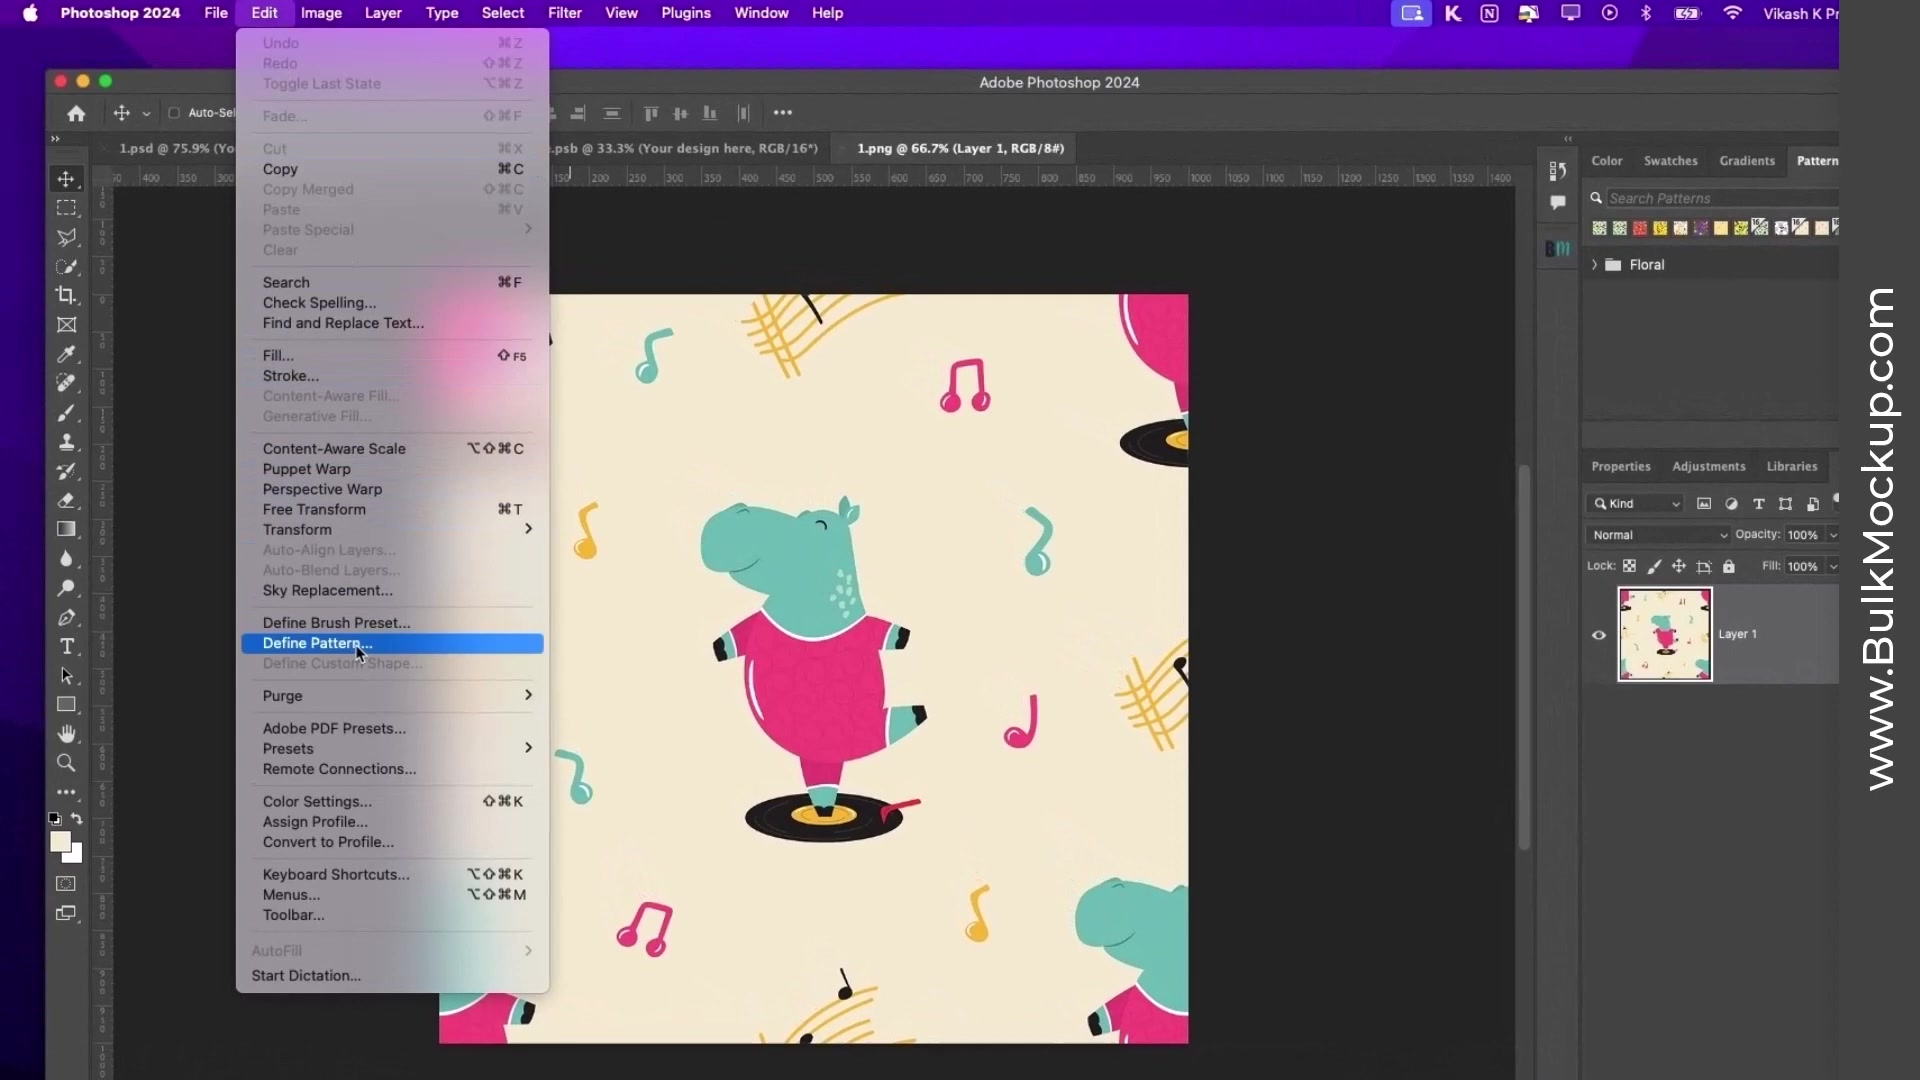
Close the pattern PNG file after defining it. You don't need it open anymore.
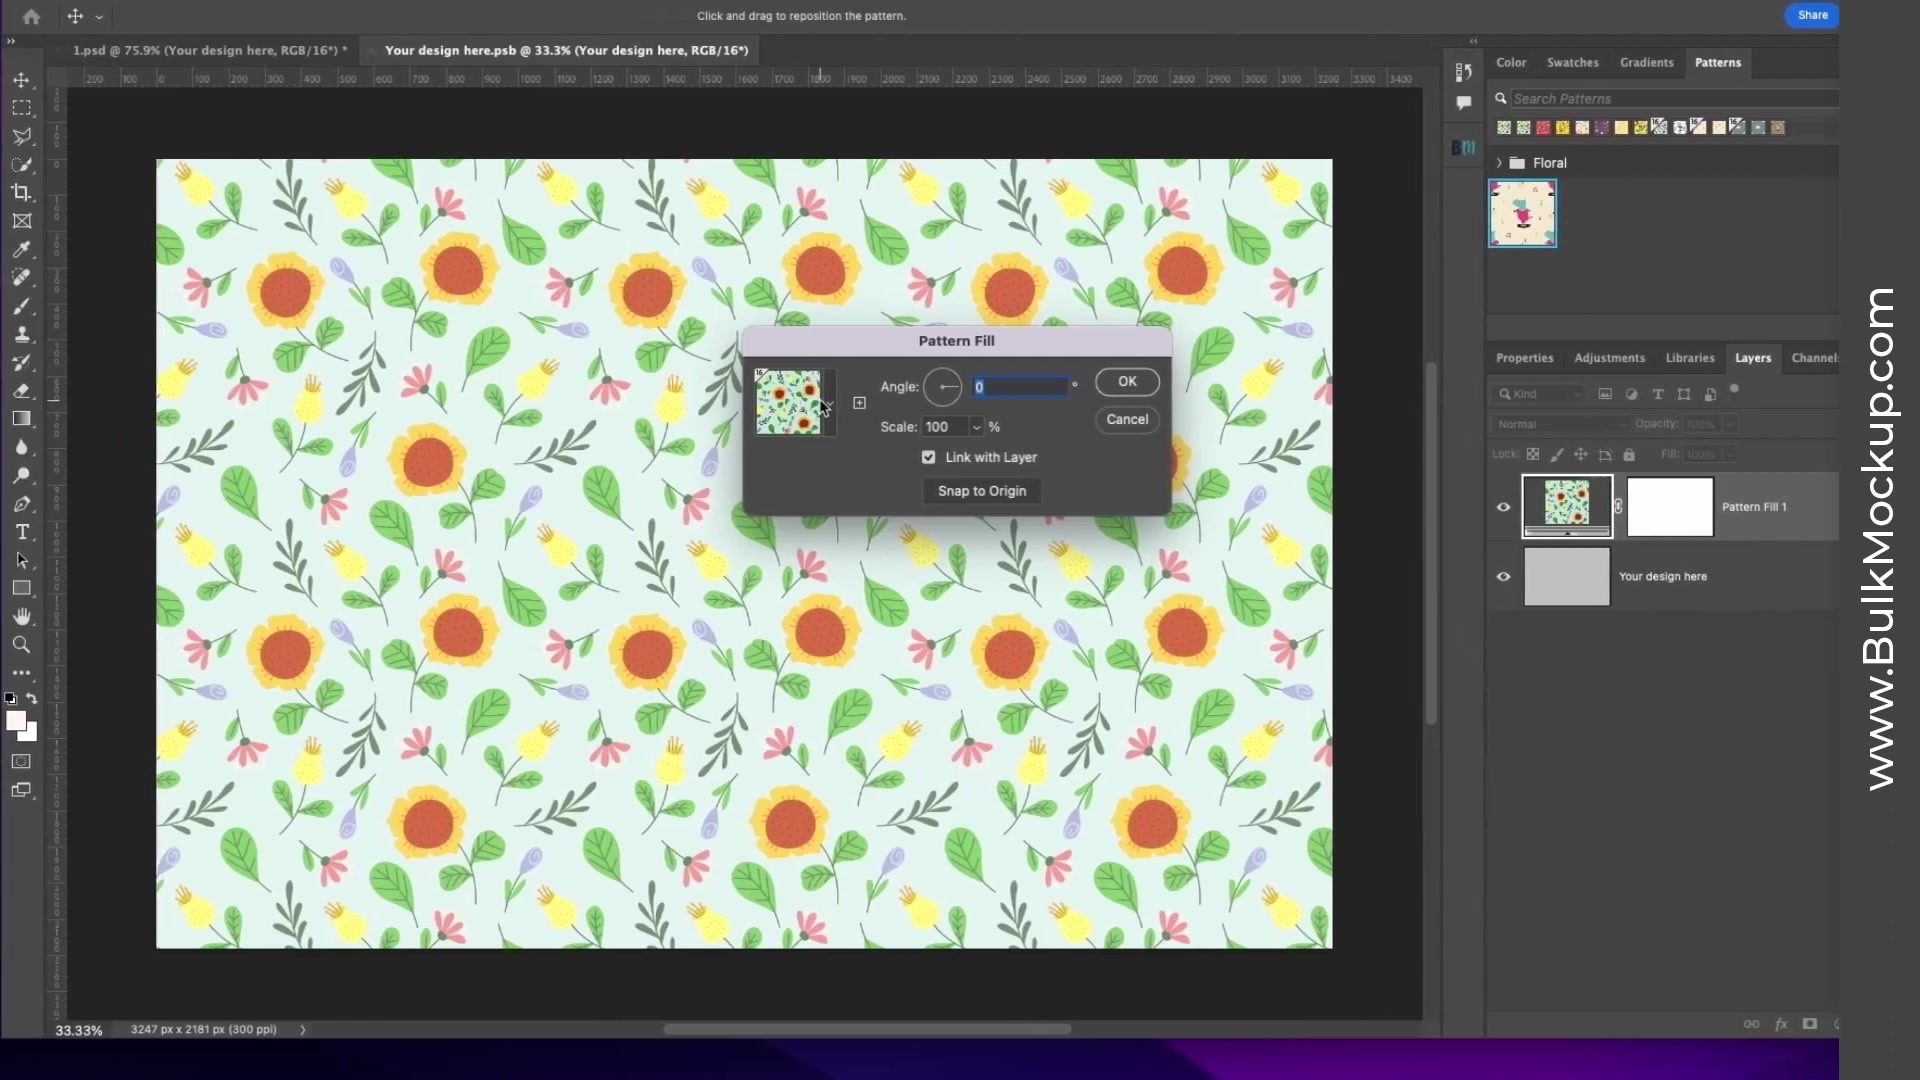
Step 3: Apply the Pattern Fill
Return to the smart object canvas window. Go to Layer > New Fill Layer > Pattern. In the Pattern Fill dialog:
Select the pattern you just defined from the dropdown
Adjust the Scale (usually 100% works well)
Set the Angle if needed (0° for standard orientation)
Click OK
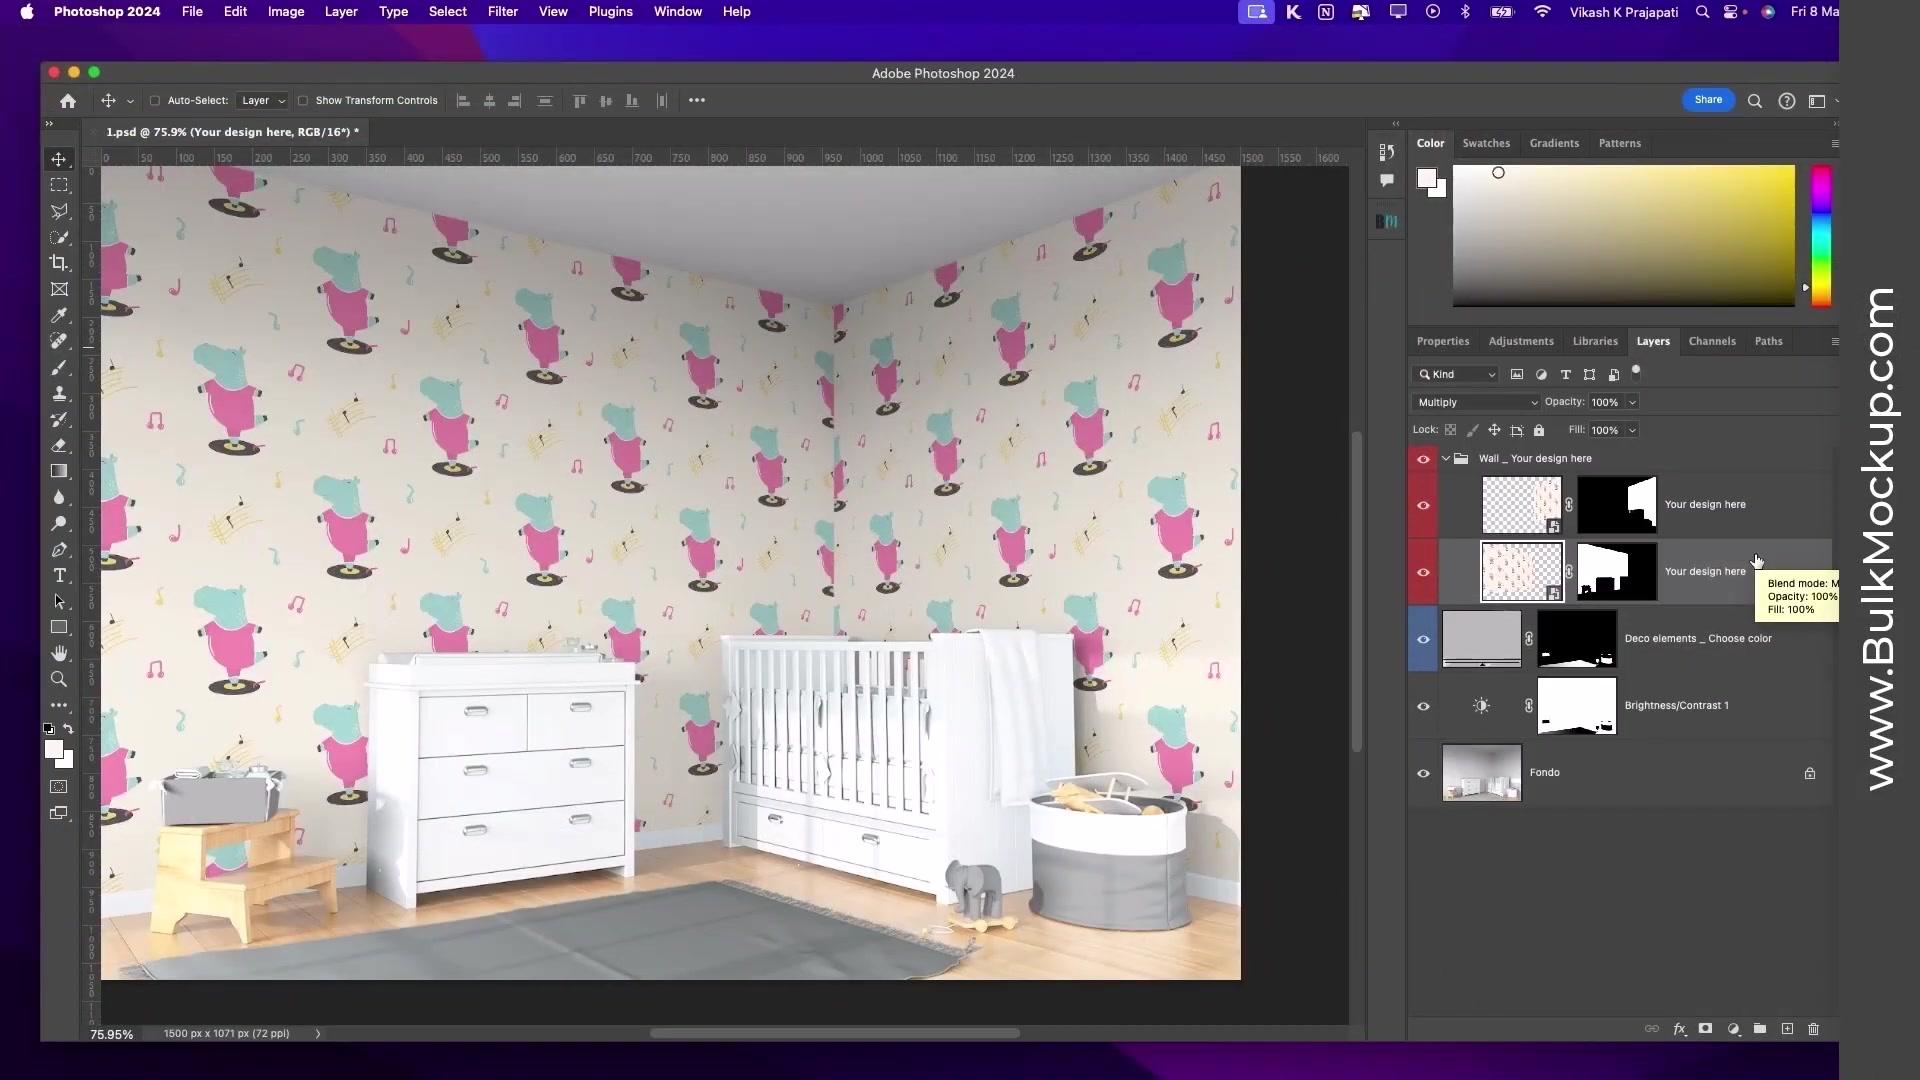
Step 4: Save and View Your Mockup
Go to File > Save to save the smart object. Close the smart object window. Back in your main template, you'll see the pattern applied to both walls automatically.
Repeat steps 2-4 for each additional pattern you want to test on different mockups.
This manual method works great for testing, but it becomes time-consuming when you need to create dozens or hundreds of mockups. For bulk processing, use Method 2 below.
Method 2: Automated Batch Processing (100+ Mockups)
Use this method to apply multiple patterns across multiple templates automatically using the Bulk Mockup plugin.
Step 1: Rename the Smart Object Layer
In your main template, locate the smart object layer in the Layers panel. Rename it to @design (must include the @ symbol).
The @design naming tells Bulk Mockup which layer to replace with your pattern files during automation.
Step 2: Prepare the Pattern Tiling
Double-click the @design smart object thumbnail to open it. Delete any existing pattern fill layers from Method 1 if present.
Place or drag one of your PNG patterns onto the canvas and resize it appropriately. Then duplicate this pattern layer by pressing Ctrl+J (Windows) or Cmd+J (Mac).
Hold Shift and drag the duplicated layer to tile it next to the original. Continue duplicating and positioning layers until the entire canvas is filled with your pattern tiles.
Step 3: Rename a Duplicate Layer to @nested
In the Layers panel, select one of the duplicated pattern layers (any copy will work). Rename this layer to @nested.
The @nested layer tells the plugin to duplicate and tile the design automatically. You only need to rename one of the duplicated layers.
Save the smart object (File > Save) and close it. Repeat these steps for all your mockup templates.
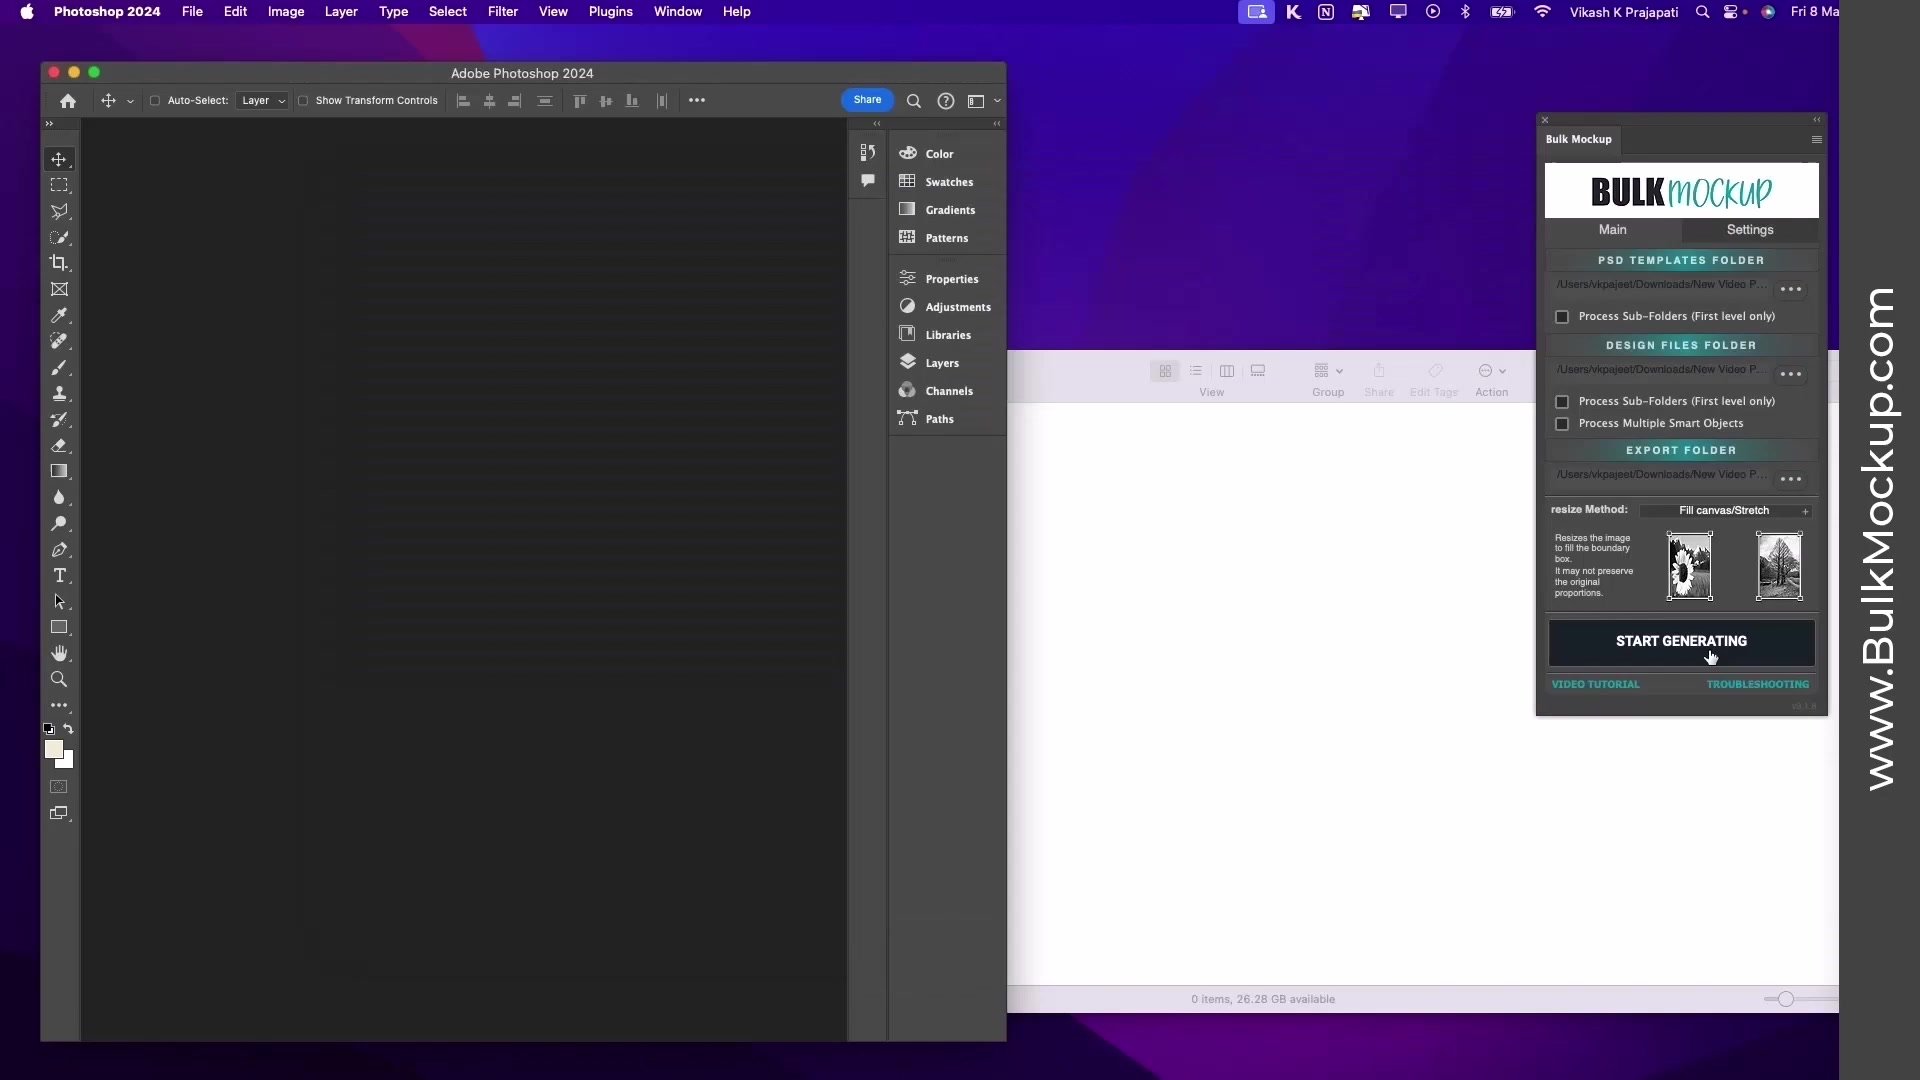
Step 4: Configure the Bulk Mockup Plugin
In Photoshop, go to Plugins > Bulk Mockup to open the plugin panel.
Configure the following settings:
PSD Templates Folder: Browse and select the folder containing your prepared mockup templates
Design Files Folder: Browse and select the folder with all your PNG pattern files (e.g., 18 different animal patterns)
Export Folder: Create and select a new folder where generated mockups will be saved
Resize Method: Set to "Fill canvas/Stretch" for best results with patterns
Step 5: Generate Your Mockups
Click the START GENERATING button. The plugin will automatically:
Apply each pattern from your Design Files folder to each template
Tile the patterns seamlessly across the wall canvases
Export finished mockups as PNG or JPG files to your Export Folder
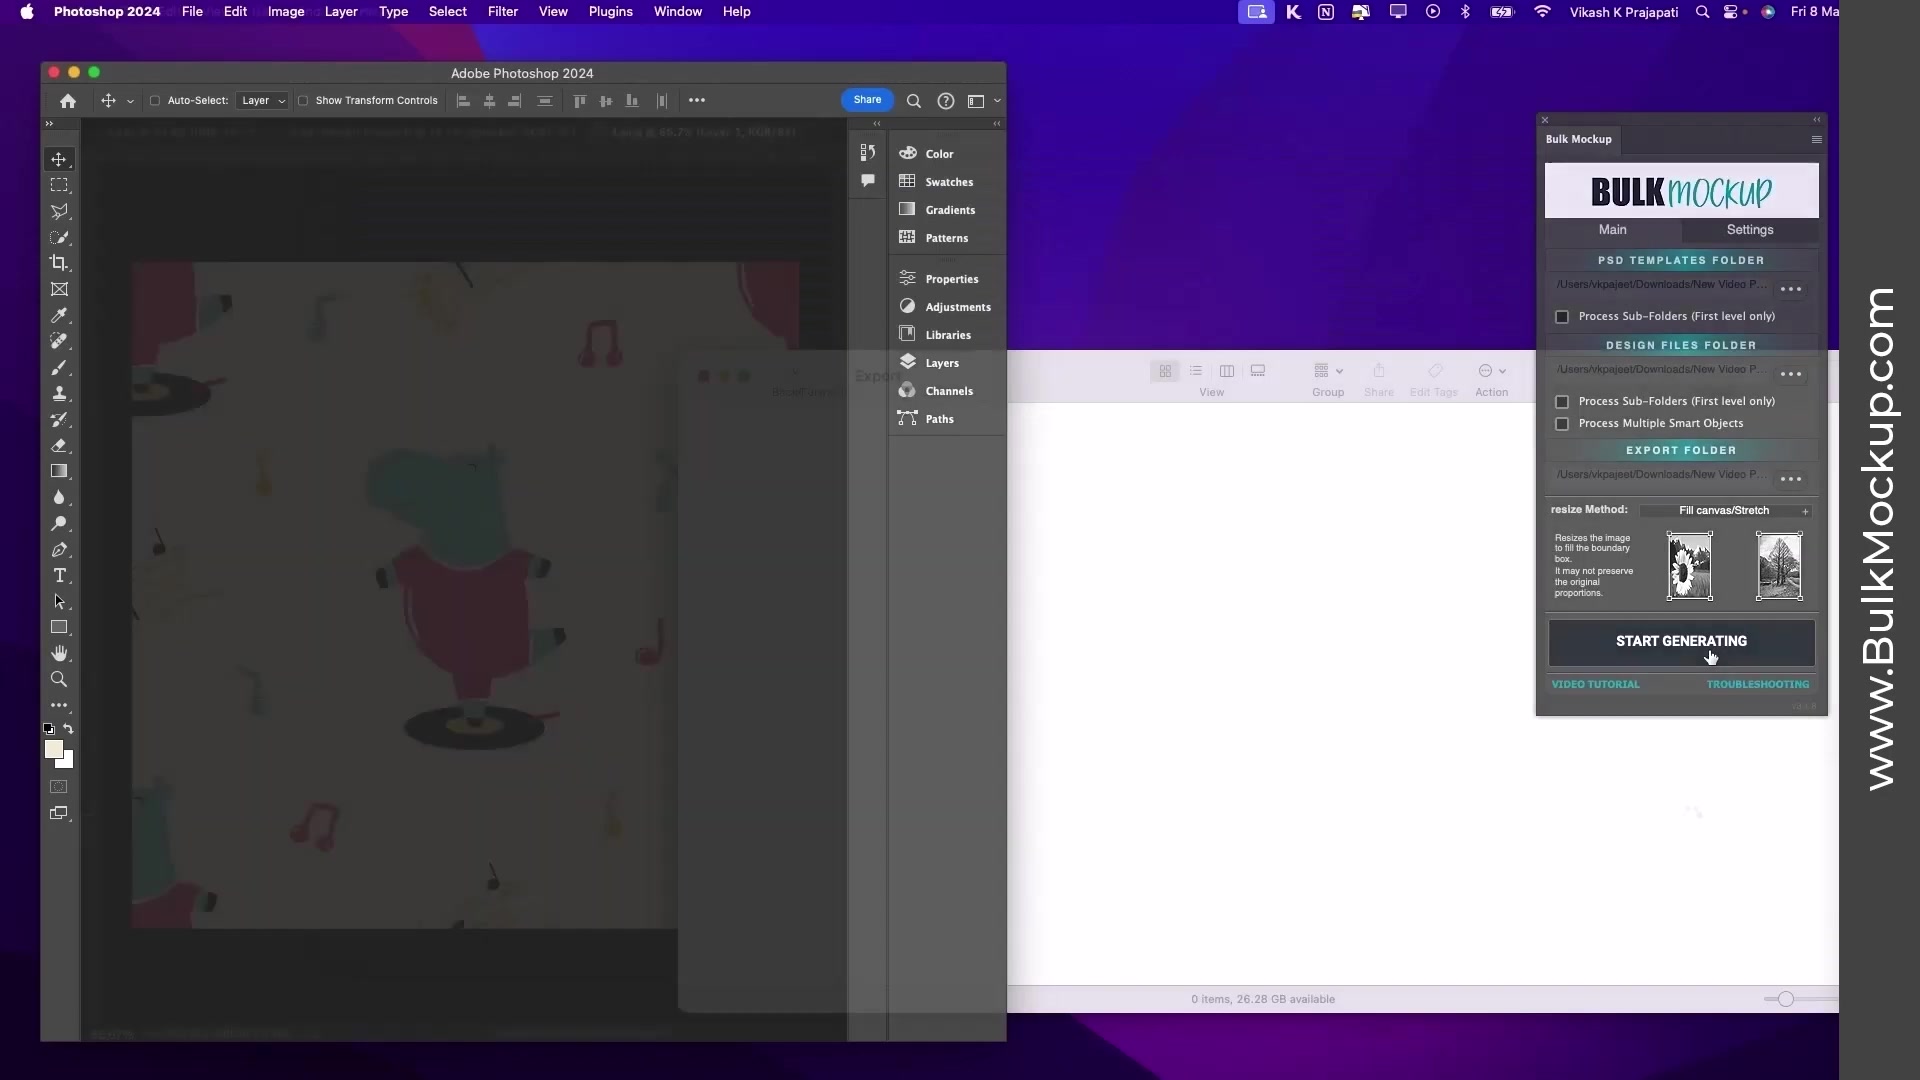
You'll see your Export Folder fill with mockups in real-time. For example, if you have 3 templates and 18 patterns, the plugin will generate 54 unique mockups automatically.
Bulk processing lets you create hundreds of wallpaper mockups in just a few minutes, perfect for Etsy shops, print-on-demand catalogs, or client presentations.
Tips for Best Results
Use seamless patterns: Make sure your PNG patterns tile perfectly without visible seams for professional results
Test first: Use Method 1 to test one pattern before running bulk automation to ensure scale and positioning look good
Organize your files: Keep templates and patterns in separate, clearly labeled folders for easier plugin setup
Save template versions: Before automating, save a copy of your original template in case you need to make changes
Check export settings: Verify your export format (PNG/JPG) and quality settings in the plugin before generating
Resources
Kids Room Mockup Template #1 (Envato Elements)
Kids Room Mockup Template #2 (Envato Elements)
Kids Patterns Collection (Envato Elements)
Bulk Mockup Plugin (Download)
How to Process Multiple Smart Object Layers (Related Guide)
Batch Process Video Mockups (Advanced Tutorial)
Need More Help?
If you have questions about pattern setup, automation, or encounter any issues, contact the Bulk Mockup support team at [email protected].
Watch Similar Videos
Looking for more mockup tutorials? Check out the Bulk Mockup YouTube channel for additional guides on automating your design workflow.
Use Cases
This workflow is perfect for:
Print-on-demand sellers: Create product mockups for wallpaper designs on Etsy, Redbubble, or other platforms
Interior designers: Show clients how different patterns look in kids' rooms before printing
Pattern designers: Build a portfolio showcasing your patterns in realistic room settings
Digital product creators: Generate mockups for pattern bundles or digital downloads