
Why are my designs stretched in the output?
If your mockups look stretched, the design file and the smart object canvas usually have different aspect ratios. In Bulk Mockup Photoshop Plugin, this most often happens when the resize method is set to Fill Canvas/Stretch, which fills the full area but can distort the design.
Before you start, make sure your PSD template uses a real Smart Object layer. If your template does not contain a usable Smart Object, see There Is No Smart Object in Layer in This Template.
Step 1: Check which resize method you are using
Open Bulk Mockup Photoshop Plugin in Photoshop.
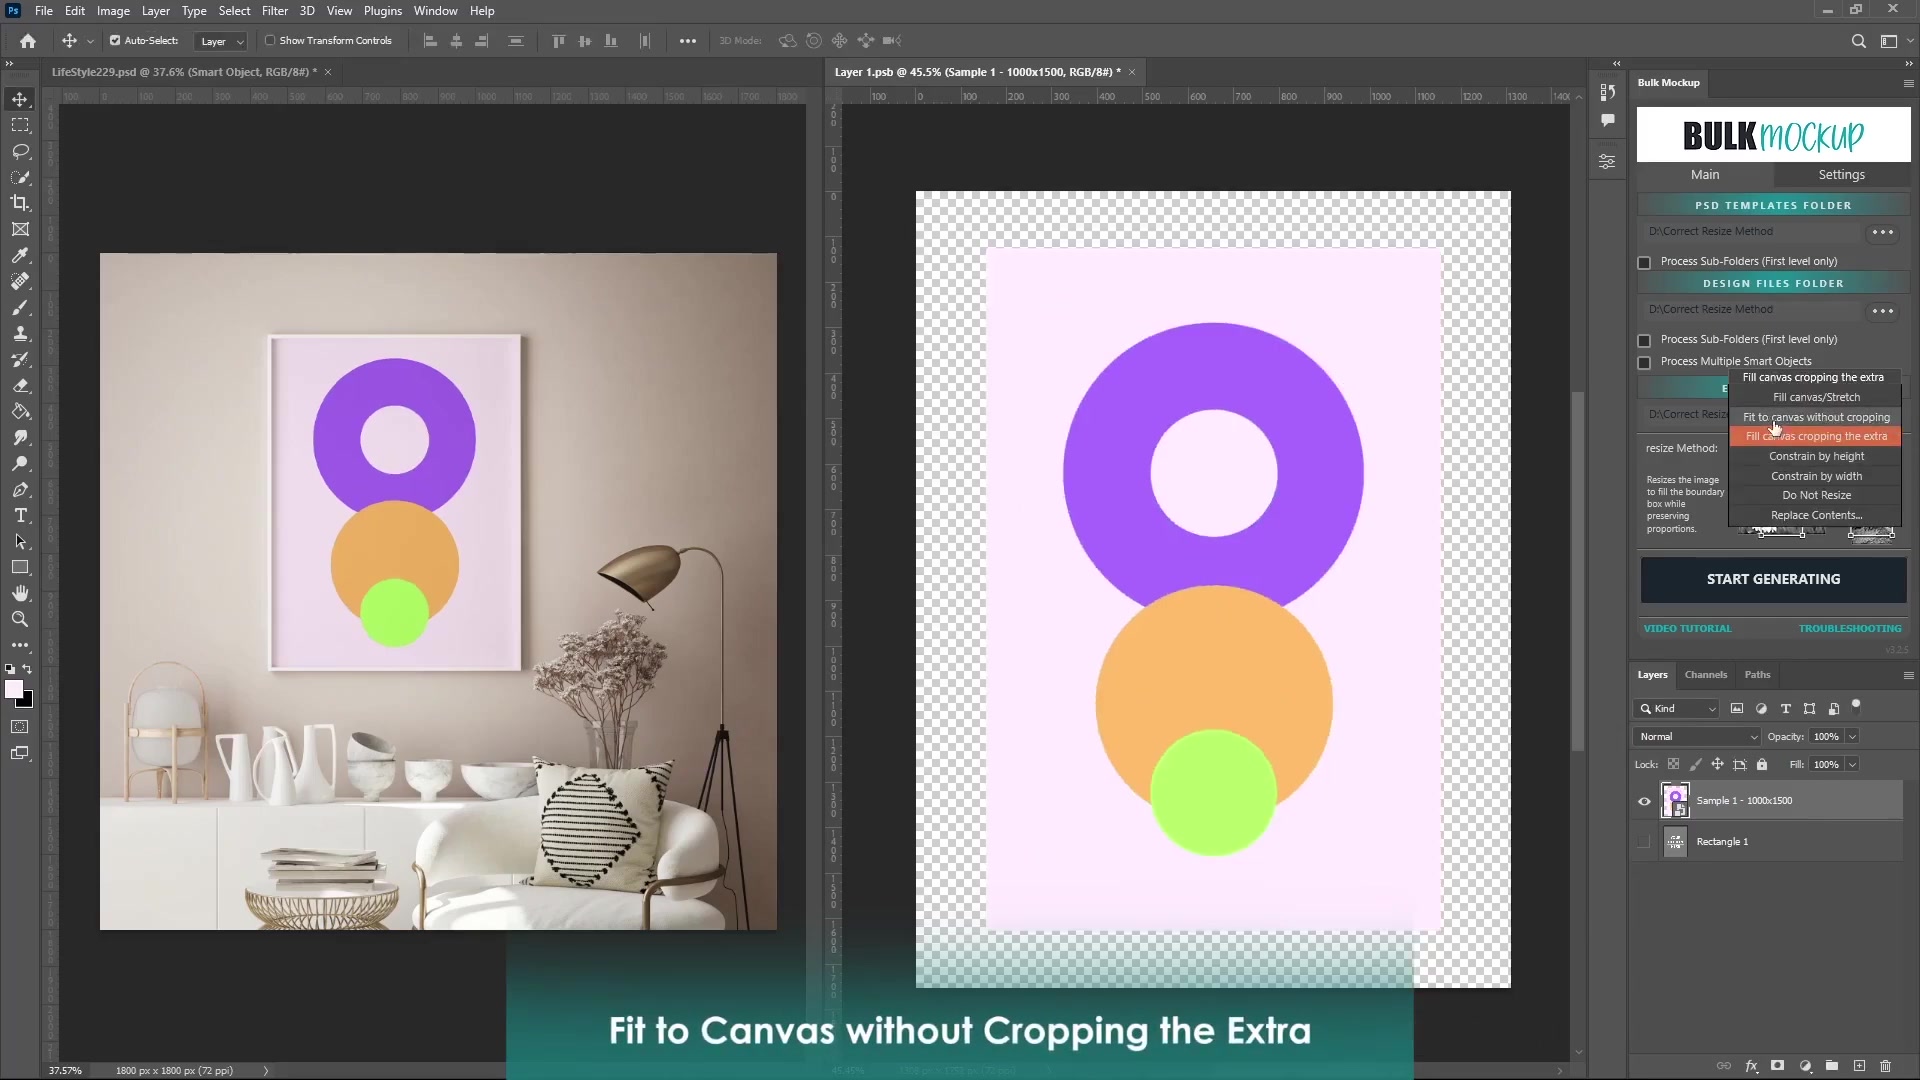
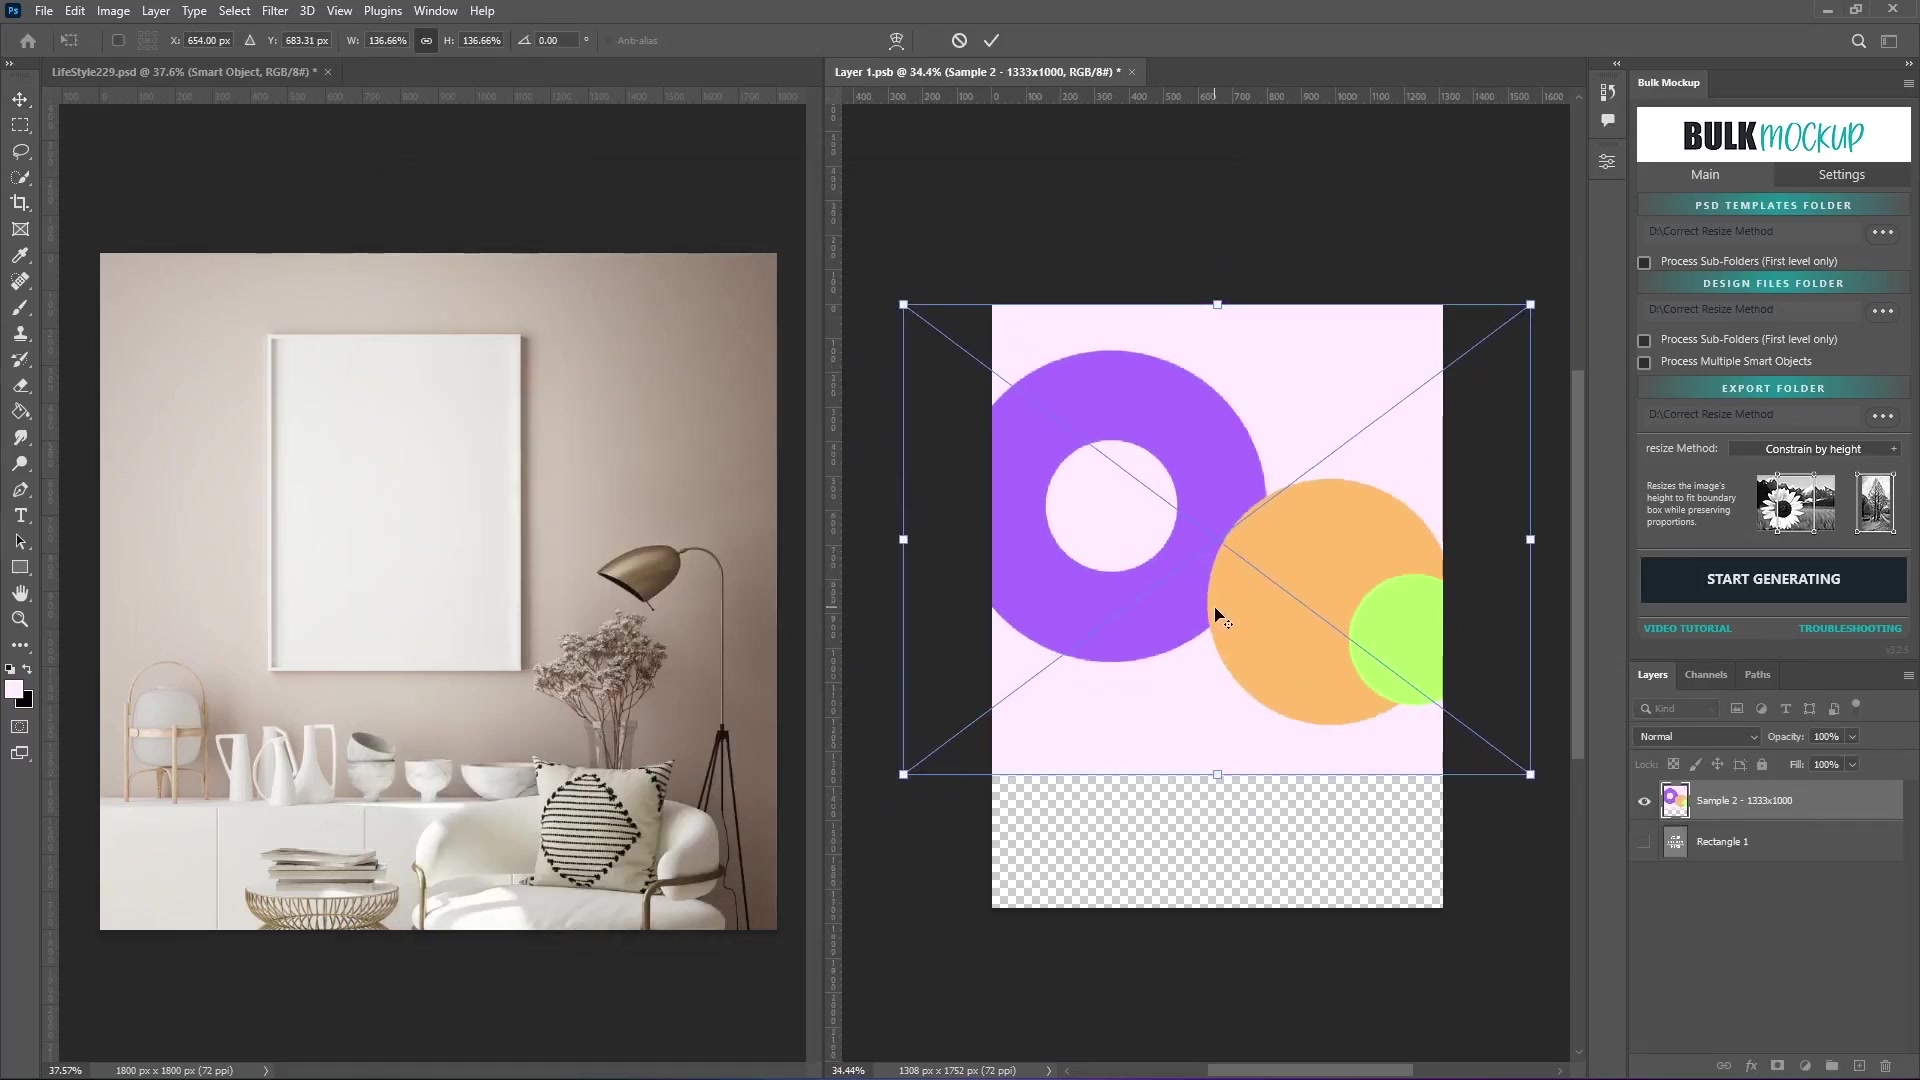
Locate the Resize Method setting.
Check whether it is set to Fill Canvas/Stretch.
If yes, this setting can stretch the design when the design dimensions do not match the smart object dimensions.

Why this happens: Fill Canvas/Stretch forces the design to cover the full smart object area. If the shape of the design does not match the shape of the smart object, Photoshop stretches the artwork to make it fit.
Step 2: Switch to a resize method that keeps proportions
If you do not want distortion, use a method that keeps the original aspect ratio.
Open the Resize Method dropdown.
Select one of these options based on your goal:
Fit to Canvas Without Cropping if you want to keep the full design visible.
Fill Canvas Cropping the Extra if you want full coverage without stretching and do not mind trimming the edges.
Constrain by Height if the height matters more than the width.
Constrain by Width if the width matters more than the height.
Do Not Resize if your design is already prepared at the correct size.
Run the mockup again and compare the result.
If you want to preserve proportions, avoid Fill Canvas/Stretch. Use Fit to Canvas Without Cropping or Fill Canvas Cropping the Extra instead.
Step 3: Match your design shape to the template when possible
Resize methods help, but the cleanest result comes from using designs that are already close to the smart object shape.
Open the PSD template in Photoshop.
Double-click the Smart Object layer to inspect its canvas shape.
Compare that shape with your design file dimensions.
If the design is much wider or taller than the Smart Object canvas, export a version of the design that better matches the template.
Run Bulk Mockup Photoshop Plugin again with the updated design.
Example: if your Smart Object is square and your design is very tall, a stretch method will distort it. A square version of the design or a fit/crop method will give a better result.
Step 4: Confirm the template uses the correct Smart Object setup
Sometimes the problem is not the resize method. The PSD template itself may need to be set up correctly for Bulk Mockup Photoshop Plugin.
Open the PSD template.
Find the main Smart Object layer where your design should go.
Rename that layer to
@designif your template uses one main design area.Save the PSD.
Run the same template again.
If the template does not contain a real Smart Object, the plugin cannot replace the design correctly. See There Is No Smart Object in Layer in This Template.
Step 5: Use multiple smart objects when the template has separate design areas
If your PSD has separate independent design areas, a single replacement setup may not be enough.
Check whether your template contains more than one independent Smart Object layer.
If each area needs a different design, use the multiple smart object workflow.
Create matching subfolders for the additional Smart Object layers.
Process the template again with the correct folder structure.
For the full setup, read How to Process Multiple Smart Object Layers in Bulk Mockup.
How to choose the right resize method
Use Fill Canvas/Stretch when full coverage matters more than exact proportions.
Use Fit to Canvas Without Cropping when you must keep the design shape unchanged.
Use Fill Canvas Cropping the Extra when you want full coverage without distortion.
Use Constrain by Height or Constrain by Width when one dimension is more important than the other.
Use Do Not Resize when your design already matches the target size.
Bulk Mockup Photoshop Plugin also supports auto resize and align, but the final result still depends on how closely your design shape matches the Smart Object canvas and which resize method you choose.
Watch Similar videos:
Use Cases:
Fix stretched wall art mockups when the artwork and frame use different proportions.
Keep logos, typography, and illustrated designs from looking distorted in product images.
Choose the best resize method before batch-generating large numbers of mockups.
Need More Help?
If you have questions about export folder settings or encounter any issues, contact the Bulk Mockup support team at [email protected].